Keeping records up-to-date is very important for any organization, and one of the most important records to keep updated is contracts. Depending on the access your customer has granted you, you may able to add, update, or have 'read only' visibility of the contract information recorded against your organization's profile.
Using the Contractor Portal you can update and manage existing contracts, upload information about new contracts, or remove contracts that are no longer relevant and not required for historical records.
Manage contracts
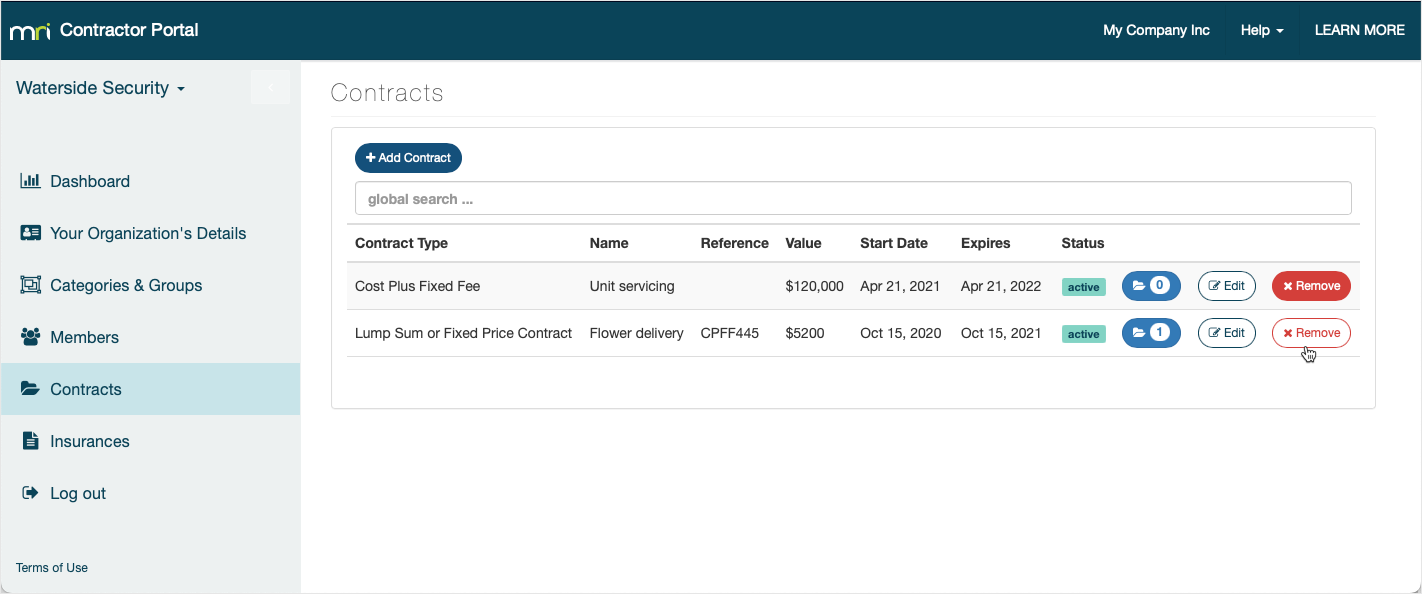
Select Contracts from the left-hand menu. You will see a list of your current contracts, their details, and their statuses. From here you can add, view, and edit the details, or remove a contract.
Add a new contract
To add a new contract:
- Click the Add Contract button.

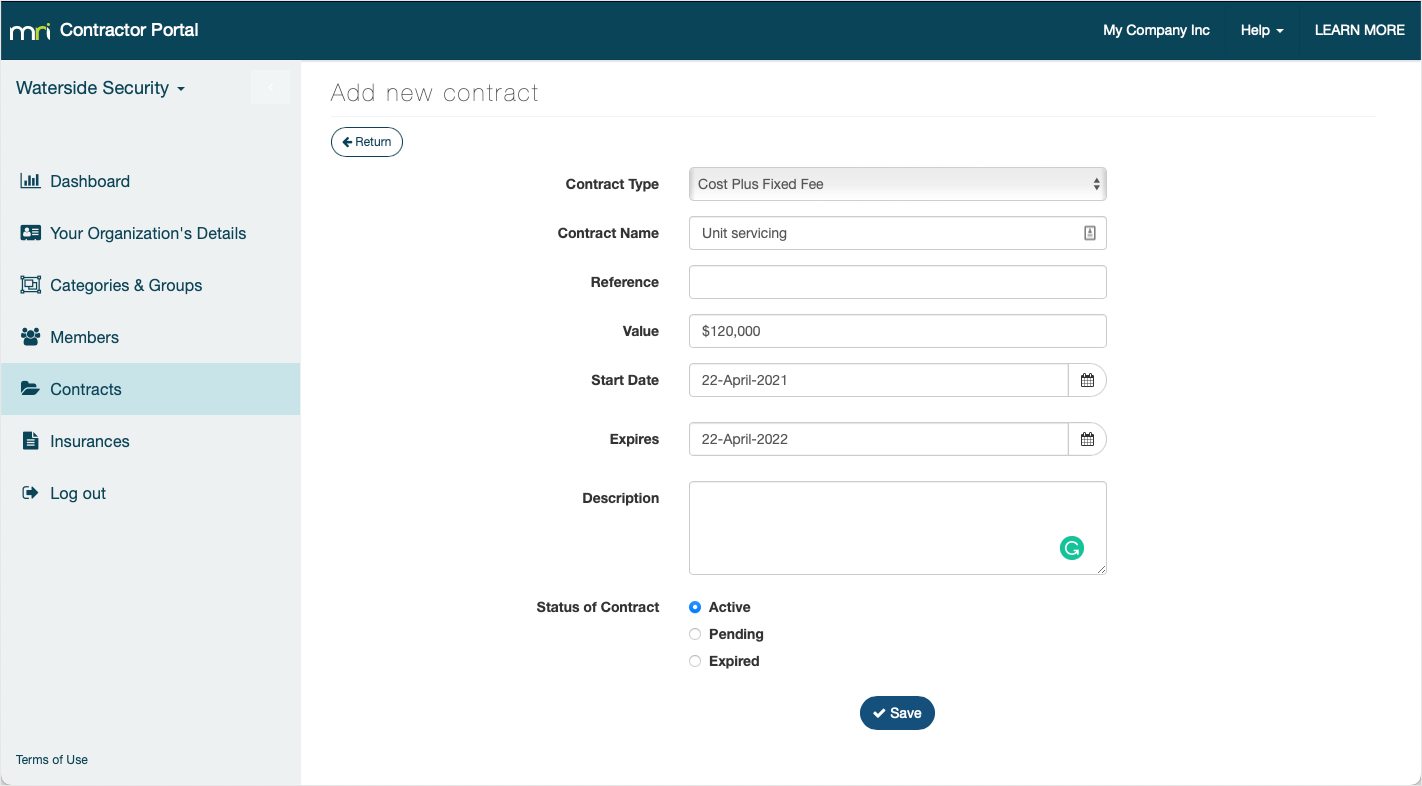
- Select the Contract Type. The options are controlled by the business you contract to and if you do not see your contract type in the list, you will want to ask them to add it.
- Add the Contract Name.
- Enter a Reference. It can include any reference number used to identify the contract.
- Enter a Value. This indicates how much the contract is worth.
- Select a Start Date. This is the date the contract begins.
- Select the end date in the Expires field. This is the date the contract is valid until.
- Enter a Description. This could include what the contract is for, or any other details about it.
- Select the Status of Contract: Active, Pending (not yet approved), and Expired (for historical records of contracts).
- Click Save and you will return to the Contracts list.

Delete a contract
To delete a contract:
- Click Remove next to the policy.

- Click OK in the confirmation pop-up.
Add supporting documents
Add supporting documents. You can upload pdf, doc, docx, jpg, jpeg, png, or gif file types.
To add supporting documents to your contracts:
- Click the documents button next to the contract.
- Click Add Document.
- Select a file from your computer and click Open.
The file will be automatically uploaded to the Contractor Portal and MRI OnLocation and linked to the contract.
You can view uploaded documents from this page by clicking the View button next to a document.
You can delete a document by clicking the Remove button.
Click Return to go back to the Contracts list.