How it works
The cloud-based user identity and authentication service Microsoft Entra ID (Azure AD / Office 365) can be synchronized to MRI OnLocation using an Azure Automation runbook.
First, create a new application registration in Microsoft Entra ID which can gain access to call Microsoft Graph API to access the users list. Then you create a new automation account in the Azure Portal and use the Powershell script provided in the Sync Profile connectors of your SyncPortal to create a SyncPortal runbook.
This will allow you to automatically sync employee information with OnLocation from your Microsoft Entra ID (Azure Active Directory).
Step 1: Create an application registration with Microsoft Entra ID
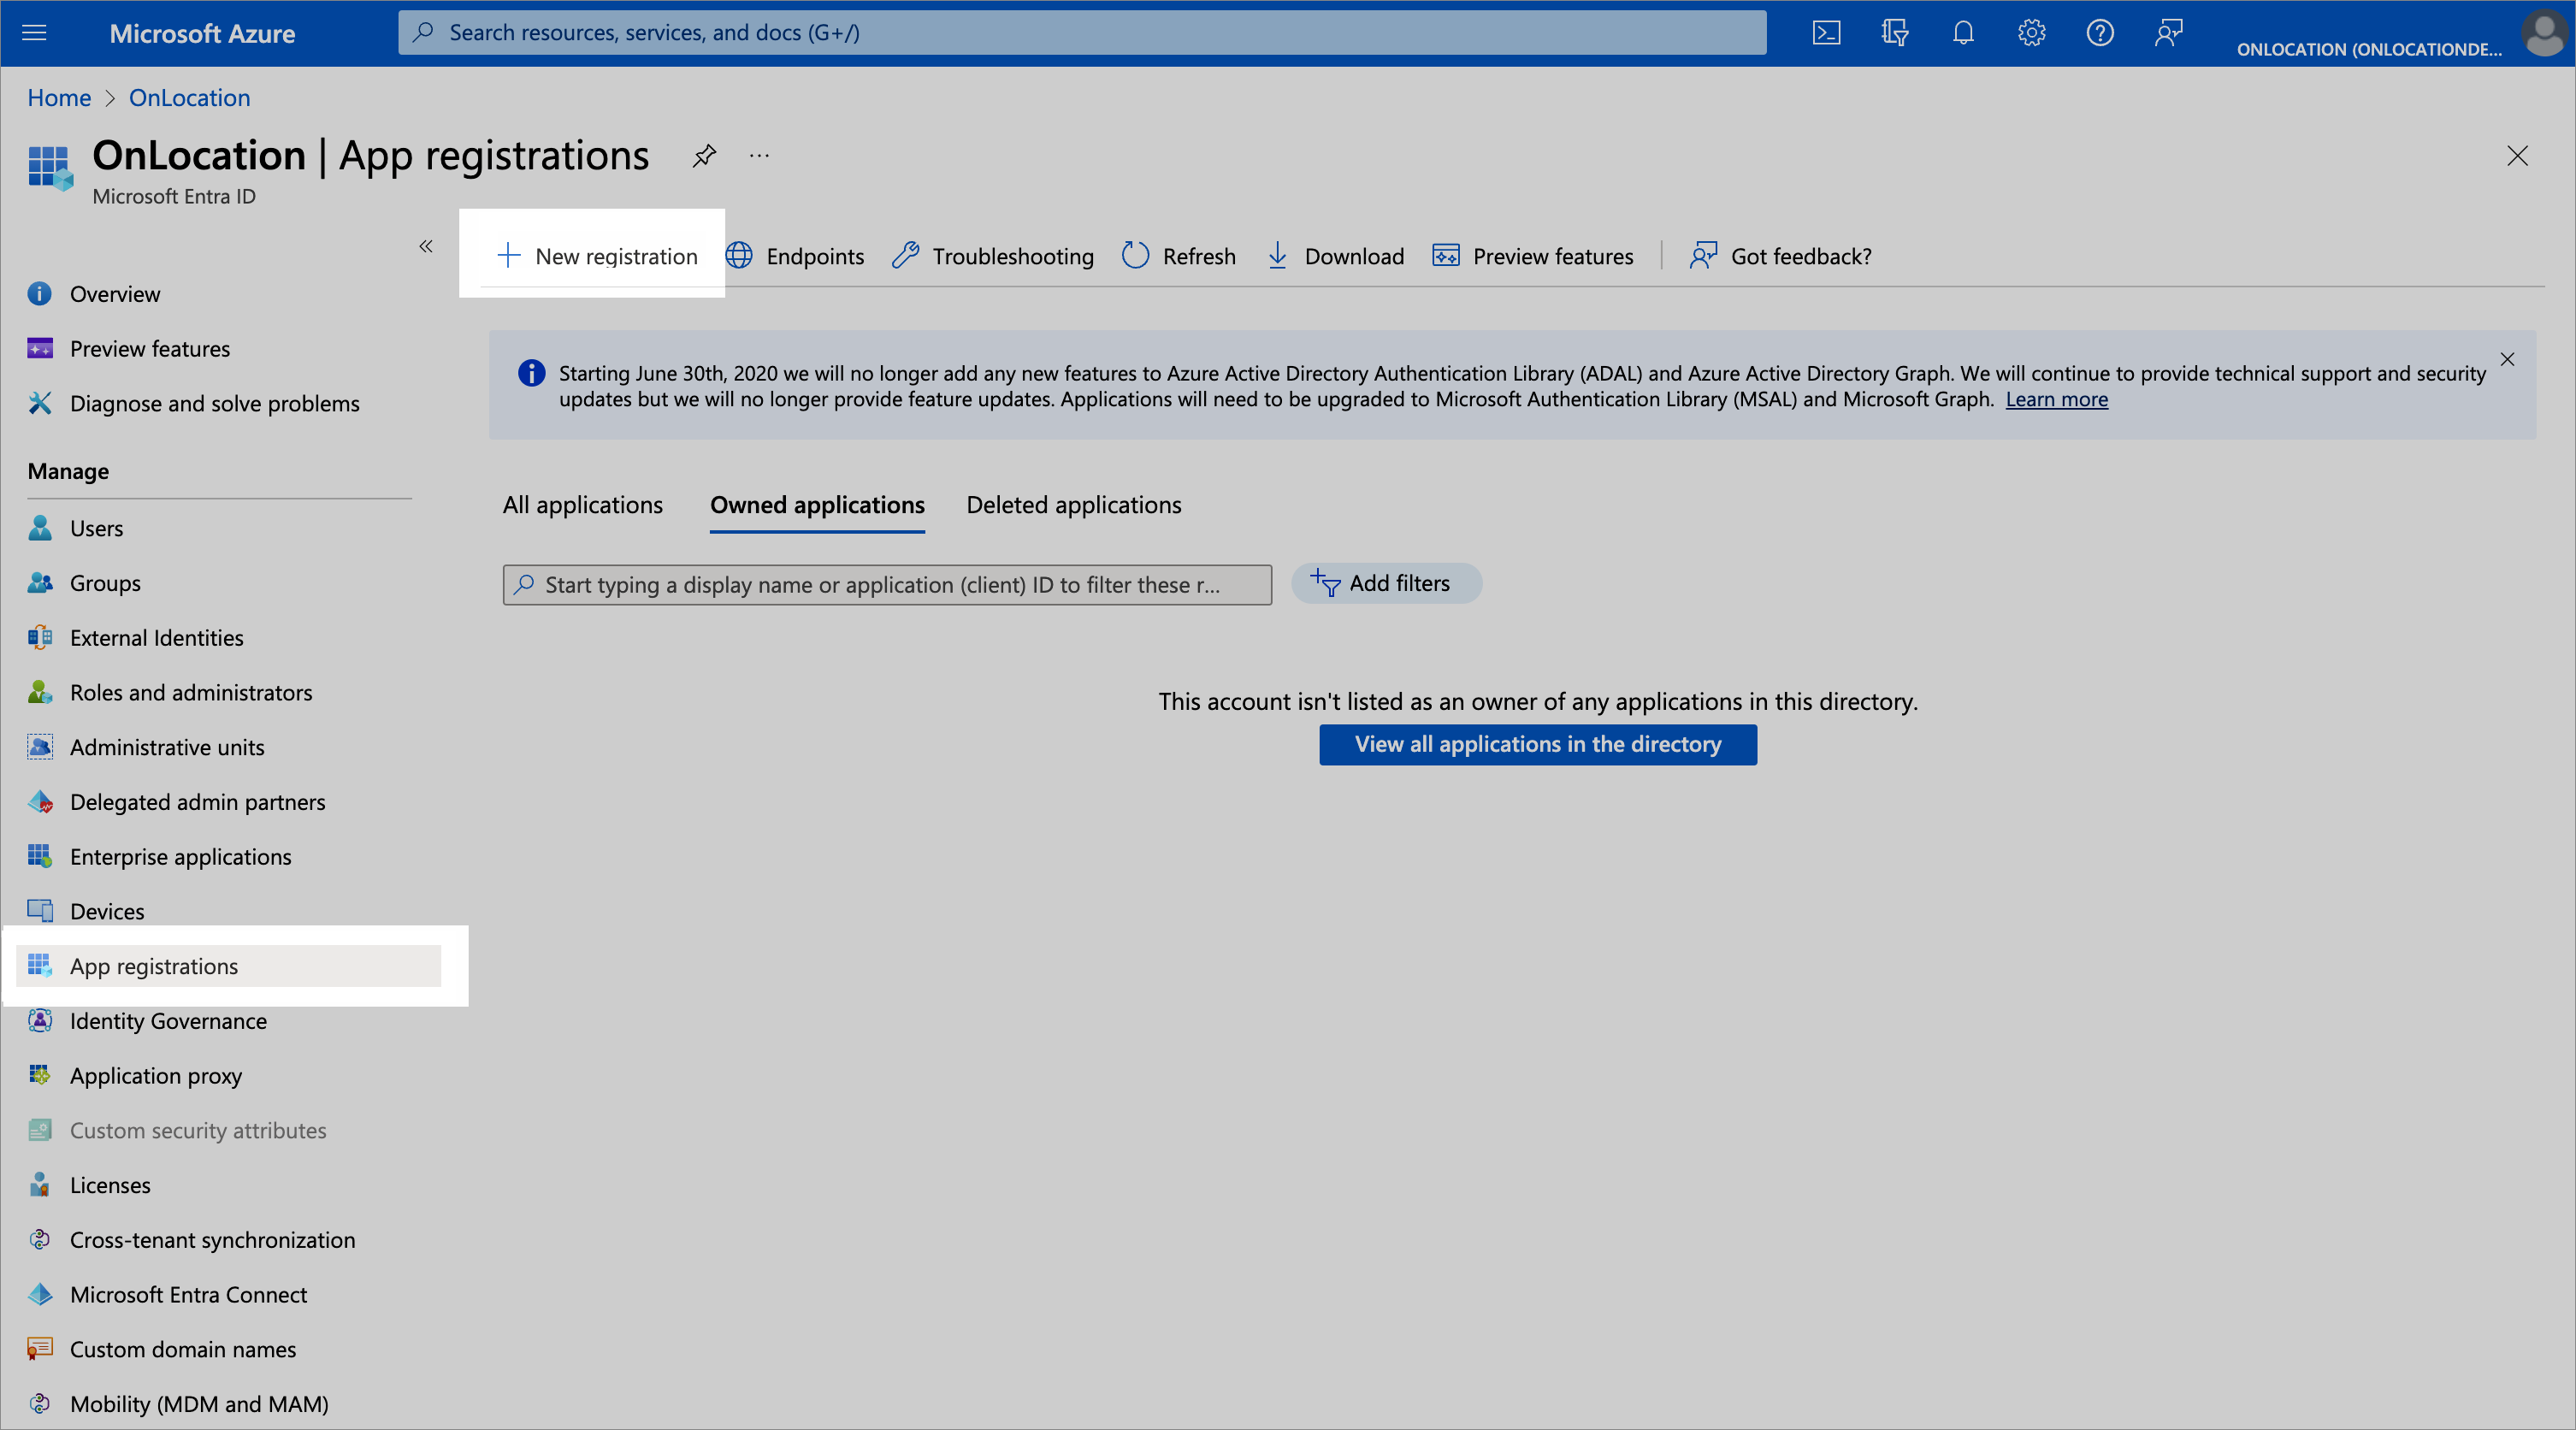
- In the Azure portal, select Microsoft Entra ID and select App registrations and click on New registration.
- On the Register an application page, enter your application's registration information. Select Accounts in any organizational directory option from Supported account types section. Do not set the Redirect URI then click on Register to create the application.

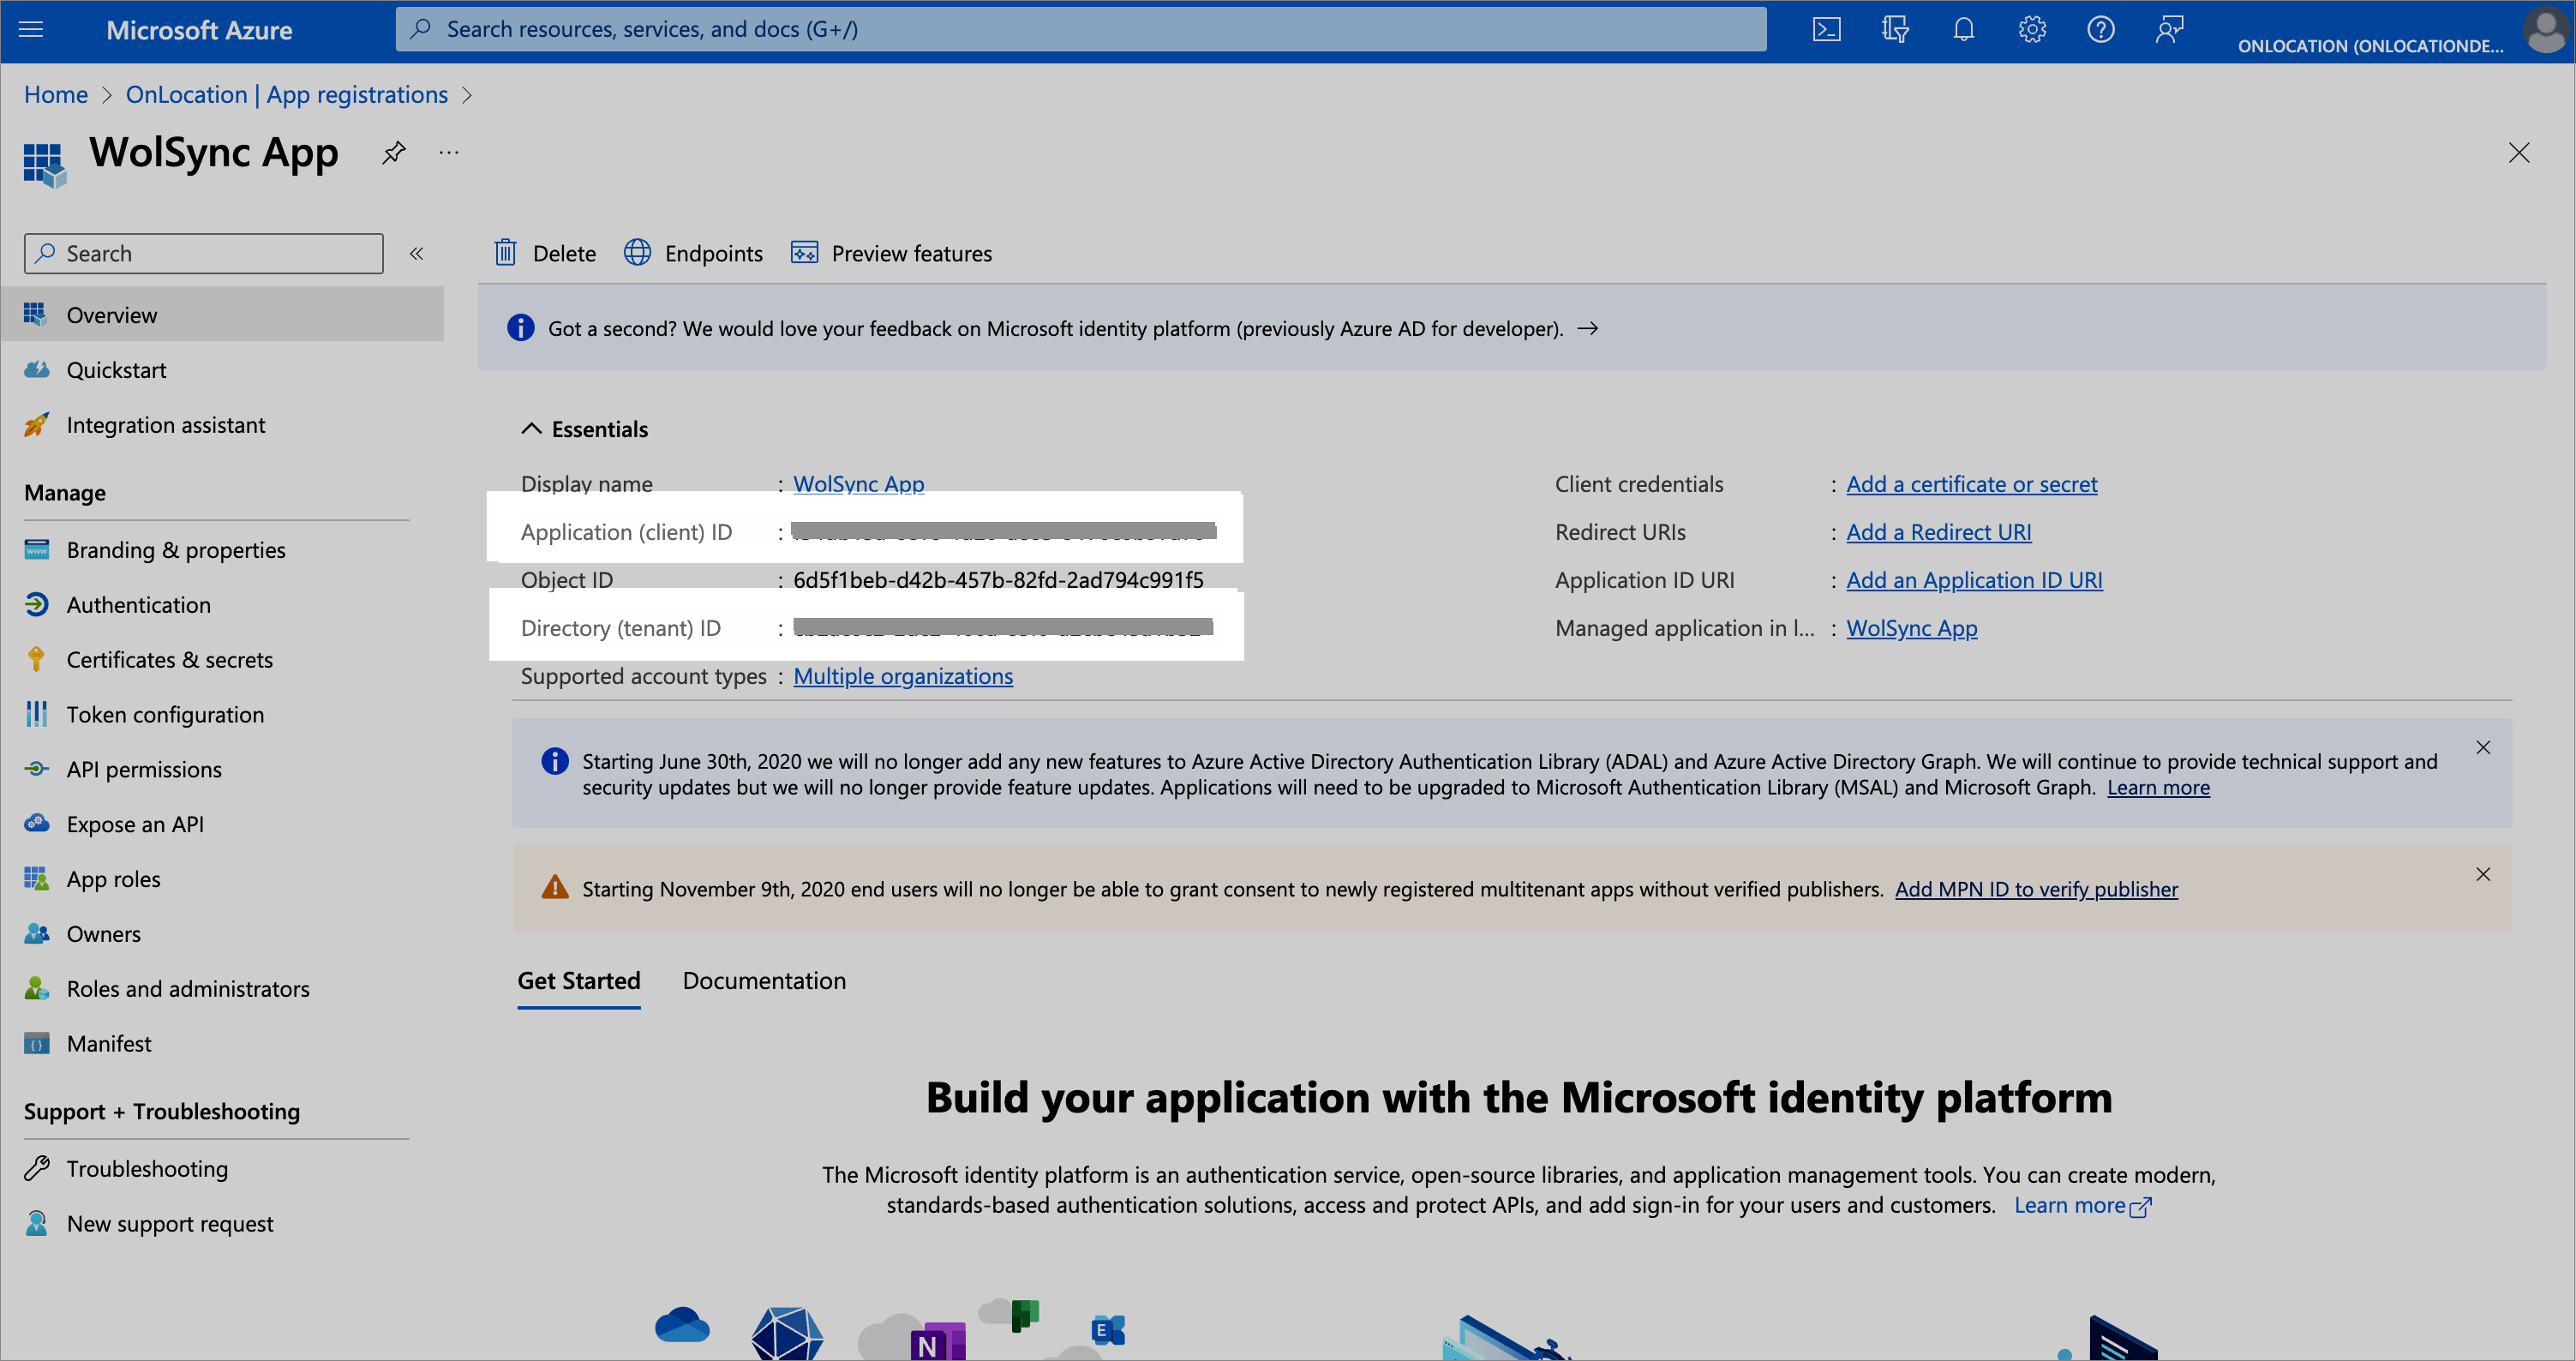
- On the app Overview page, we can see the client ID and the tenant ID which will be used afterwards.
- Select the API Permissions tab and click on Add a permission, we must add the Microsoft Graph User.Read.All and Group.Read.All permissions.
- Add the Microsoft Graph User.Read.All
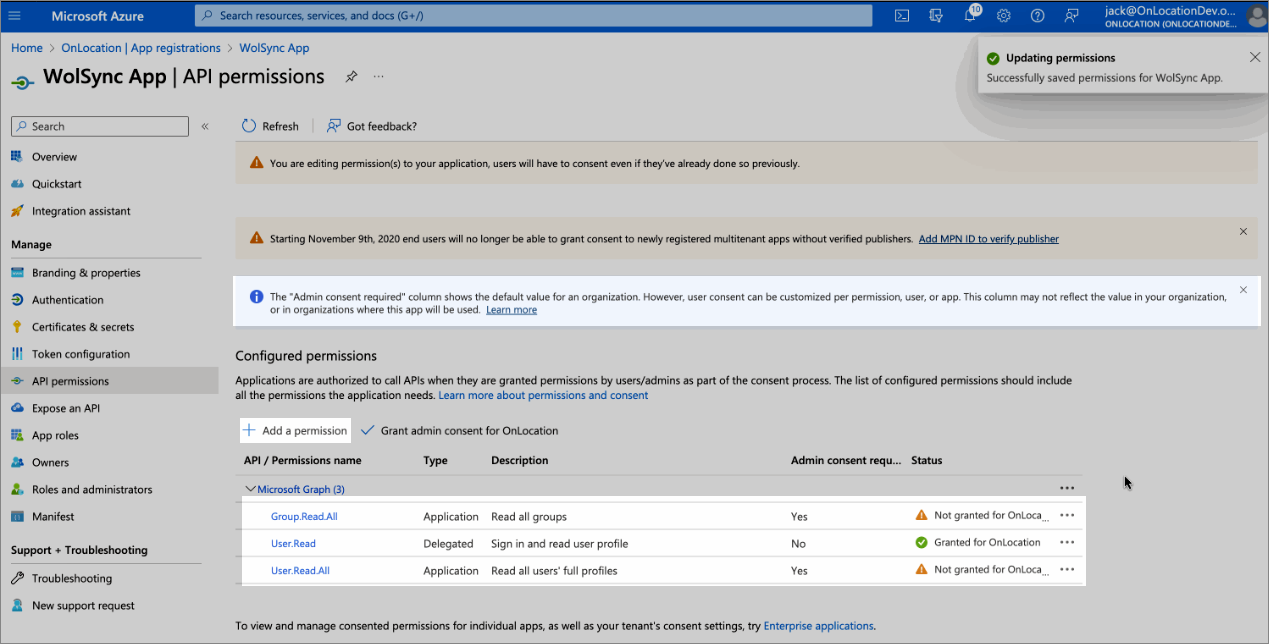
- Add the Microsoft Graph User.Read.All
-
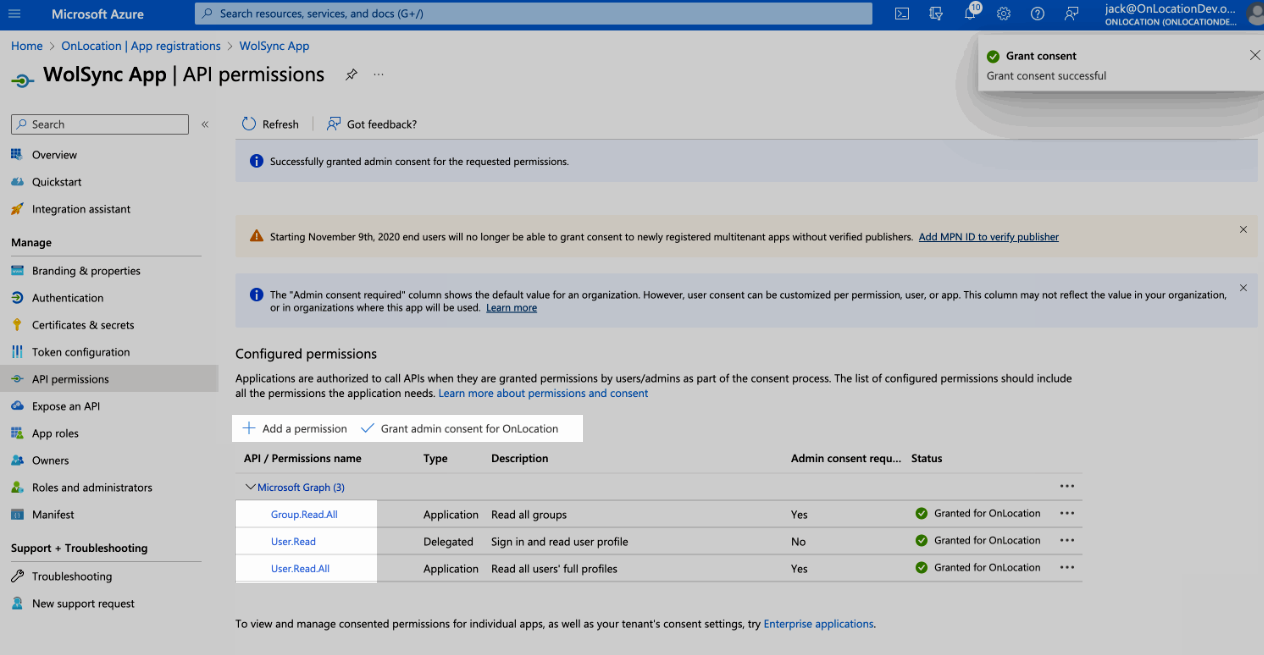
Grant admin consent by clicking on Grant admin consent for [your organisation]
Step 2: Create a new automation account in the Azure portal
You will need to sign in to the Azure portal with an account that's a member of the subscription Administrators role and a co-administrator of the subscription.
- Log in to Microsoft Azure.
- Click Create a Resource.
- Search for and select Automation. Click Create.
- In the Create an Automation Account page, specify the subscription you want to use.
- Enter a new resource group or select an existing group.
- Enter a name.
- Select an Azure data center as the region.
- Click Review + Create.
- Click Create.
Your automation account will be created and deployed. Wait for an in-app notification to confirm deployment is complete before continuing.
Step 3: Set up the OnLocation SyncPortal runbook
To set up the runbook, you must install the Microsoft Graph Modules and create a credential.
Install Microsoft Graph Modules
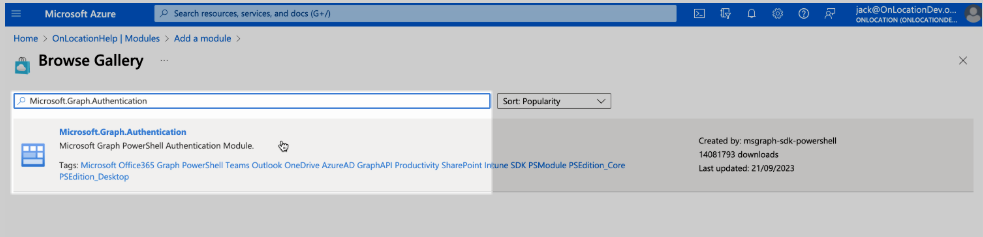
Our runbook requires the Microsoft.Graph.Authentication, Microsoft.Graph.Groups and Microsoft.Graph.Users modules to be installed. This is not set up as a default option and will likely need to be added.
- From the Automation Overview screen, select the Modules from the menu under Shared Resources. If the module is not present, it can be installed from the Gallery.
- Install the Microsoft.Graph.Authentication module and Select Runtime Version 5.1. Click Browse gallery, Search for Microsoft.Graph.Authentication then select the module, Choose the runtime version, then click Import. It takes a while to complete the installation.
- Install the Microsoft.Graph.Groups module.

- Install the Microsoft.Graph.Users module.
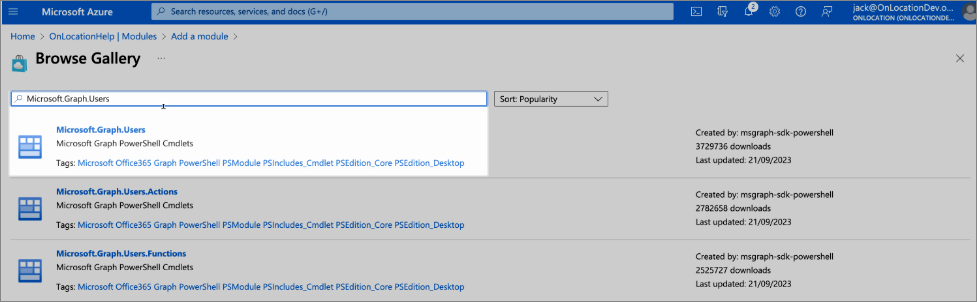
- Check the modules status. Search for Microsoft.Graph, the status of the 3 modules should be available.
Create a credential
OnLocation runbook requires WolSyncUploadKey credentials to be configured.
- Select Credentials from the resource menu under Shared Resources.
- Click Add a credential.
This is your OnLocation SyncPortal profile key. It authenticates the upload and routes the uploaded data to your SyncPortal profile for import.
The key is found in your Sync Profile, and each key is unique to that profile. Check the Sync Profile Connectors article to find out where to find the key.
To add this credential, use the following configuration:
- Name - WolSyncUploadKey.
- Description - This is optional and not required for your sync.
- User name - This is ignored by our system, so use a placeholder such as 'key'.
- Password and Confirm Password - Enter your Sync Profile password here.
Create variables
OnLocation runbook requires 3 necessary variables to be configured: WolExportAppClientId, WolExportAppTenantId and WolExportAppClientSecret. They are used by the runbook script to access to the Microsoft Graph API to export the users from your Microsoft Entra ID (AzureAD) .
You can also configure the WolExportGroup variable to export only users in that group, this is optional, if omitted all users will be exported.
- Configure WolExportAppClientId variable
- Click Microsoft Entra ID -> App registrations -> Your registered app
- From the Overview screen, find the Application (client) ID, which is the WolExportAppClientId
- Click Automation Accounts -> Click on the automation account that you created
- Select Variables from the resource menu under Shared Resources
- Click Add a variable
- Configure WolExportAppTenantId variable
- Configure WolExportAppClientSecret variable
-
First, we need to create a client secret under the registered app. Go to Microsoft Entra ID -> App registrations -> Your registered app, select the Certificates & secrets tab and click on New client secret to add a new client secret. In the Expires section, you can select a maximum expiration period of 24 months. Then click Add.
- Copy the value of the client secret then create the WolExportAppClientSecret variable in the automation account with this value.
-
First, we need to create a client secret under the registered app. Go to Microsoft Entra ID -> App registrations -> Your registered app, select the Certificates & secrets tab and click on New client secret to add a new client secret. In the Expires section, you can select a maximum expiration period of 24 months. Then click Add.
- Configure WolExportGroup variable (optional)
To disable export by group membership, delete this variable, and the runbook will go back to exporting all users.
Step 3: Import runbook
With your credentials set up, you can now import the runbook from OnLocation to your Automation Account resource. This will run the sync when the resource is activated.
First, you must download the runbook from your Sync Profile in OnLocation. This is in the same section as the Sync Profile Key under the Sync Profile Connectors tab.
Once you have downloaded this runbook:
- Select Runbooks from the resource menu under Process Automation.
- Click Import a runbook.
- Click the file icon next to Runbook file.
- Select the runbook downloaded to your computer.
- Select PowerShell as the runbook type.
- Select 5.1 as the Runtime version.
- Click Import.
- Once the runbook is imported, it will open in edit mode. You can view the Powershell script, which can be used as-is or modified. Make any modifications you require before publishing.
- Click Publish, then click Yes to confirm.
Your runbook will be installed, published, and ready to run your sync.
Step 4: Run your sync
You can run your sync manually or automatically from the WolSync runbook overview:
- Select Runbooks from the resource menu under Process Automation.
- Select the WolSync runbook.
Run manually
You can run your sync manually anytime by clicking Start and selecting Yes on the confirmation pop-up.
Run automatically
To set your sync to run automatically, you must create a schedule to tell the runbook when to run.
- Click Link to schedule.
- Select Link a schedule to your runbook.
- Click Add a schedule.
- Add a name.
- Enter when the sync should start.
- Choose how often it should run: Once or Recurring.
- If recurring, set the frequency.
- Choose if you want to set an expiration date. This will stop the recurring sync on the date chosen.
- If expiring, set the expiry date.
- Click Create.
Tips for running your sync
We recommend using 'Do not import anything (Dry Run)' for the SyncPortal profile mode when first deploying this runbook.
This allows the file to be uploaded and processed without actually changing anything in OnLocation, the profile logs can then be used to ensure the data will be imported as expected.
Once satisfied all is set up correctly, it is recommended to change the profile mode to 'Update existing items and import new (ALL)' and set the runbook on a regular automated schedule.