How it works
You can use Microsoft Azure Active Directory (AD) with SAML-based single sign-on (SSO) as an authentication source for your users to log in to OnLocation. With SAML single sign-on, Azure AD authenticates to the application with the user's Azure or Microsoft 365 account.
Set up Azure AD SSO
OnLocation is listed in the Azure AD App Gallery. To set up SSO with Azure, you can install the OnLocation app to your Active Directory instance through the Azure Portal.
For a complete tutorial on how to set this up, refer to the Microsoft documentation.
Before you start
Before starting in Azure AD, make sure you record the following details from your OnLocation account:
- Go to Tools > Account.
- Select Employee Access from the left-side menu.
- Next Single sign-on with SAML, select Yes.
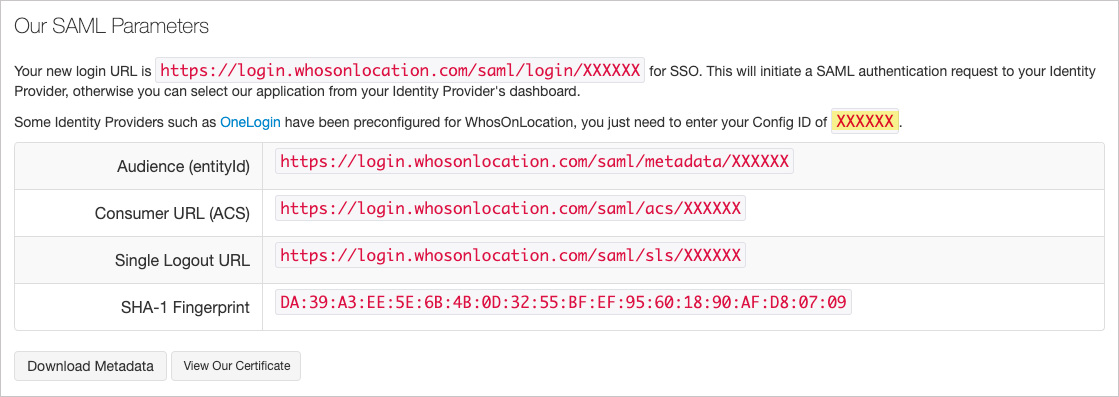
- Under Our SAML Parameters, make a note of:
- Your 6-digit ID number (highlighted below)
- The Audience (entityId) URL – you'll use this in the Identifier (Entity ID) field in Azure.
- The Consumer URL (ACS) – you'll use this in the Reply URL field in Azure.
Follow Microsoft's instructions to set up SSO with Azure.
Enter the SAML settings in OnLocation
Once you've configured the settings in Azure, you'll need to add following settings in OnLocation:
- Go to Tools > Account.
- Select Employee Access from the left-side menu.
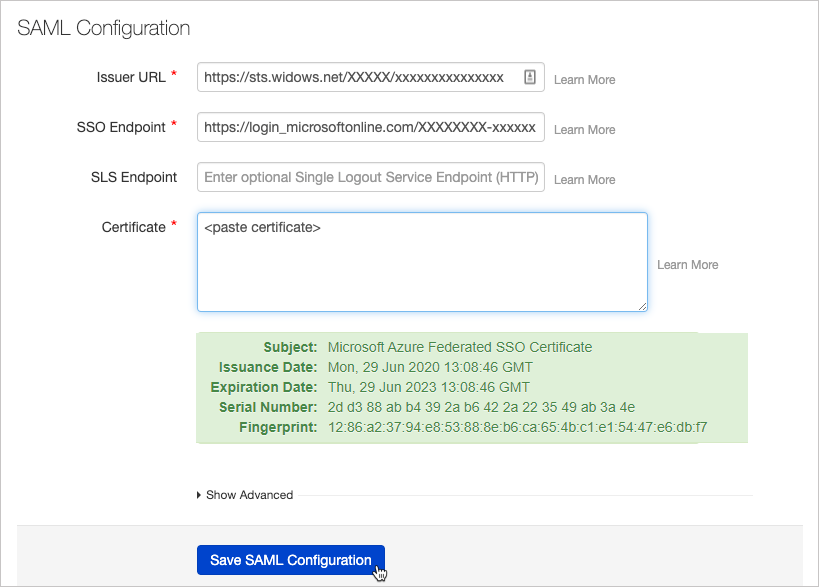
- Under SAML Configuration, in the Issuer URL field, paste the Azure AD Identifier from the Azure portal.
- In the SSO Endpoint field, paste the Login URL from the Azure portal.
- Open the downloaded certificate from the Azure portal and paste the content into the Certificate field.
- Click Save SAML Configuration.