How it works
This integration is run using webhooks created in Zapier, which connects a Google Sheets spreadsheet with your OnLocation account.
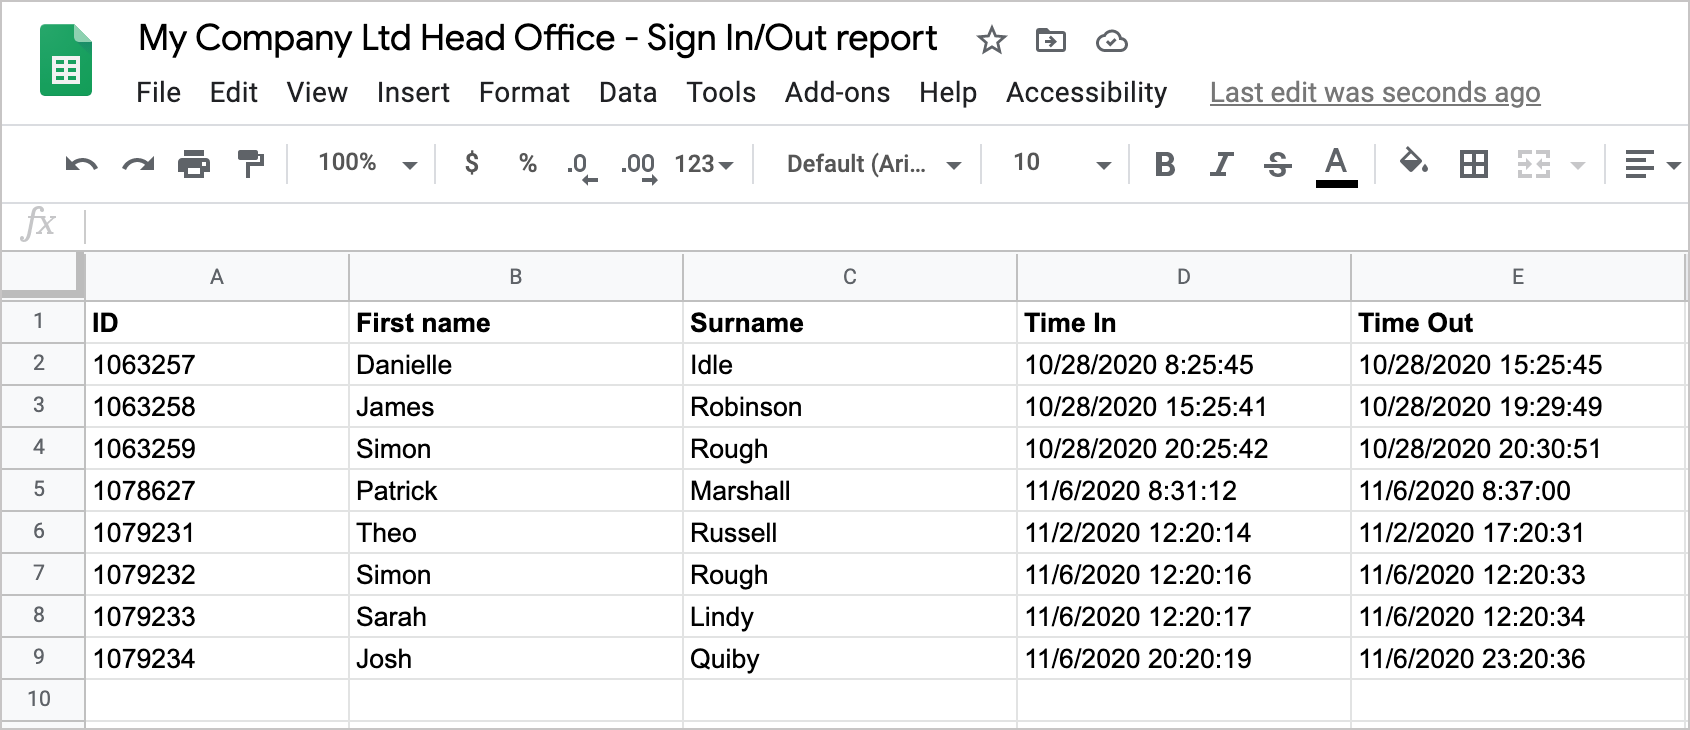
By setting up triggers in OnLocation, each time an employee signs in to your location, their details are added as a new row in the spreadsheet. The same row is then instantly updated when the employee signs out.
This may be a good solution for your organization if you need a report of who is currently on-site and you don’t want to give OnLocation reporting access to everyone who needs this information.
Before you start
- Create your spreadsheet in Google Sheets. Make sure you include all the fields you need to match with your OnLocation account, for example System ID, First Name, Surname, Signed In, Signed Out.
- Sign up for a paid Zapier account (if you don’t already have one)
- Make sure you have either the Account Owner or IT Support user role in OnLocation
Set up the integration
Step 1: Create a webhook in Zapier
- Log into your Zapier account.
- Click Make a Zap.
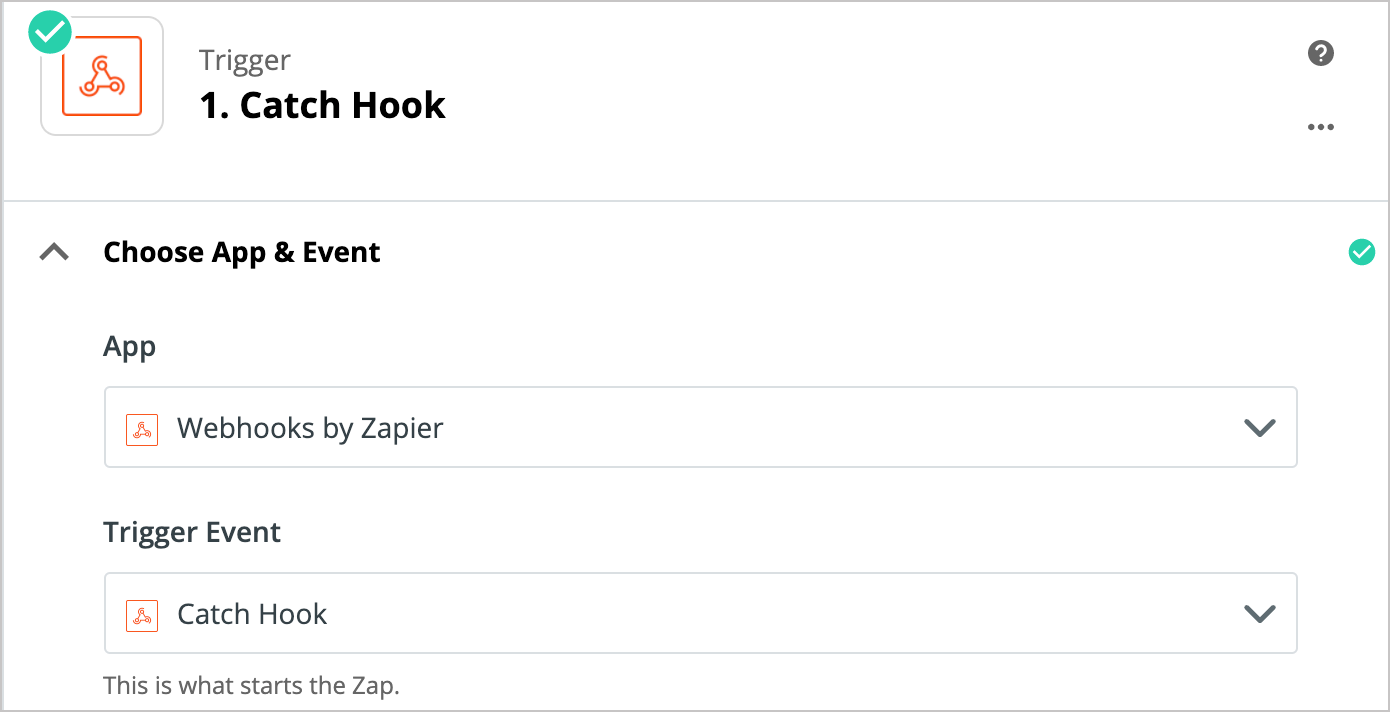
- Select Webhooks by Zapier as your Trigger App.
- Select Catch Hook, then click Continue.
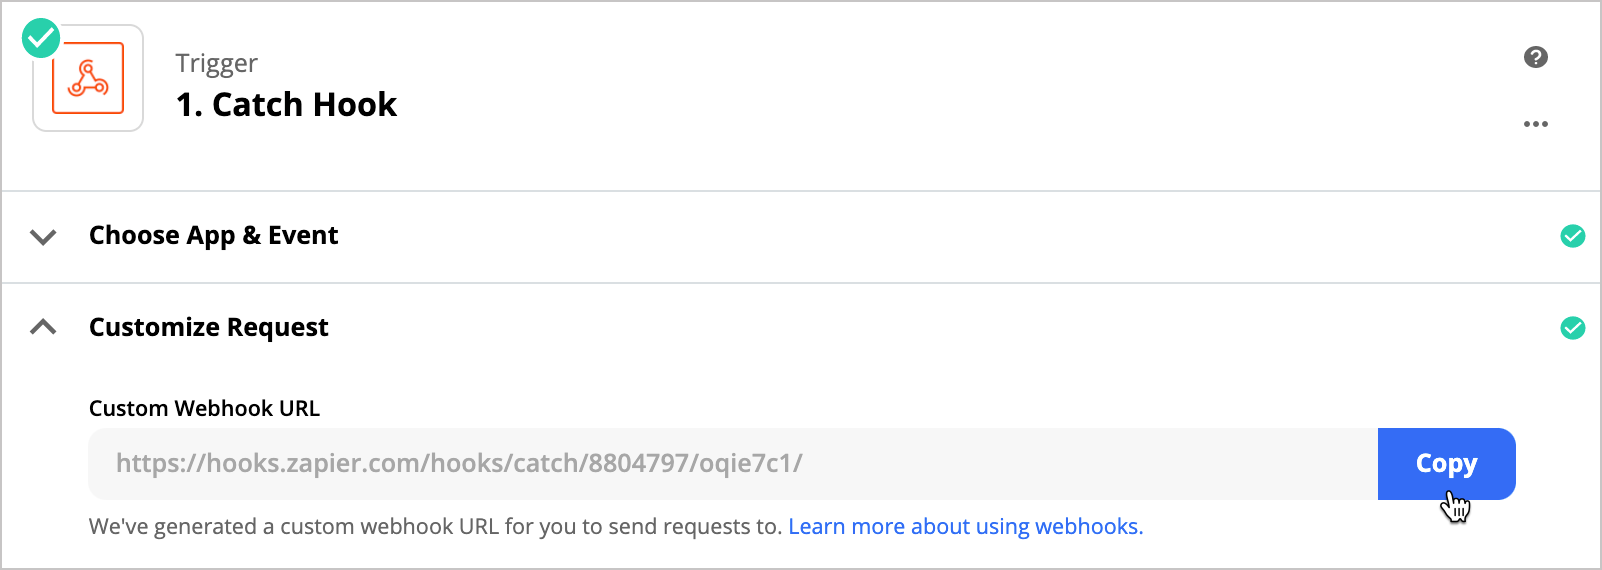
- Click Copy next to the Custom Webhook URL, then click Continue.
Keep this tab or window open, you'll continue working on this screen in step 4.
Step 2: Add the webhook in OnLocation
To add the webhook:
- In a new tab, log in to OnLocation.
- Go to Tools > Accounts.
- Select Integrations from the left-hand menu.
- Click the Webhooks tile.
- If this integration isn't active, click Enable, then click Manage Settings. If you're already using Webhooks, click Settings.
- Click Create a New Webhook.
- Add the Webhook Name. You may like to note it is for Google Sheets employee sign in.
- Paste in the Webhook URL from Zapier.
- Select POST as the method.
- Select Form encoded as the content type.
- Click Save.
Step 3: Create a trigger in OnLocation
Set up a trigger so OnLocation connects an event to the webhook:
- Go to Locations, then select the location from the drop-down list.
- Select Triggers.
- Click Create a New Trigger.
- Enter a trigger name. You may like to note it is for Google Sheets employee sign in.
- Set the trigger status to Active.
- Select Employee Sign In as the trigger event, then click Next.
- (Optional) Select the Trigger Rules tab, enter any trigger rules that you might like to use, then click Next.
- Select the Trigger Actions tab, then click Create a New Action.
- Select Webhook – Triggers a Webhook URL from the drop-down menu.
- Select the webhook.
- Select Full as the data type.
- Click Preview.
- Select a record, then click Send Data.
- Click Save & Close.
Keep this tab or window open, you'll continue working on this screen in step 6.
Step 4: Create an action in Zapier
Create an action in Zapier to send the employee sign in information to the spreadsheet. Open Zapier in the same tab or window you were using previously:
- Click Test trigger. If it's successful, click Continue.
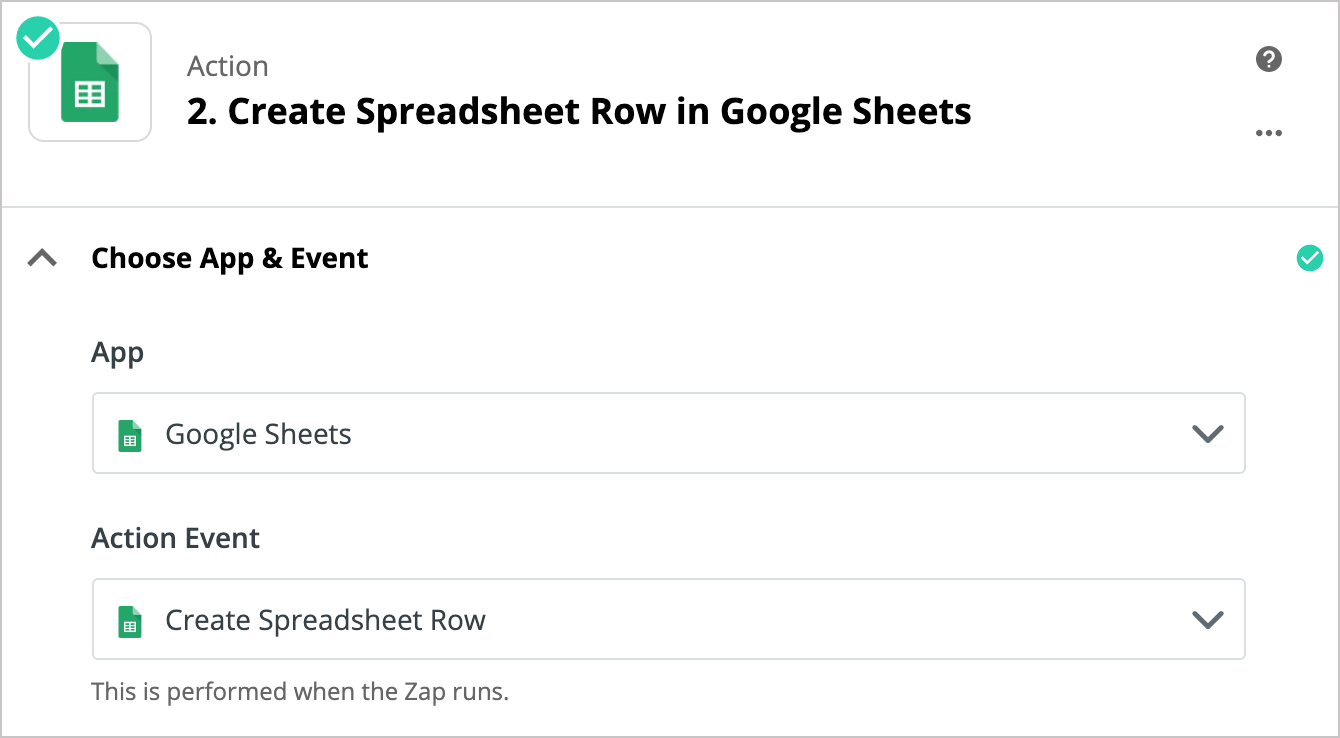
If it fails, check that you've entered the custom URL correctly in OnLocation and try the test again. - Select Google Sheets as the app.
- Select Create Spreadsheet Row as the event action, then click Continue.
- Select your Google Sheets account, click Continue.
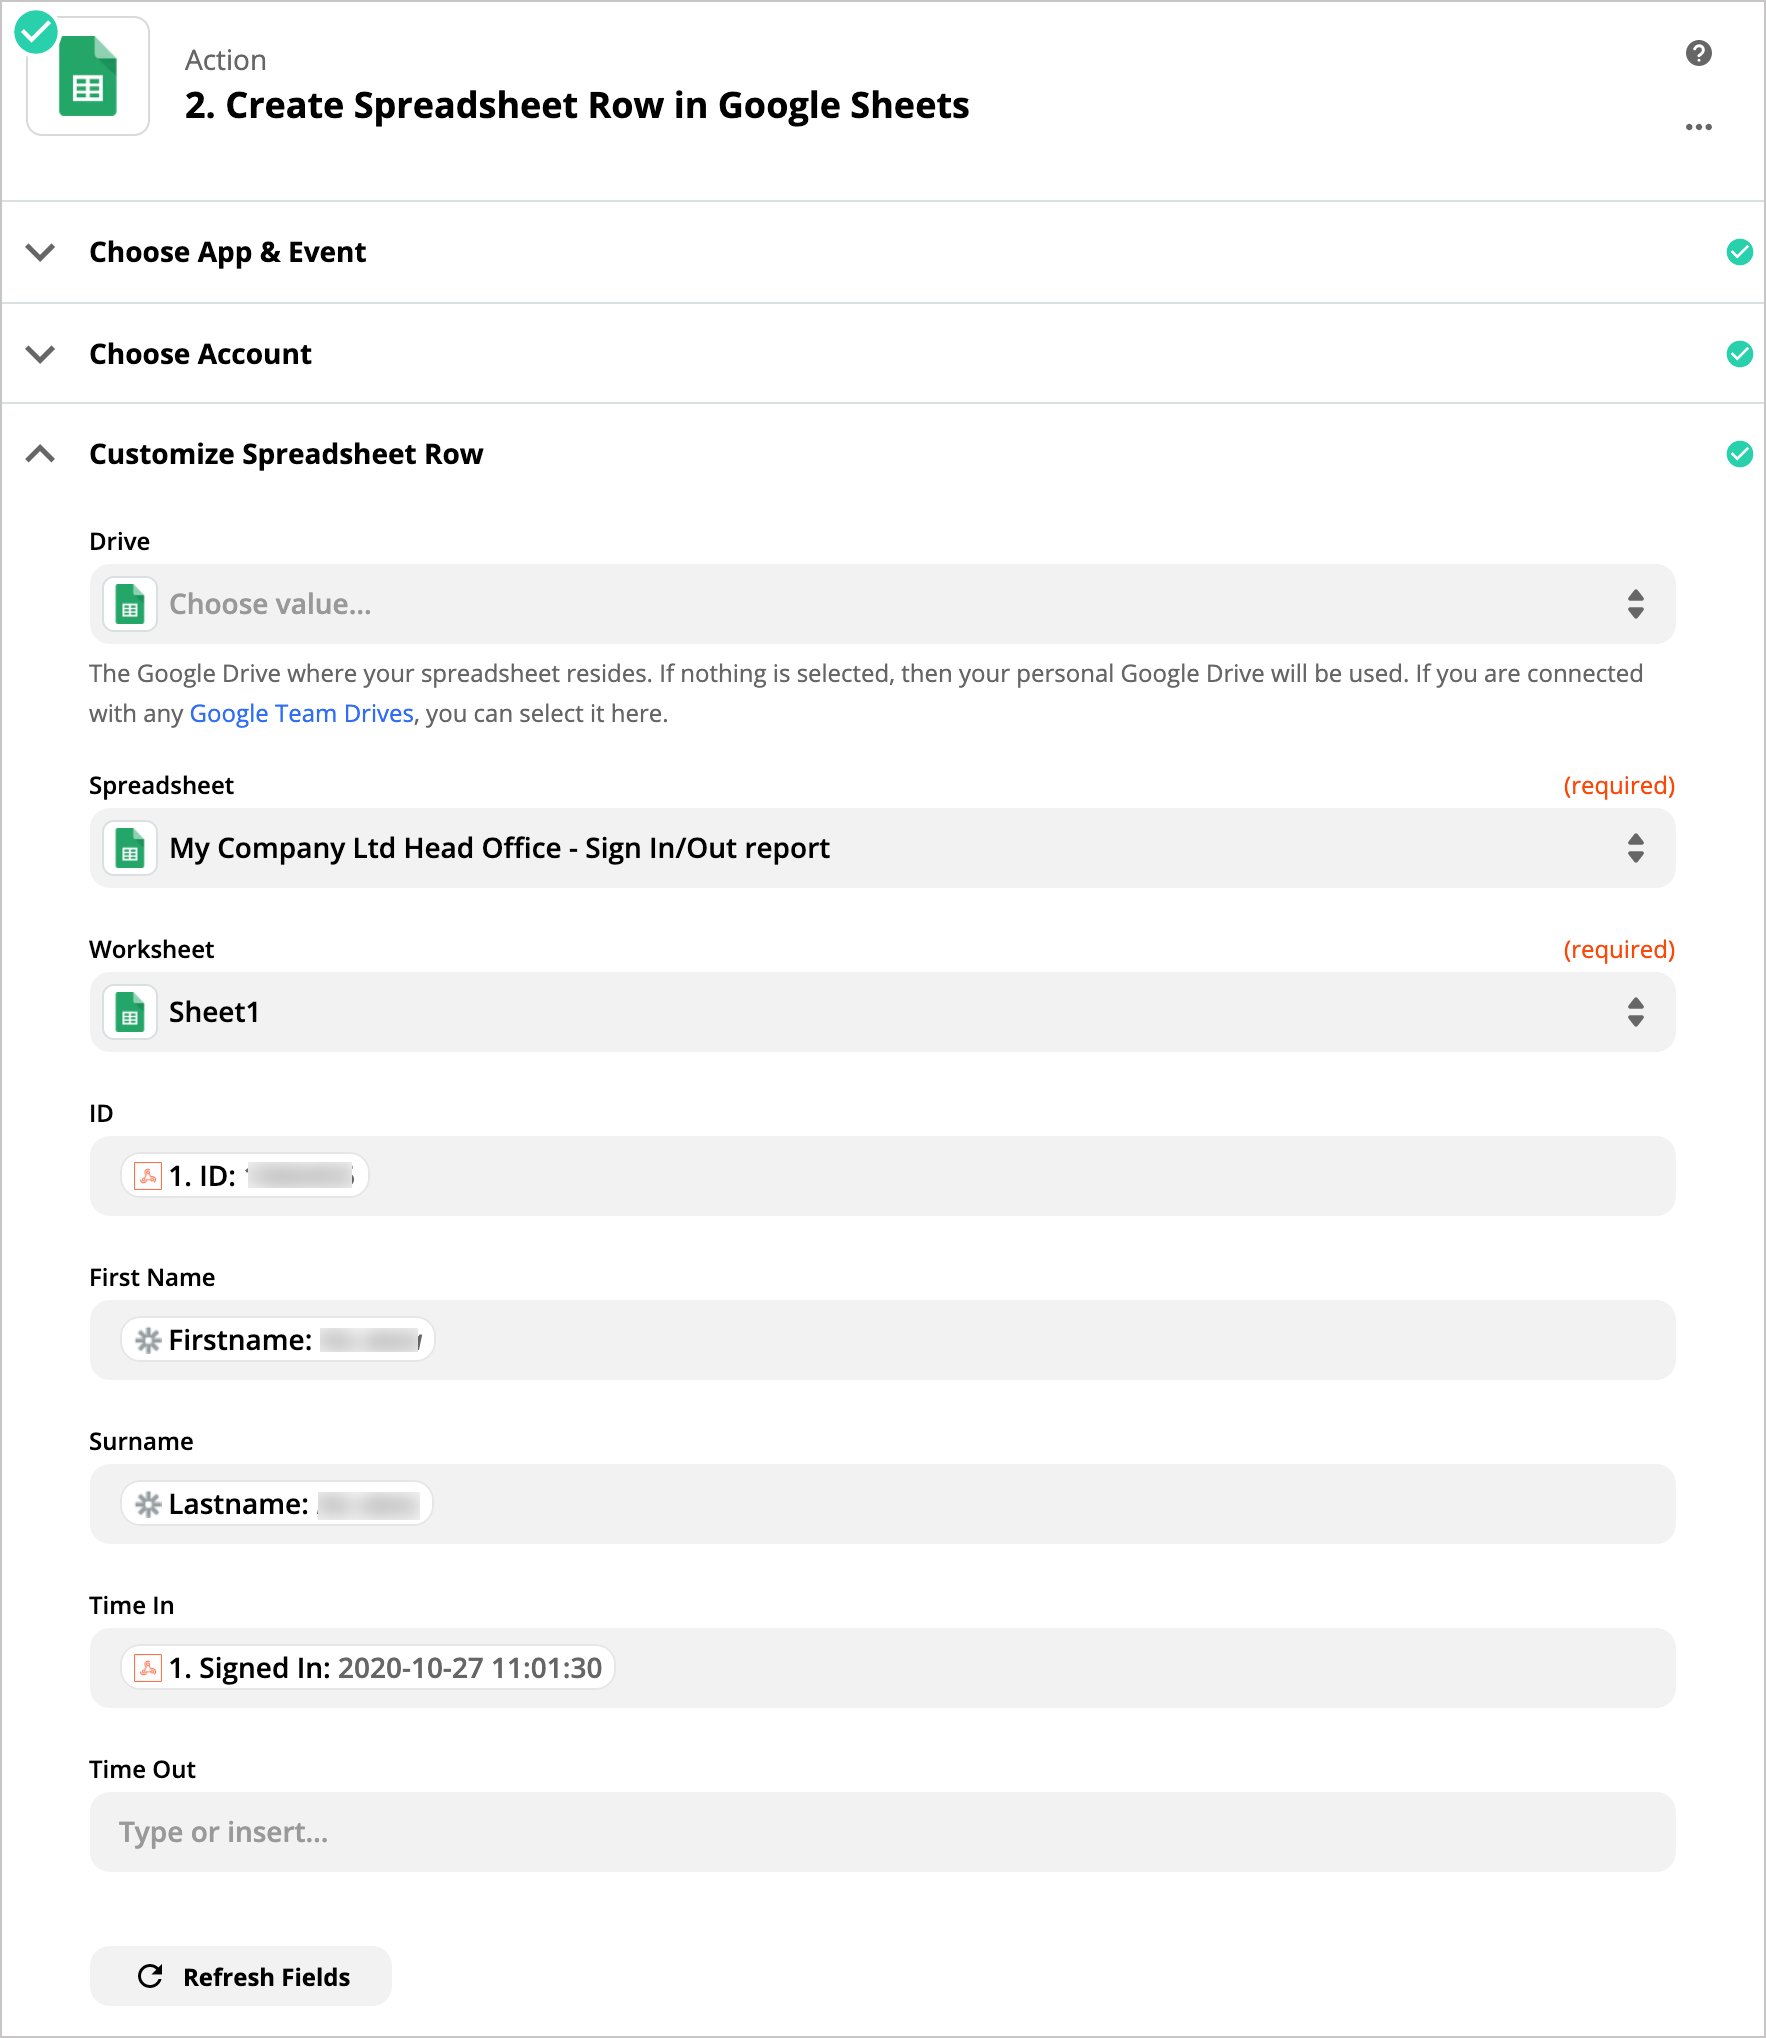
- Customize the spreadsheet row: choose the drive, select the spreadsheet and worksheet, then insert the relevant data fields. In this example ID, Firstname, Lastname and Signed In have been added.
- Click Continue.
- Click Test & Review.
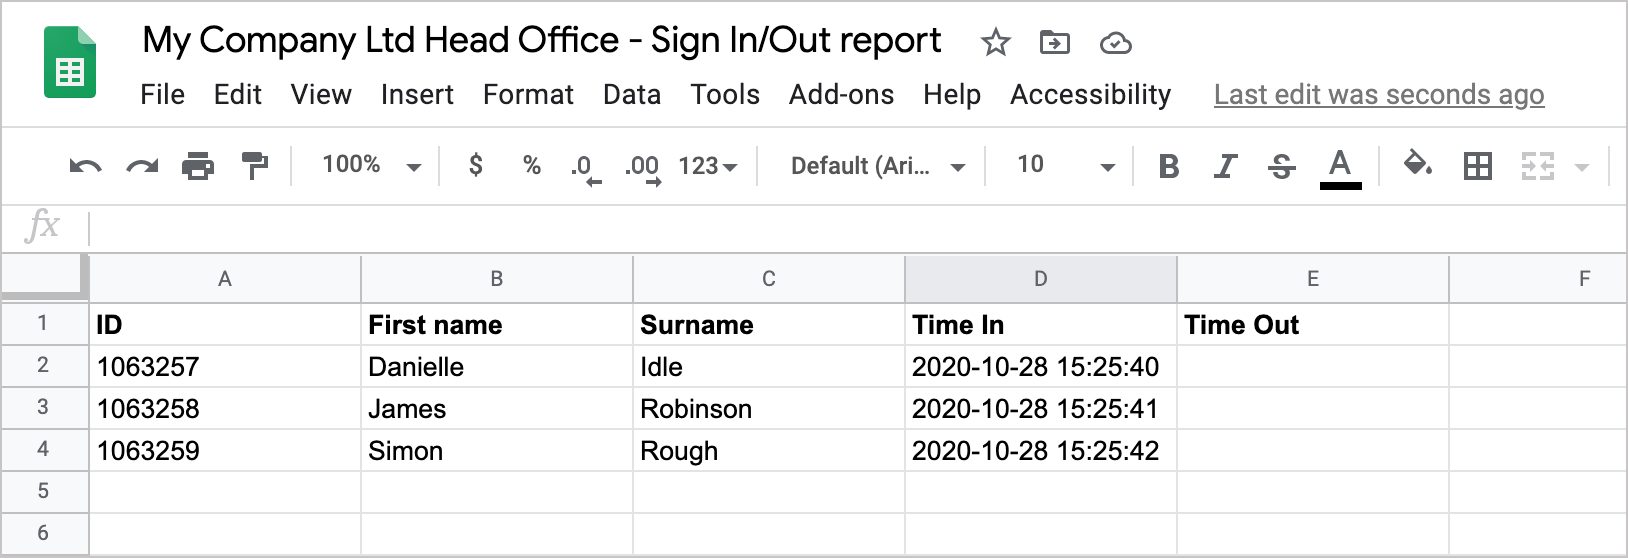
To check that the first stage of the integration works, sign an employee into your location using your Sign In/Out Manager, then look for the update in your spreadsheet.
Step 5: Create a second webhook in Zapier
Create another webhook in Zapier. This webhook is to update the employee sign out information in the spreadsheet.
- Click Make a Zap.
- Select Webhooks by Zapier as your Trigger App.
- Select Catch Hook.

- Click Continue.
- Click Copy next to the Custom Webhook URL, then click Continue.

Keep this tab or window open, you'll continue working on this screen in step 8.
Step 6: Add the webhook in OnLocation
To add the webhook:
- Go to Tools > Accounts.
- Select Integrations from the left-hand menu.
- Select the Webhooks integration, click Settings.
- Click Manage Settings.
- Click Create a New Webhook.
- Add the Webhook Name. You may like to note it is for employee sign out.
- Enter the Webhook URL (paste this from your copied URL in Zapier).
- Select POST as the method.
- Select Form encoded as the content type.
- Click Save.
Step 7: Create a second trigger in OnLocation
Set up a trigger for employee sign out:
- Go to Locations, then select the location from the drop-down list.
- Select Triggers.
- Click Create a New Trigger.
- Enter a trigger name. You may like to note it is for Google Sheets employee sign out.
- Set the trigger status to Active.
- Select Employee Sign Out as the trigger event.
- (Optional) Select the Trigger Rules tab, enter any trigger rules that you might like to use, then click Next.
- Select the Trigger Actions tab, then click Create a New Action.
- Select Webhook – Triggers a Webhook URL from the drop-down menu.
- Select the second webhook.
- Select Full as the data type.
- Click Preview.
- Select a record, then click Send Data.
- Click Save & Close.
Step 8: Create an action in Zapier
The last step is to create an action in Zapier to update the spreadsheet with the employee sign out details:
- Click Test trigger.
- Select Google Sheets as the app.
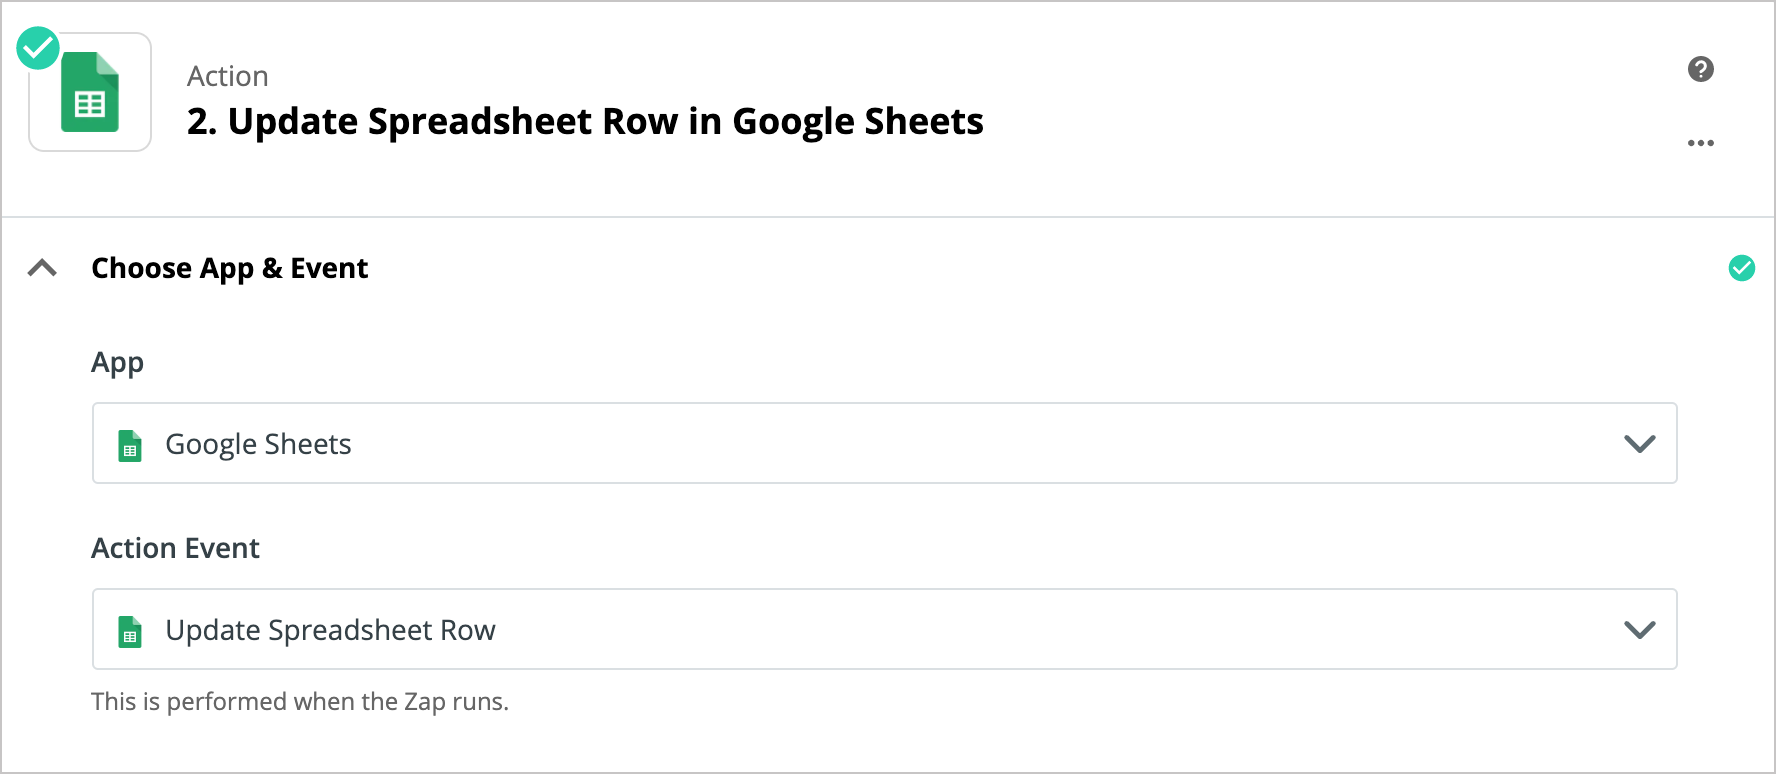
- Select Update Spreadsheet Row as the event action, then click Continue.
- Select your Google Sheets account, then click Continue.
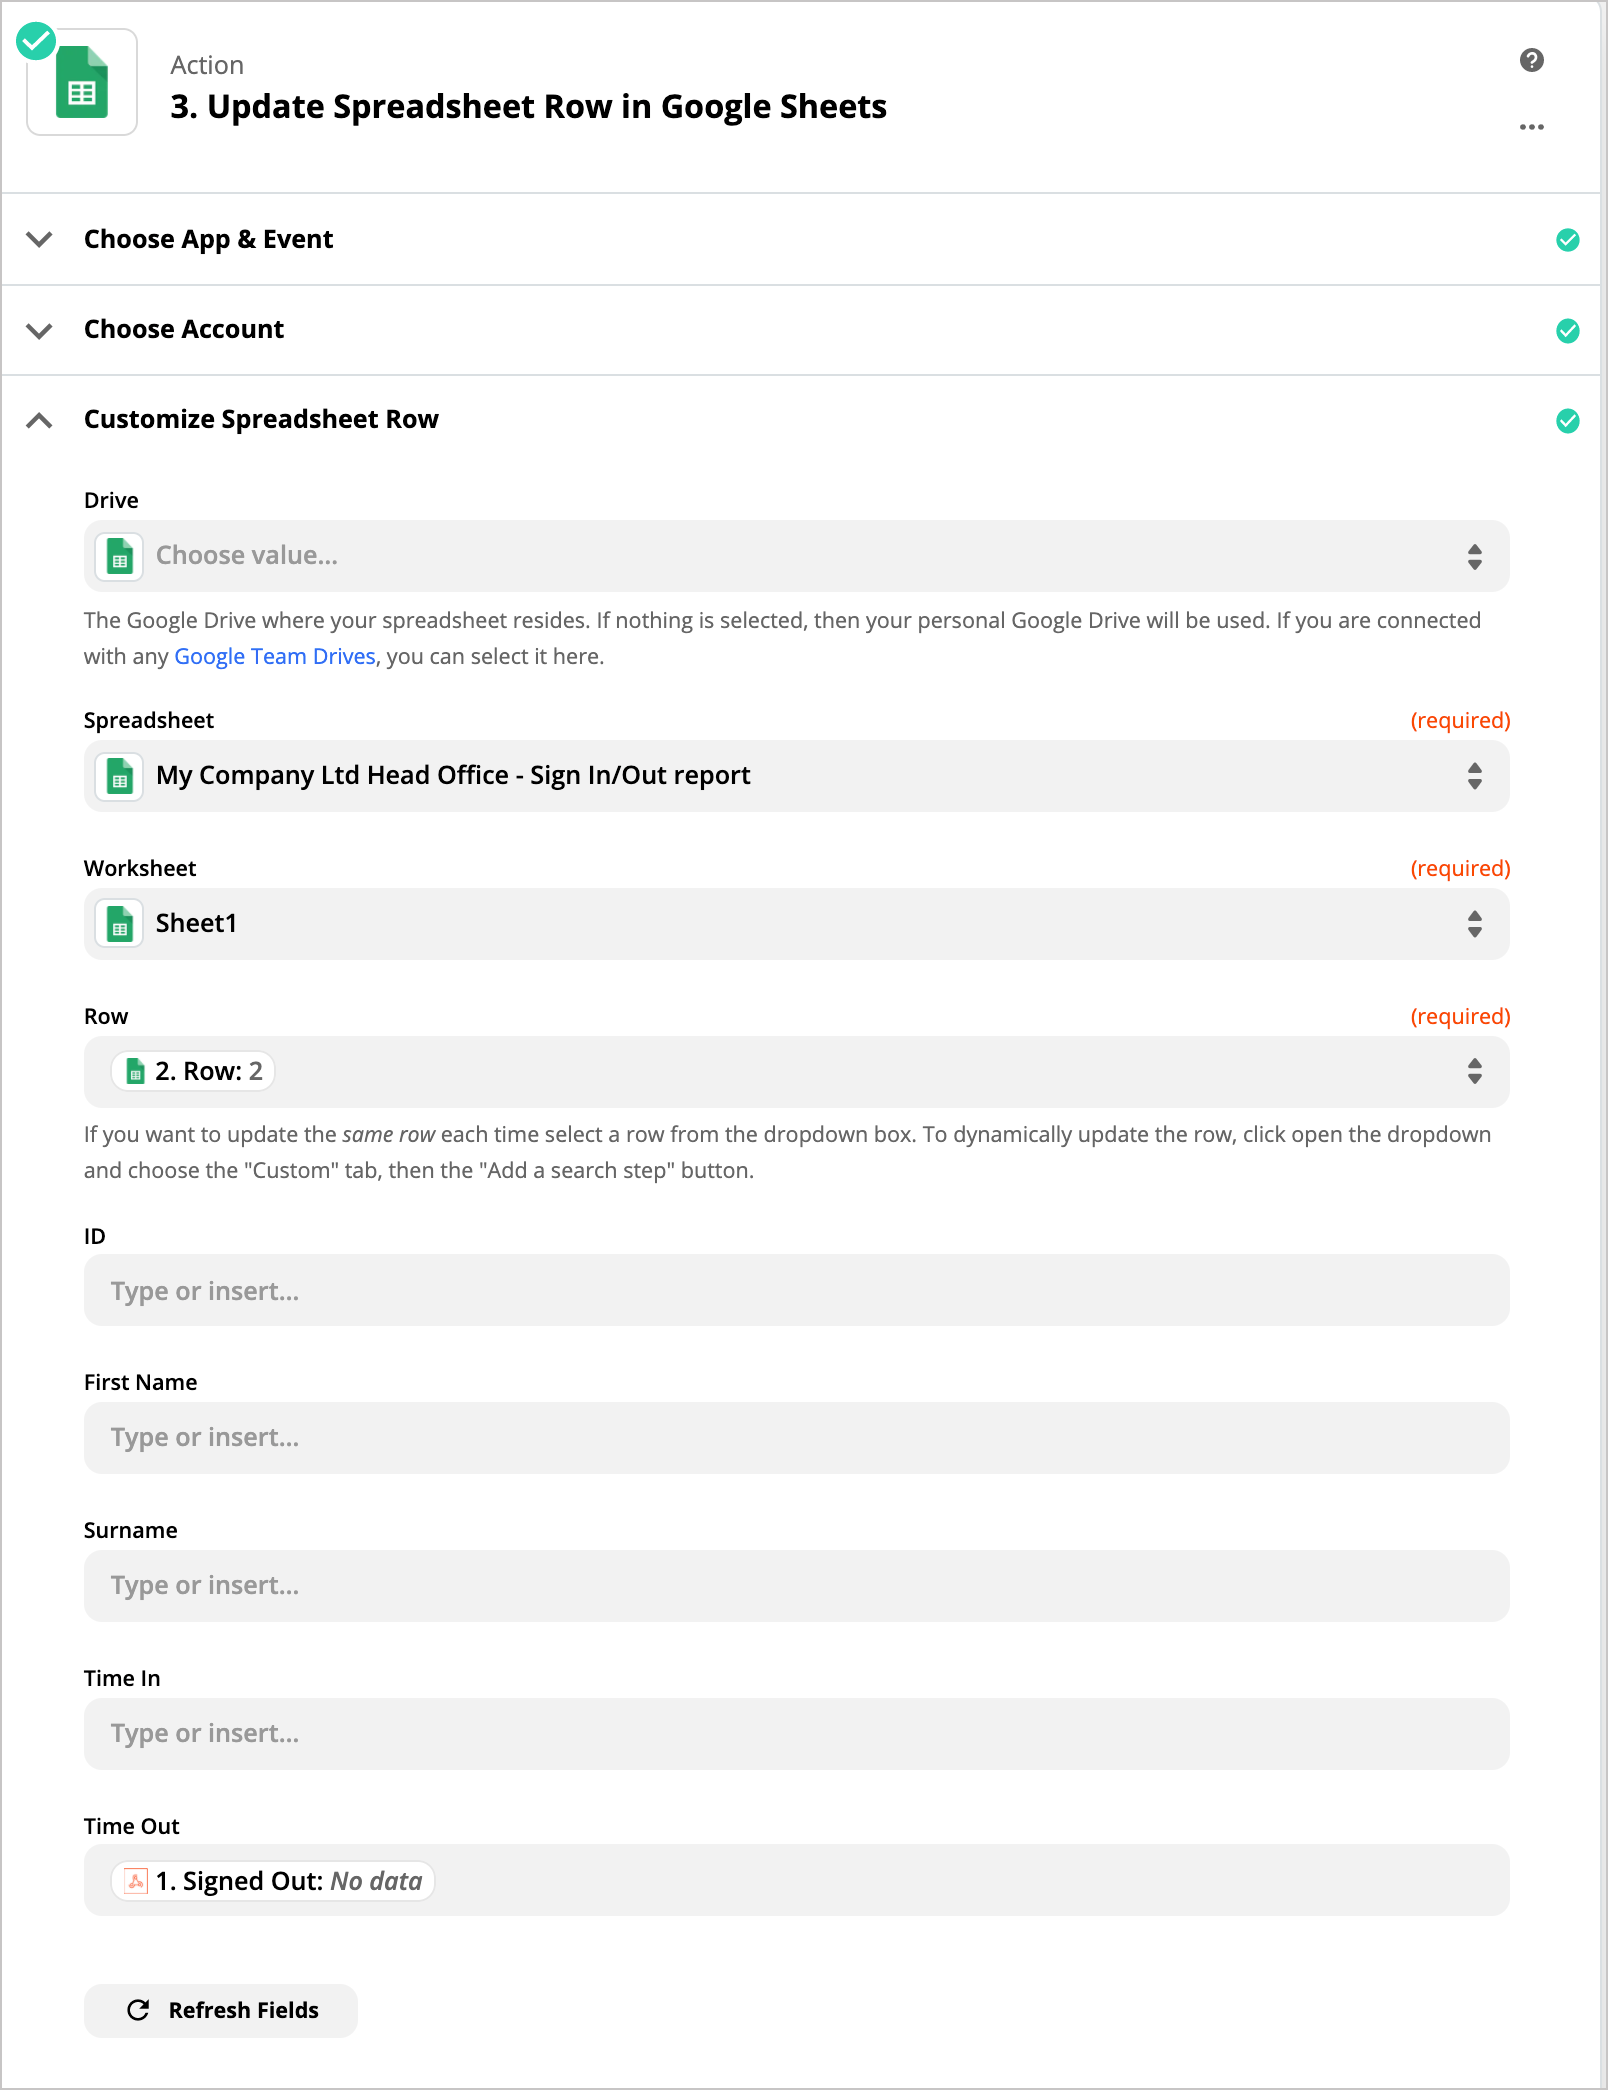
- Customize the spreadsheet row: choose the drive, select the spreadsheet, and worksheet.
- Click on the Row field, then click Add a search step. A new action will appear above the one you've just added.
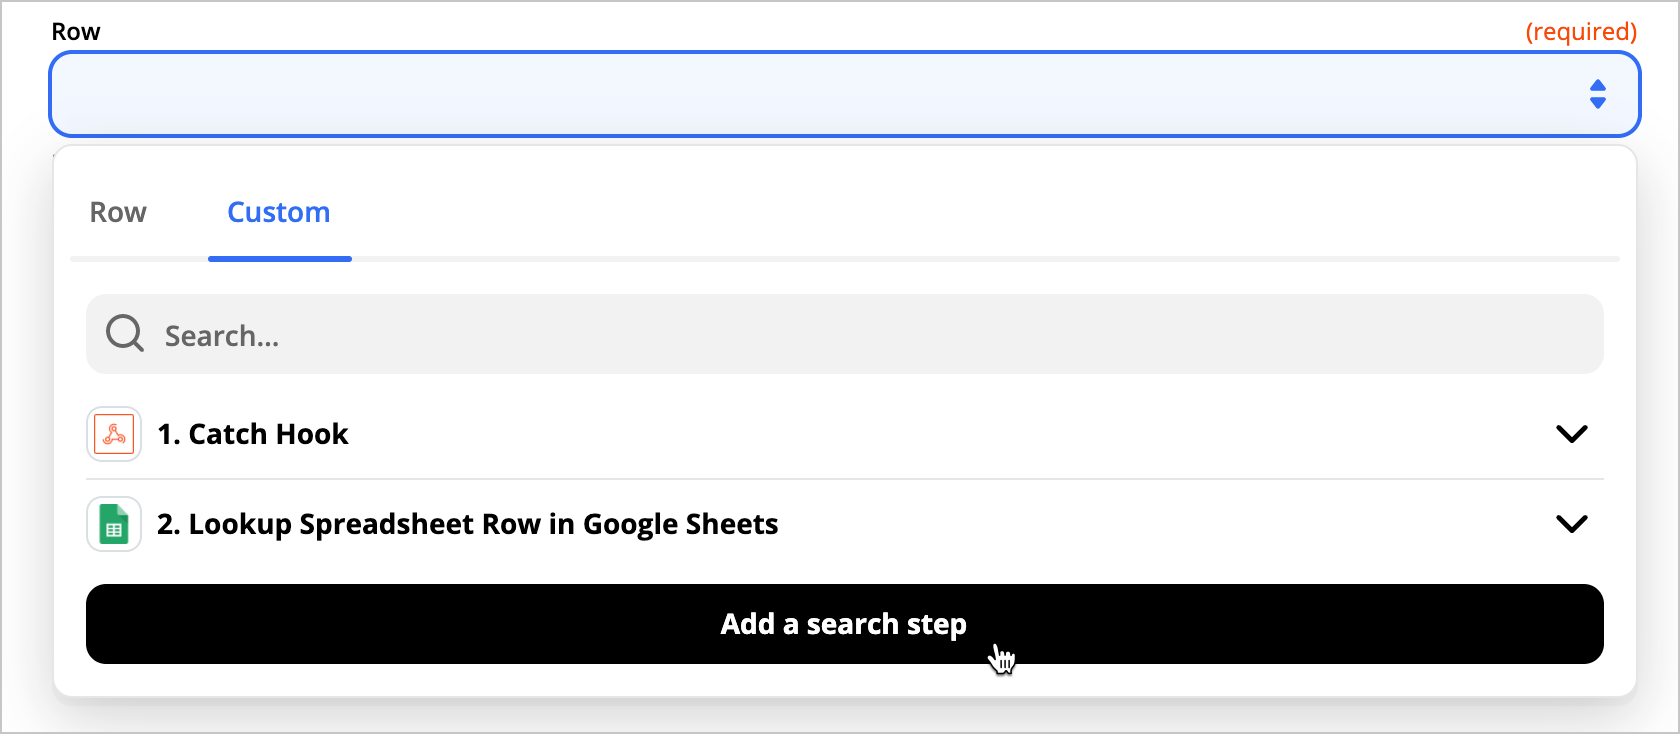
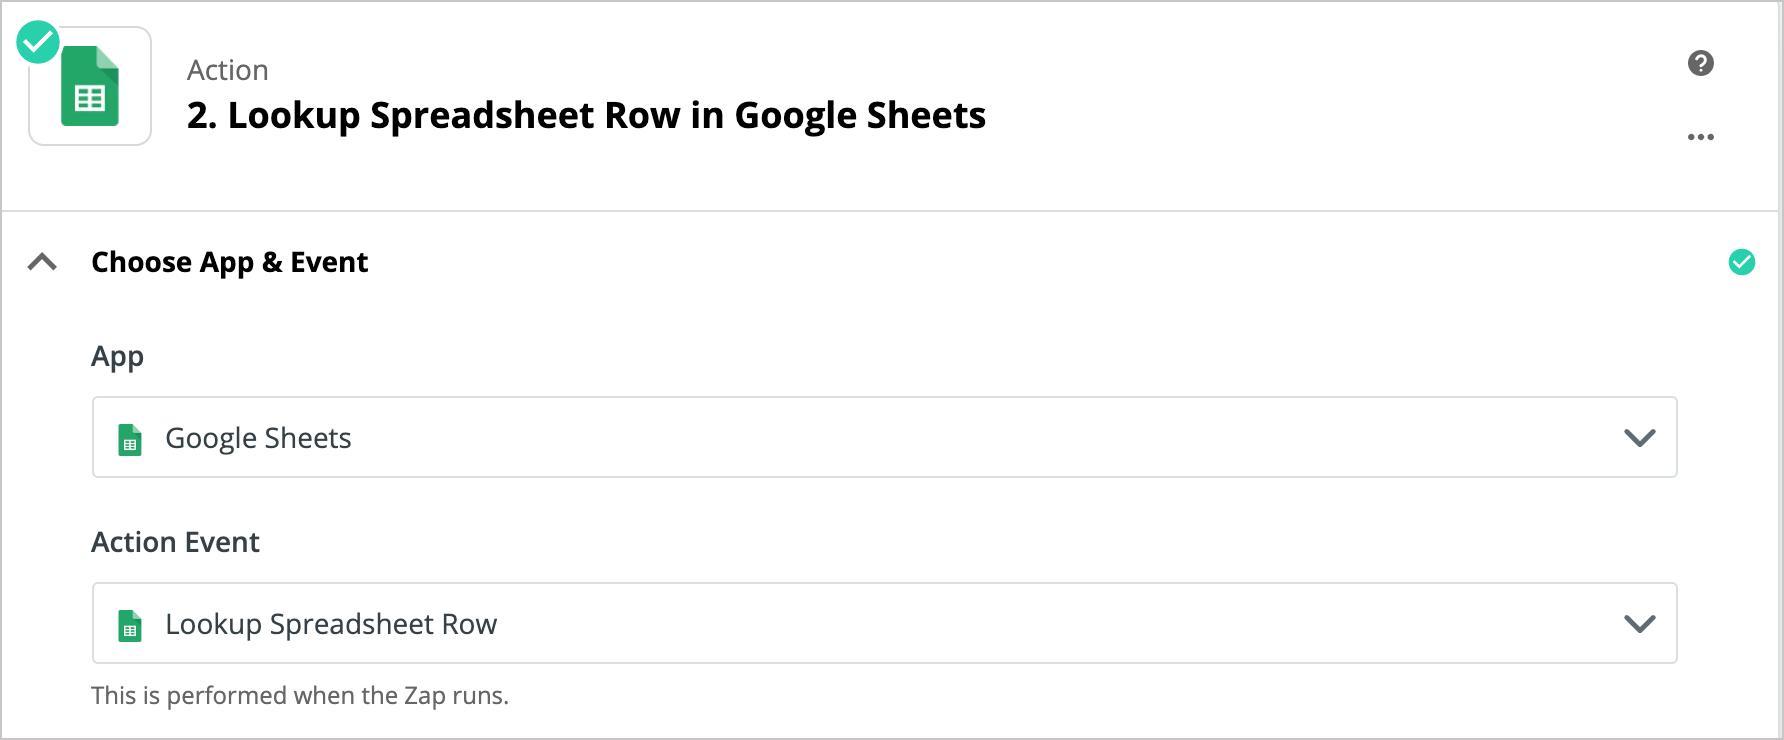
- Select Google Sheets as the app and Lookup Spreadsheet Row as the event action, then click Continue.
- Select your Google Sheets account, then click Continue.
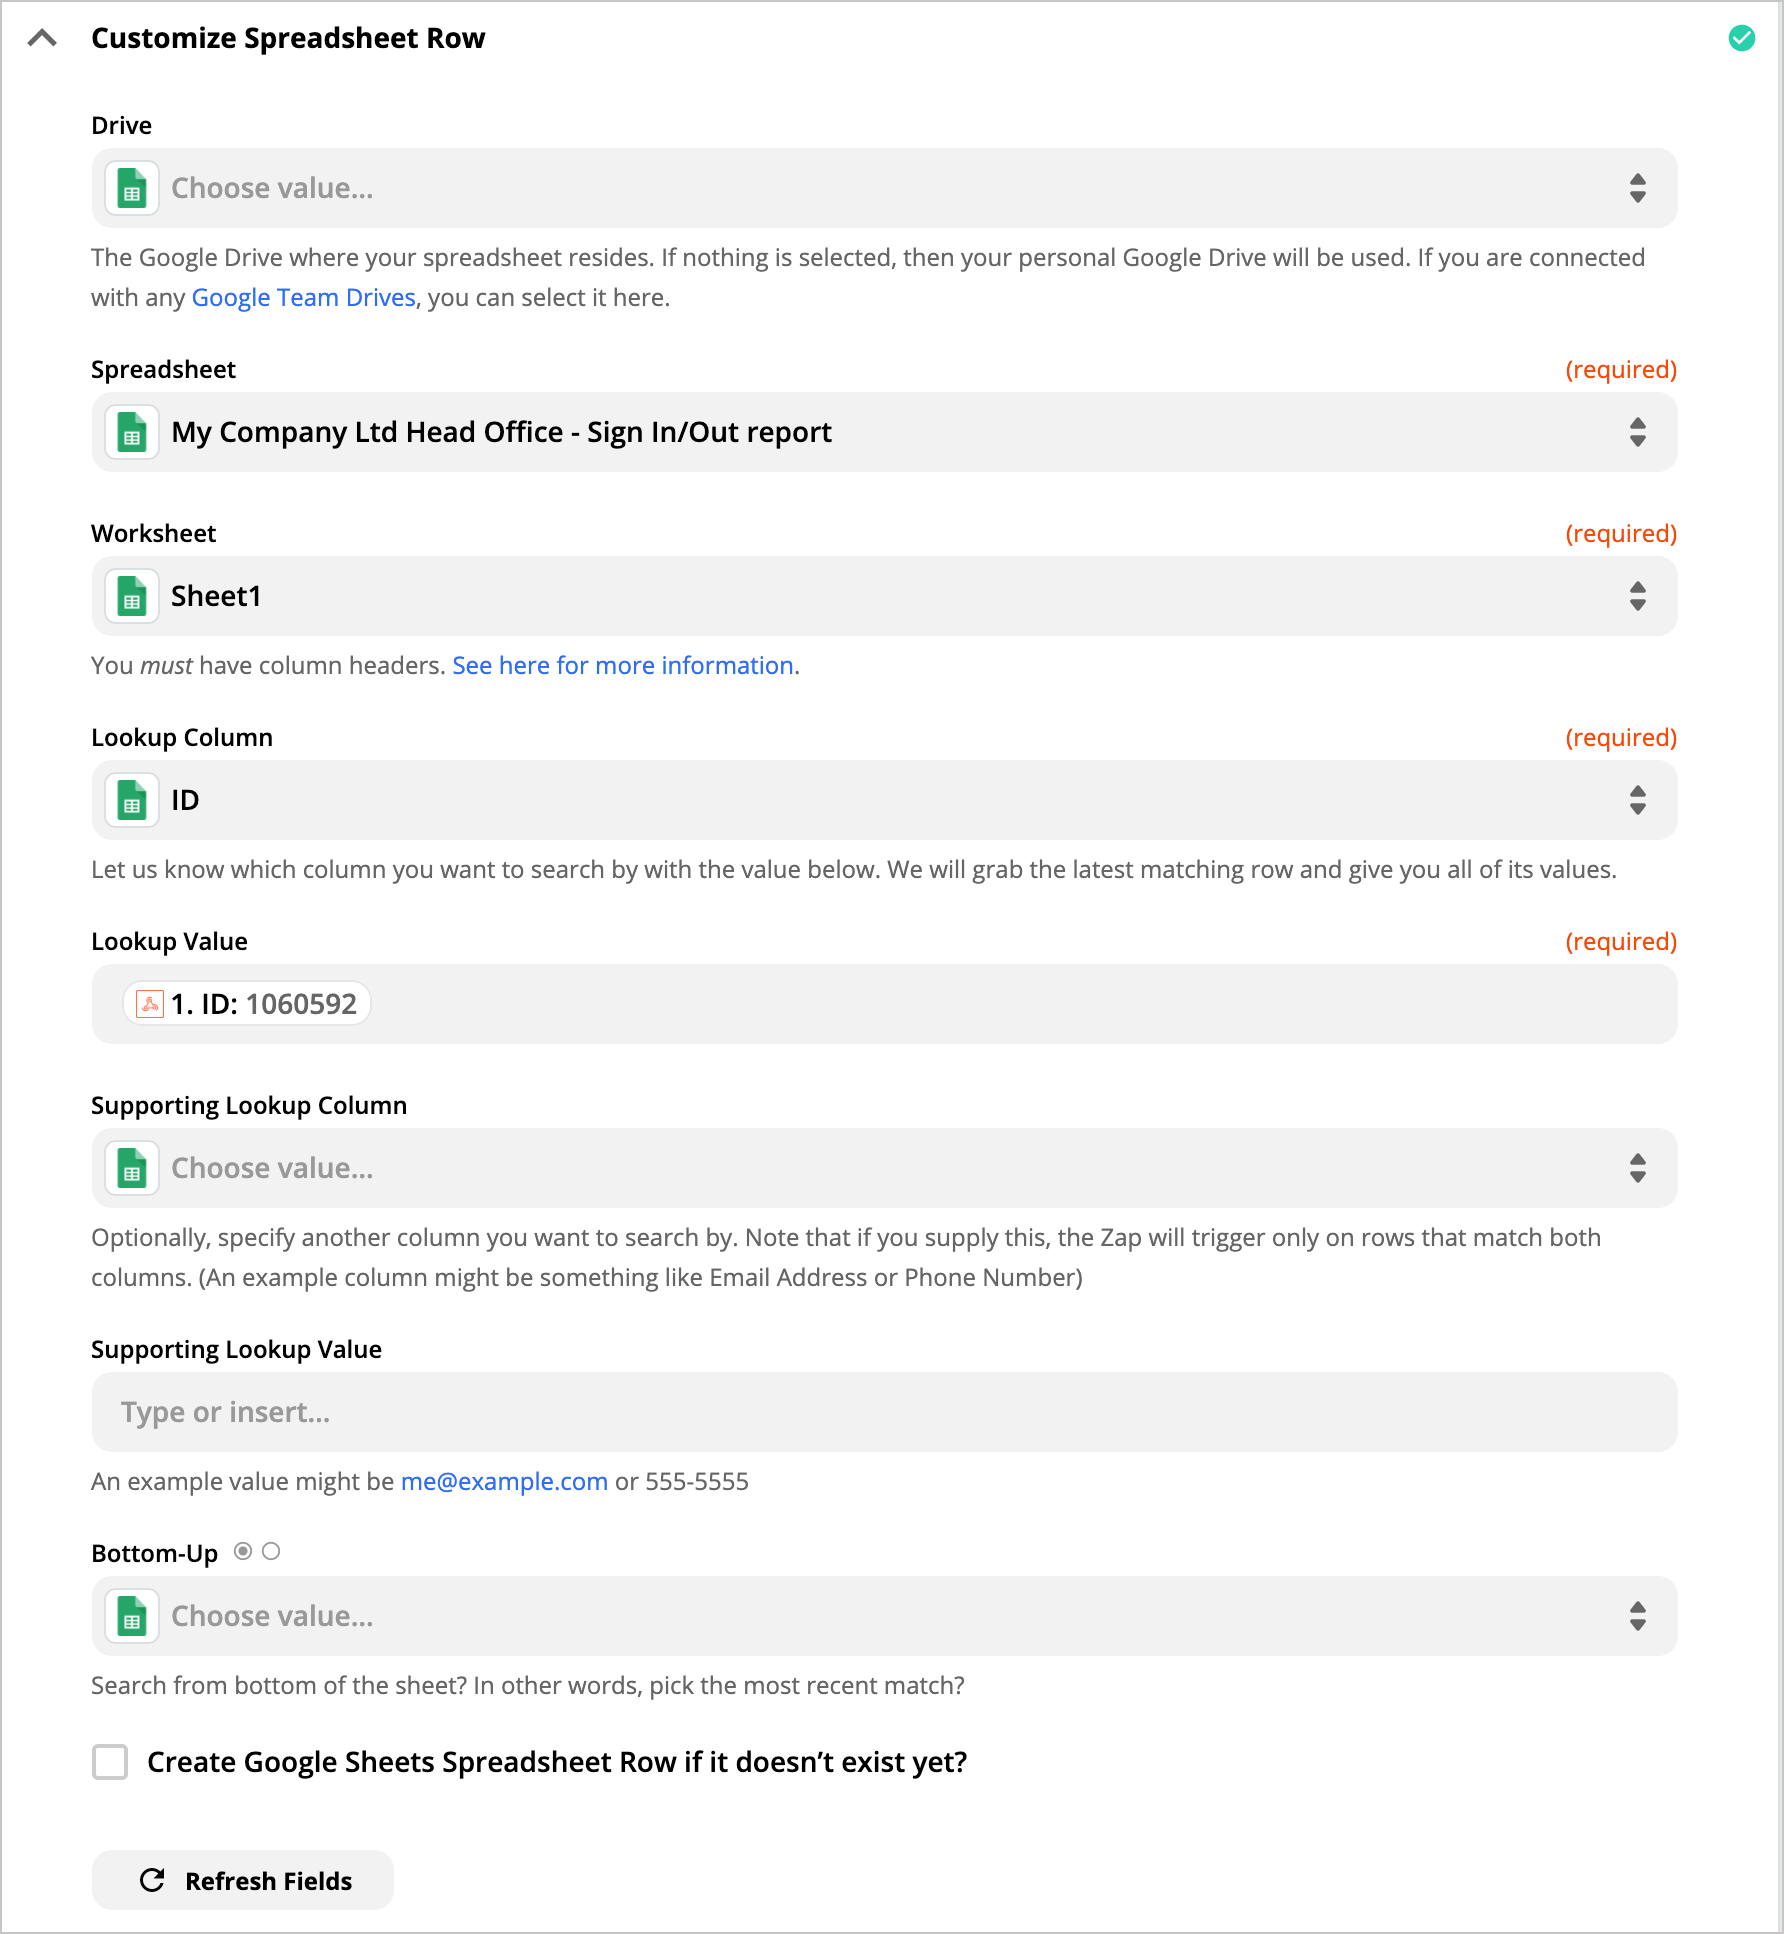
- Customize the spreadsheet row: choose the drive, select the spreadsheet, and worksheet.
- Choose ID as the Lookup Column.
- Choose ID as the Lookup Value.
- Click Continue.
- Click Test & Review.
- Go back to the Update Spreadsheet Row action, then add the Signed Out field to the relevant data category. In this example, it has been added to the Time Out column in the spreadsheet.
- Click Continue.
- Click Test & Review.
To check the integration, sign out an employee in your Sign In/out Manager, and check that the row updated in your spreadsheet.
