Your trial period
If you have signed up for a free trial period with OnLocation, you have access to all of OnLocation’s features for 14 days. You can sign up for a pricing plan anytime during your trial.
Any information you enter during the trial period will remain when you move to a paid subscription. If you have added your locations, imported employees, set up your sign in/out kiosks, and added your contractor organizations and members, all of this information will remain in your account.
If you don’t sign up for a paid subscription, your trial account and any data entered will be deleted.
Subscription options
We offer a range of pricing plans. They are tiered by the number of guest and employee sign in/out movements per year. There are also limits on the number of SMS notifications that can be sent each year. You can upgrade or downgrade your pricing plan at any time.
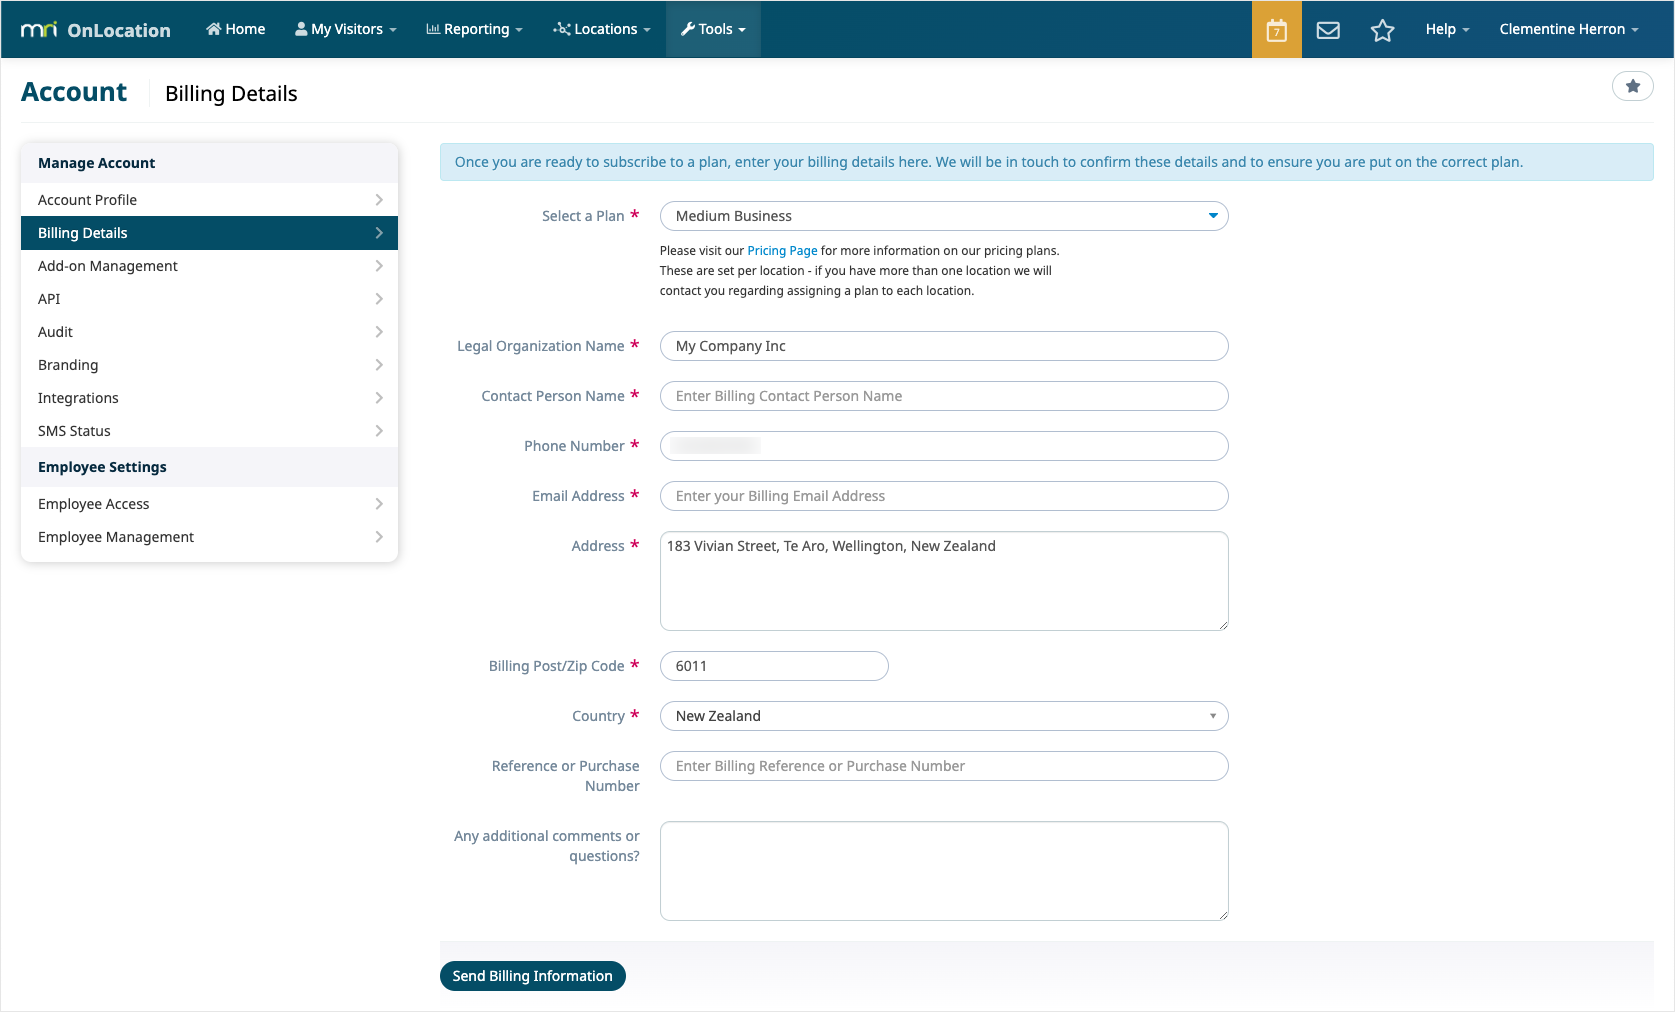
When you’re ready to purchase a subscription, you can select the pricing plan for your first location in the Billing Details screen in OnLocation. If you have multiple locations, our support team will contact you to confirm which pricing plan you need for each location.
For monthly payments, we require payment by credit card or direct debit. For annual payments, we accept credit card payments, direct debit, or wire transfers.
If you sign up for a pricing plan, the term of the agreement is 12 months. You can cancel your subscription with 30 days written notice at any time. For more information, check the Master Subscription Agreement.
Choose a pricing plan
To sign up for a pricing plan, the Account Owner can set up your billing details:
- Go to Tools > Account.
- Select Billing Details from the left-hand menu.
- Select a pricing plan for your first location.
- Enter your organization's legal name. This defaults to the account name but can be changed if this is not the name used for billing.
- Enter the name of the person that we will contact for billing-related queries.
- Add the phone number and email address of the contact person.
- Enter the address and post/zip code used for billing.
- Select the country of the location.
- (Australia only) Add your Australia Business Number (ABN) for the organization.
- (Australia only) Select if you are GST registered in Australia.
- (Optional) Add a reference or purchase number.
- (Optional) Add any additional comments or questions. If you have a question or comments about your account or billing, add them to this field.
- Click Send Billing Information.
