Creating a watchlist trigger is mostly the same as creating any other trigger. You have a trigger event, the trigger rules, and the trigger actions.
To create a trigger that works with a watchlist:
- Make the trigger event a visitor event, e.g. Visitor Sign In, Visitor Sign Out, or Visitor Overdue.
- Select Matches a Person on a watchlist as the trigger rule.
- Set up what trigger actions you want to happen when the watchlist is matched. This may be sending an email or text to your security team, or showing a message up on the kiosk.
Step 1: Create the trigger
Once your watchlist has been created, you can set up a new trigger to match your watchlist with your visitors:
- Go to Locations, then select the location from the drop-down list.
- Select Triggers.
- Select Create a New Trigger.
- Enter the trigger name.
- Set the trigger status to Active.
- Click Select an Event, then select either Visitor Sign In, Visitor Sign Out, or Visitor Overdue depending on when you want to match the visitor with your watchlist.
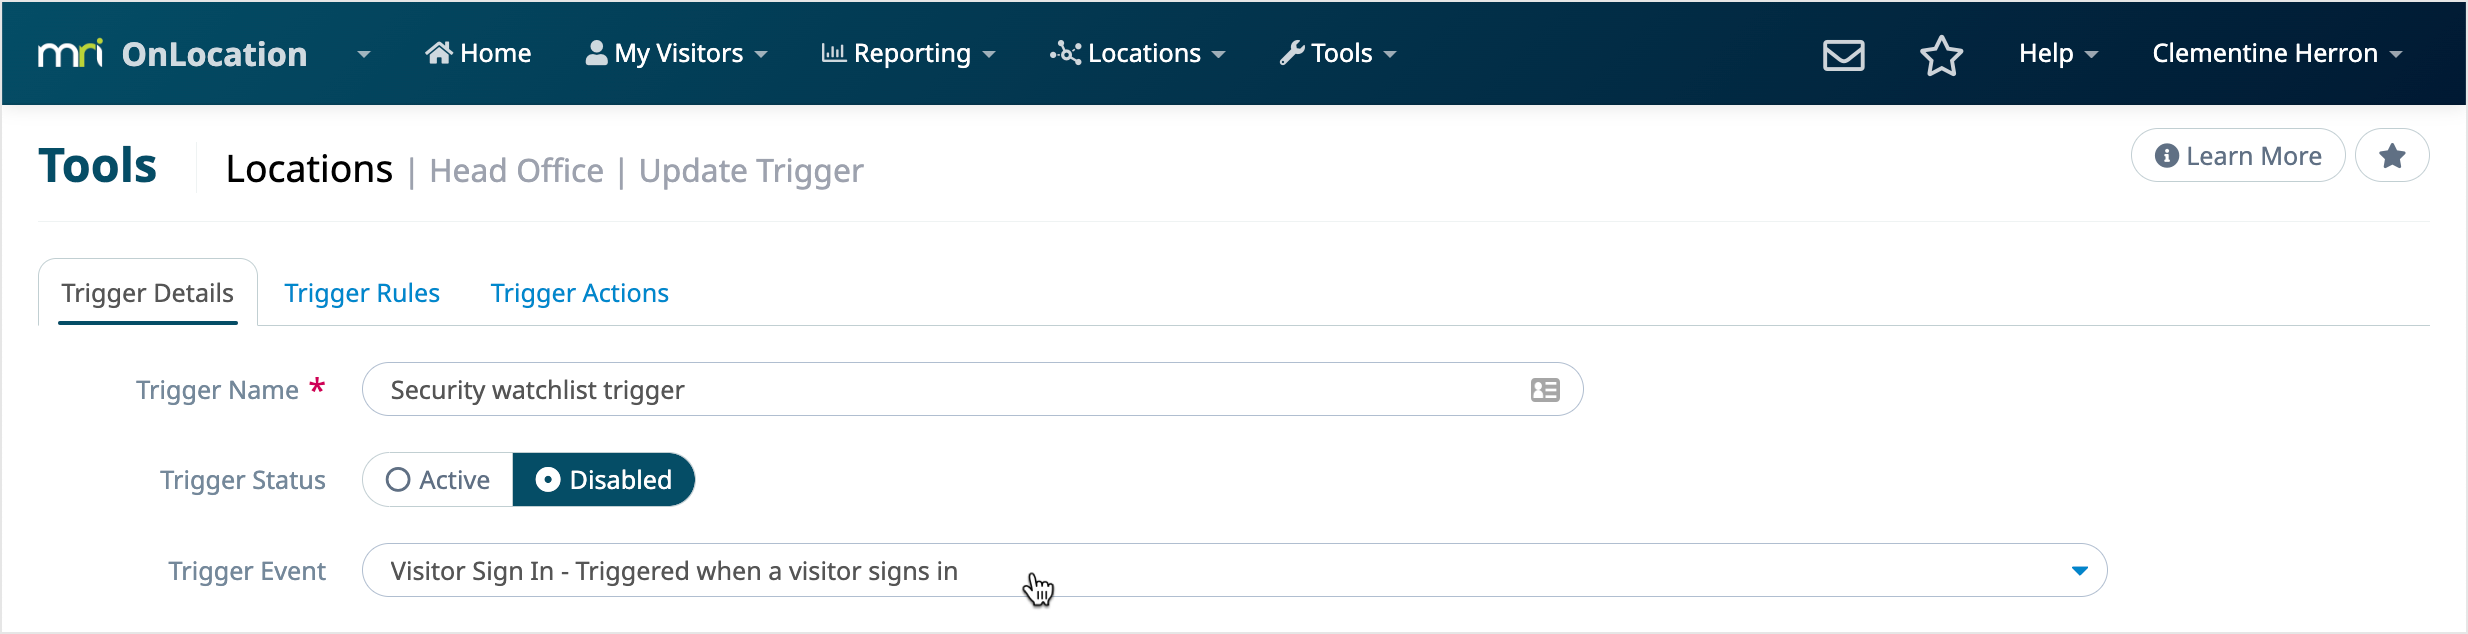
- Click Next.
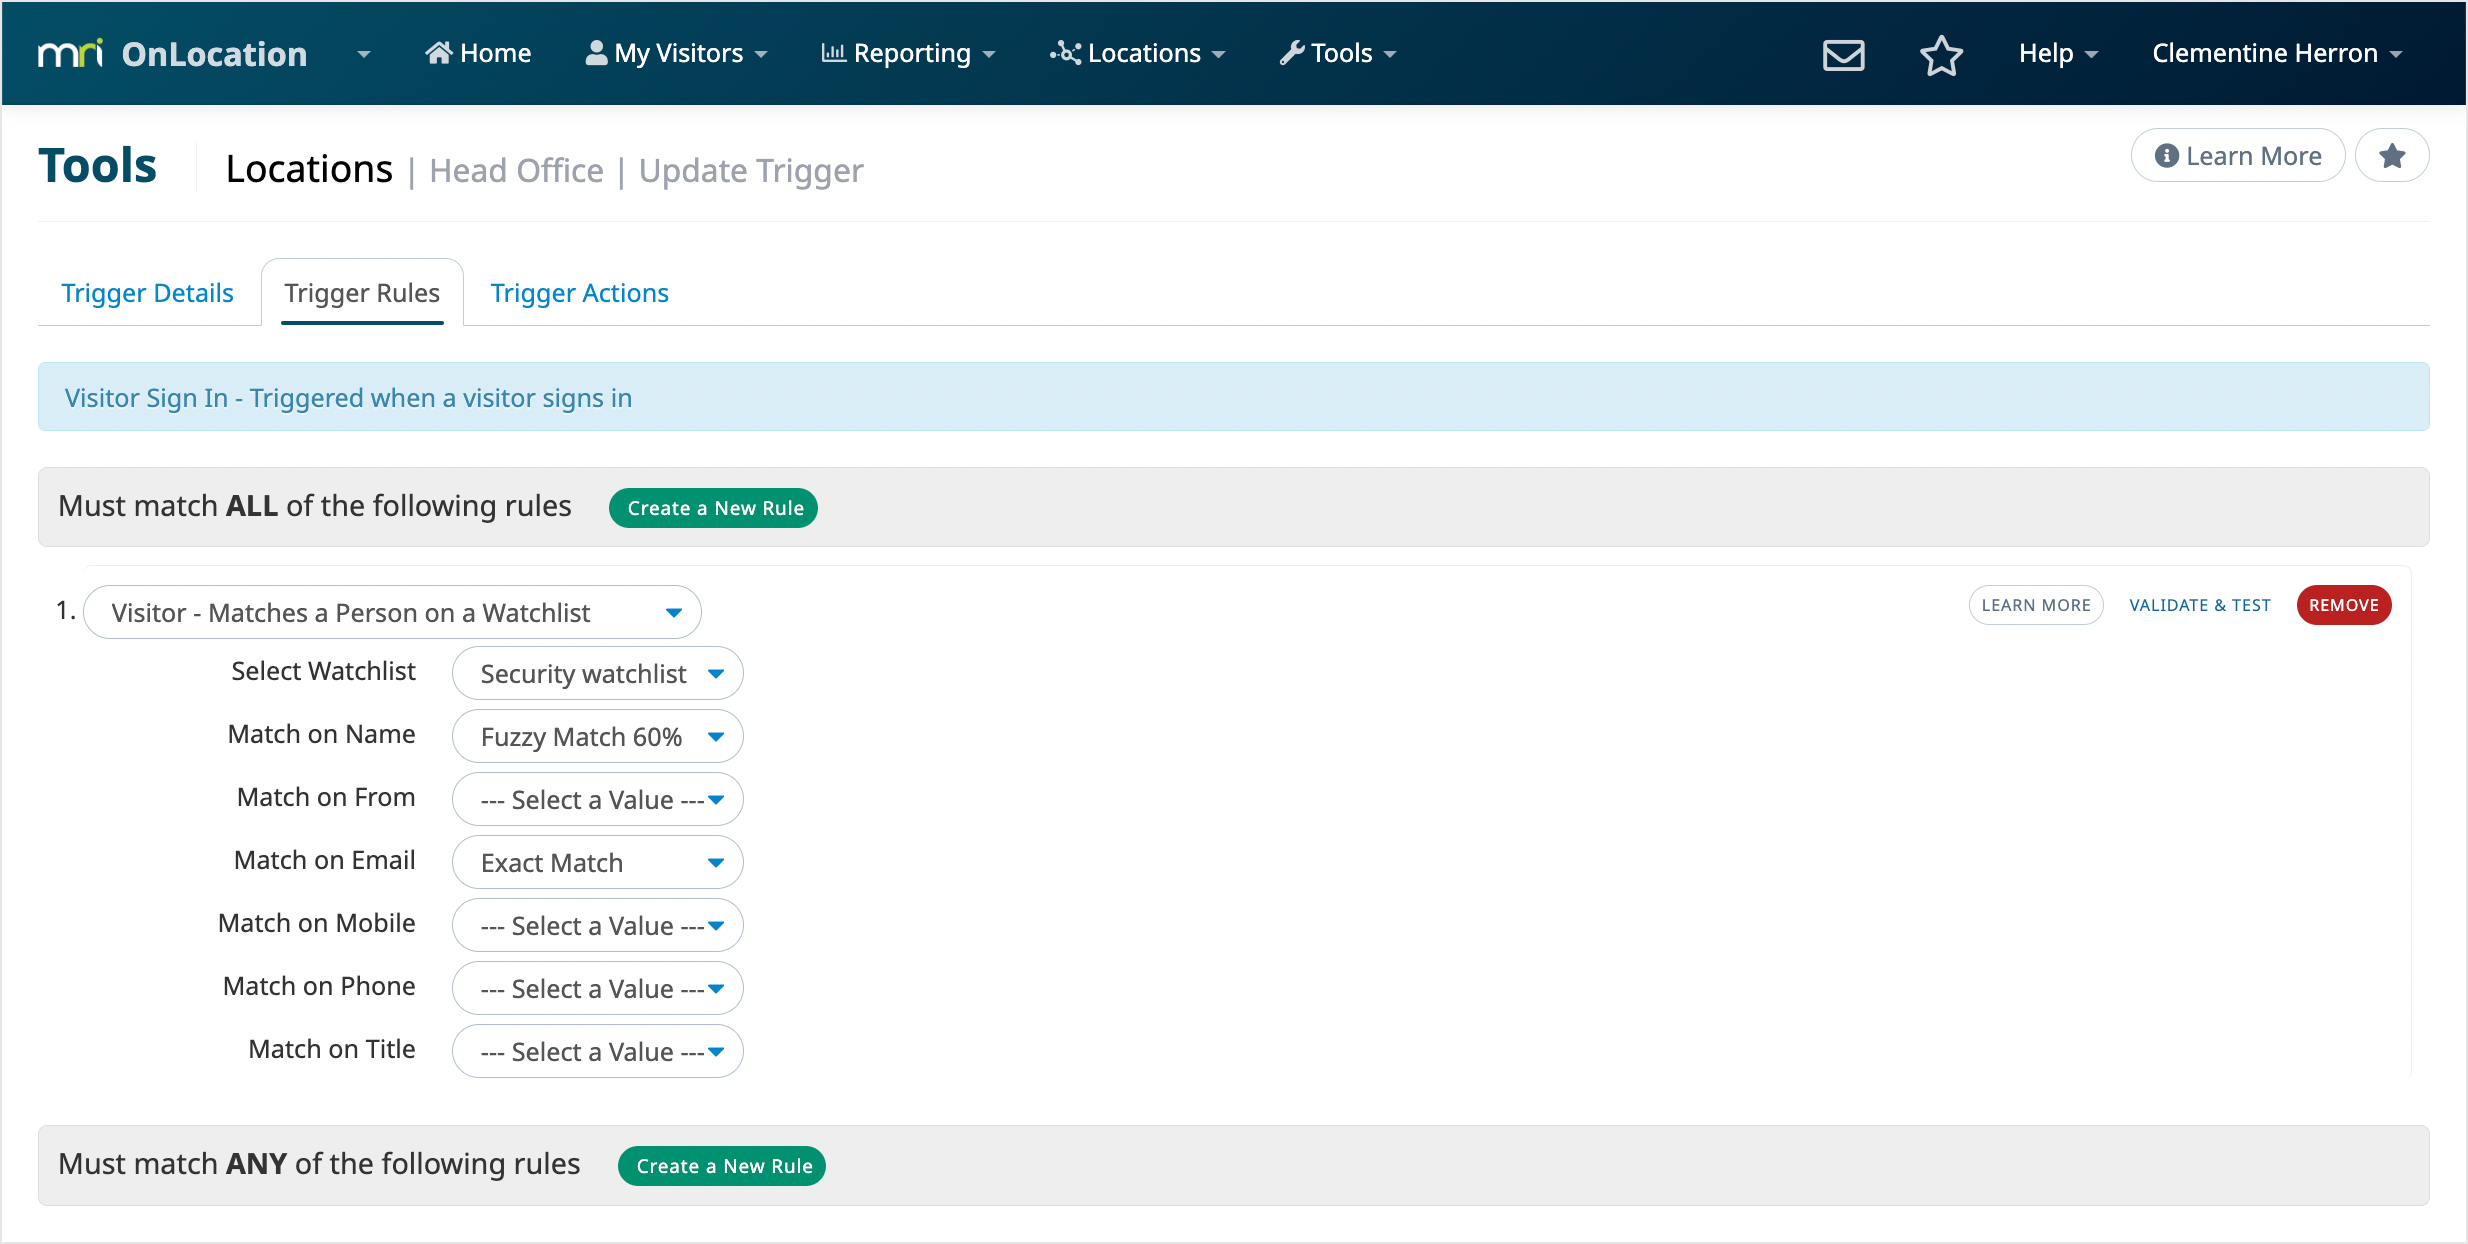
Step 2: Add a watchlist trigger rule
Watchlist trigger rules, like normal trigger rules, can be set under the ALL or ANY categories. If multiple rules are added to the ALL category they must all be met to make a positive match. Reversely, if multiple rules are added to the ANY category, only one must be met to make a positive match.
Entering multiple fields in the same watchlist rule will mean that they all need to be met to match on that particular rule, i.e. if you want to match on one of many rules, you will need to create new rules for each one in the ANY section, rather than entering multiple fields on one rule in that section.
From the Trigger Rules tab:
- Click Create a New Rule.
- Click the Select a Rule dropdown, then select Visitor - Matches a Person on a Watchlist.
- Select the watchlist you want to match people from.
- Select what fields you want to match and to what degree:
Exact Match - What the visitor enters must match exactly what is entered in a watchlist entry.
Must Contain - What the visitor enters must contain what is entered in a watchlist entry. E.g. If the visitor enters their email as john@company.com, and the watchlist has @company.com as the email address, it will match.
Fuzzy Match 80% - What the visitor enters must match what is entered in a watchlist entry to an 80% accuracy. E.g. If the visitor enters their email as john@company.com, and the watchlist has john@company.co.nz entered, it will still match.
Fuzzy Match 60% - The same as 80% with a larger degree of inaccuracy. E.g. If the visitor enters their email as johnny.w@company.com and the watchlist has john@company.co.nz entered, it will still match. - Click Validate & Test.
- You can test your Trigger Rule against people set up in your watchlist to make sure you have set it up to your standards.
- Enter details that a potential visitor would enter and click Test Rule.
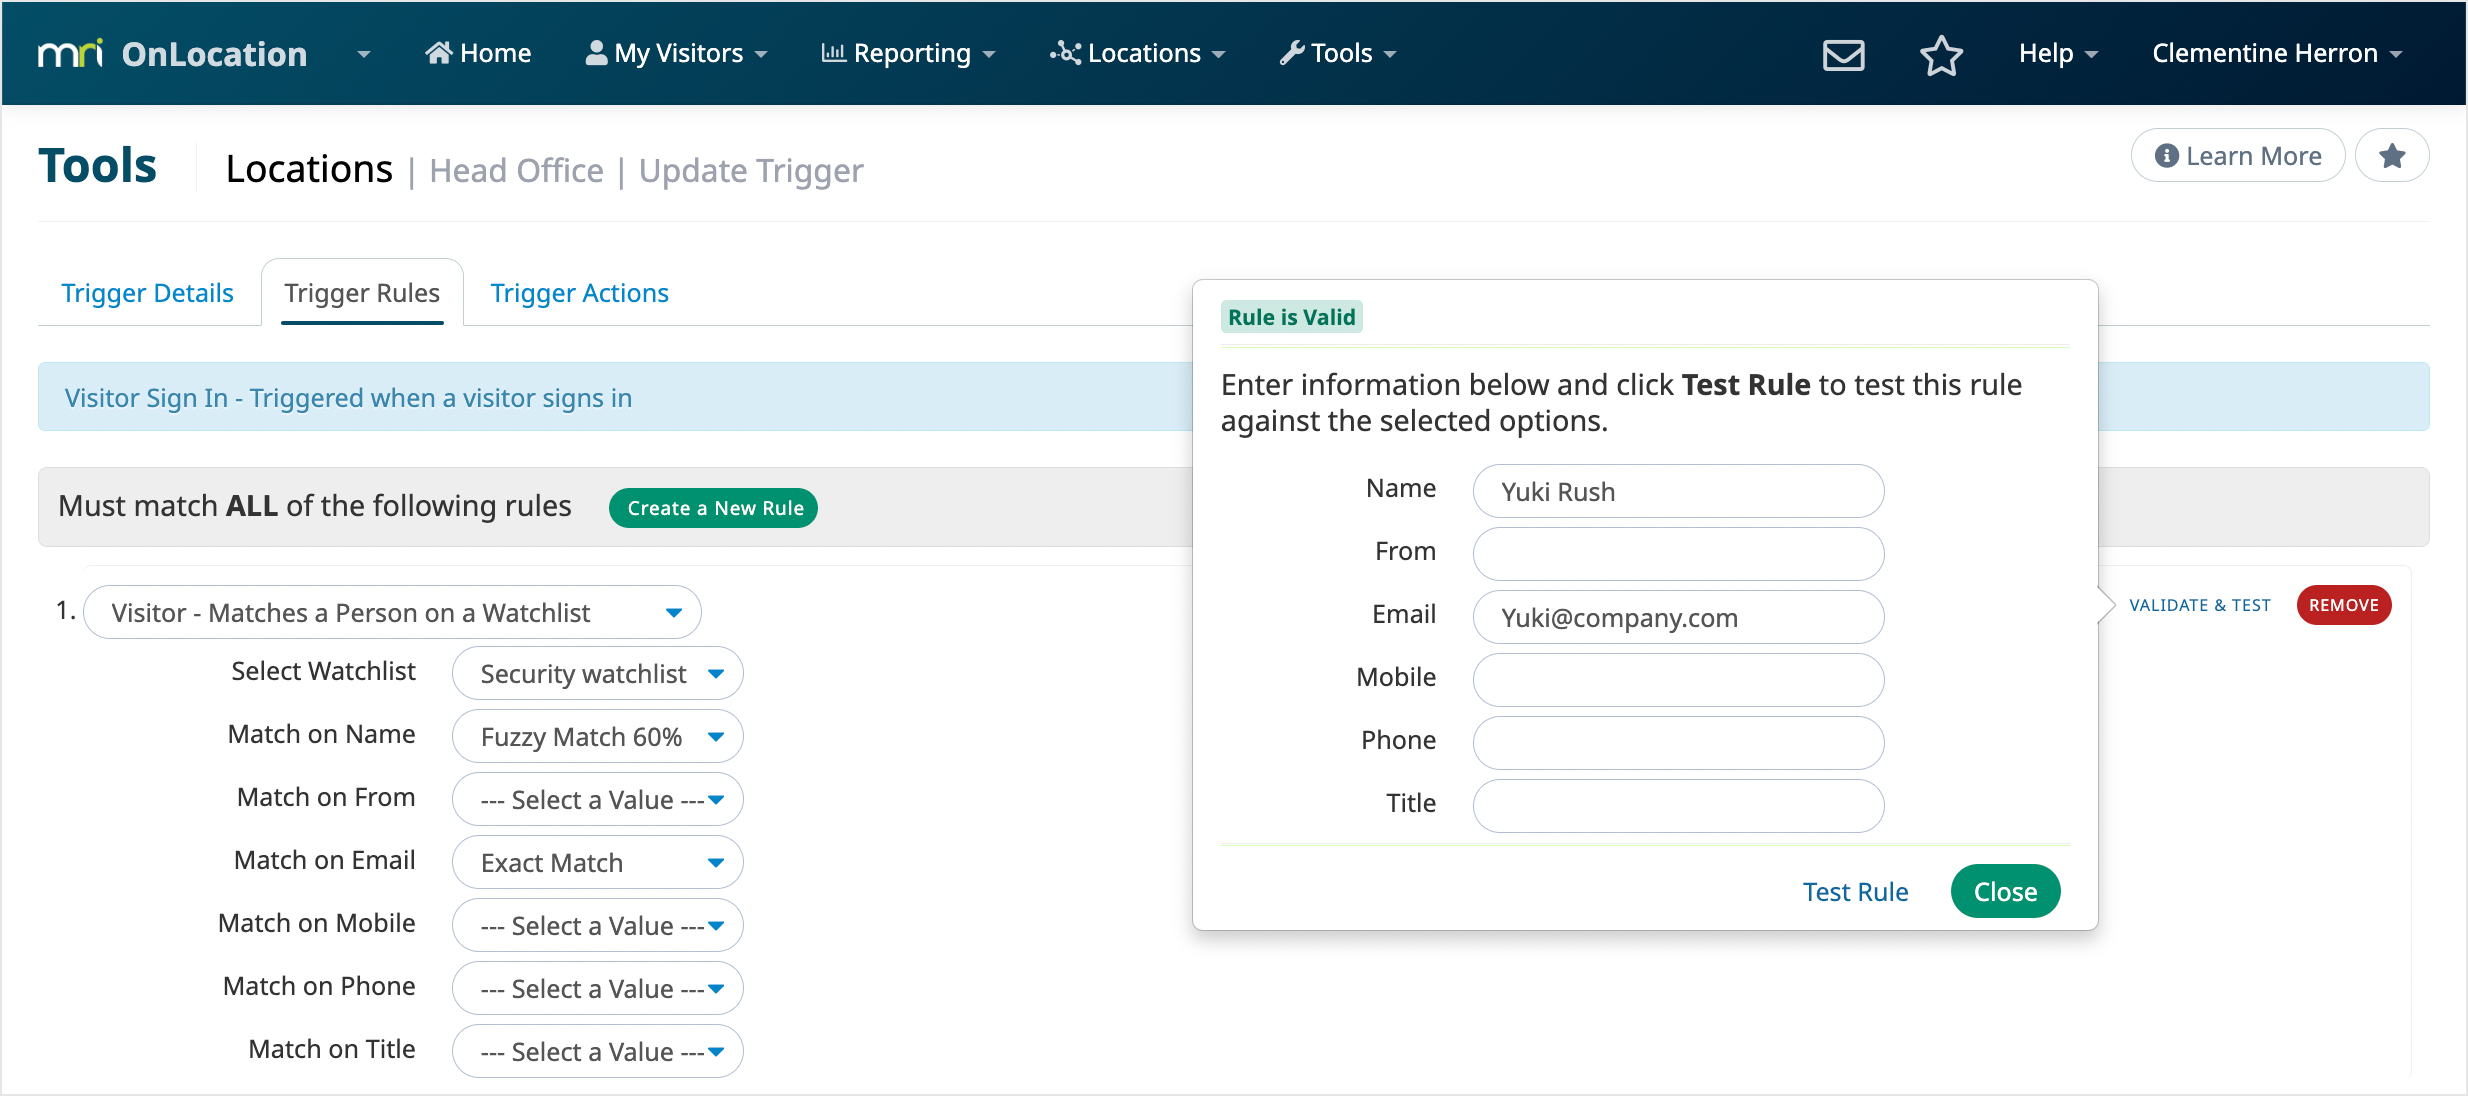
- If the details you entered match with a person on the watchlist, the results will display on screen.
- When you've finished testing, click Close.
- Click Next.
Step 3: Add a watchlist trigger action
There are many options available for trigger actions and any action for a normal trigger is also available for a watchlist trigger. The most common for a watchlist trigger action would be sending an email, sending a text, popping up a message, or denying entry.
You can set up as many different actions as you want, including multiple of the same action, e.g. send an email to security and send an email to the visitor's host.
From the Trigger Actions tab:
- Click Create a New Action.
- Click the Select an Action dropdown menu.
- Select the action you want to perform. To receive an email or SMS, the recipient's details must be entered into OnLocation:
Notification: Send an Email - Send an email to one or many recipients - You can set up specific people to receive this email or groups of people, e.g. the host of the visitor, an external recipient, all employees with a selected role type, etc.
Notification: Send a SMS - Send a SMS to one or many recipients - The same rules for people you can send an email to applies to SMS as well.
Popup a Message - Popup a message on the screen - This will display on the screen the visitor is being signed in through, either on the kiosk displayed to the visitor or on the Sign In/Out Manager displayed to an employee signing the visitor in.
Deny Access - Deny Access to a Person - A popup message will be displayed and the visitor will not be able to sign into the location. A record of their attempt to sign in will still appear in the People Presence Report.
Sign In/Out People - Sign a group of people in/out - you can automatically sign in or out a group of employees, contractors, or visitors when a visitor matches your watchlist. - Enter the details for the action.
Most actions will ask for a subject or title and message for the action. Notifications will require one or more recipients, and popup messages require a style that is a color scheme for the popup. You can use the placeholders to create dynamic information based on the information entered and the recipient, see below for more information on placeholders. - Repeat for as many actions as you want to set up.
- Click Save & Close.

Your trigger will begin working immediately and any people on your watchlist who match visitors through your trigger settings will activate the trigger action(s).
Frequently used placeholders
A placeholder will generate specific information about a visitor based on the answers to questions asked on sign in. Some of the most useful placeholders for watchlist triggers are found under the Matched Person category:
- {{match.name}} - The name of the visitor
- {{match.mobile}} - The cellphone number of the visitor
- {{match.lacp_in_name}} - The access control point the visitor signed in through
- {{match.purpose}} - The purpose of visit of the visitor (only applicable if you have this question enabled)
- {{match.watchlist_people}} - Details of the record in the watchlist that the visitor matches
- You can also give the visitor dynamic information about their host's contact details under the Visit Host category:
- {{host.name}} - The host's name. Great for personalizing the message
- {{host.email}} - The host's email if recorded in OnLocation
- {{host.mobile}} - The host's cellphone number if recorded in OnLocation