About kiosk notifications
The Notifications tab is used to set up notifications specific to this kiosk. Notifications that you can configure are for the kiosk status, badge pass levels, panic alarm, Contractor Help, and delivery notifications.
The Badge Pass Notifications sub-tab will not appear for Inter-zone kiosks because printing is not available for inter-zone kiosks.
Access kiosk notification settings
- Go to Locations, then select the location from the drop-down list.
- Select Sign In/Out Kiosks.
- Click View next to the kiosk.
- Select the Notifications tab.
- Configure the settings in the notifications sub-tabs:
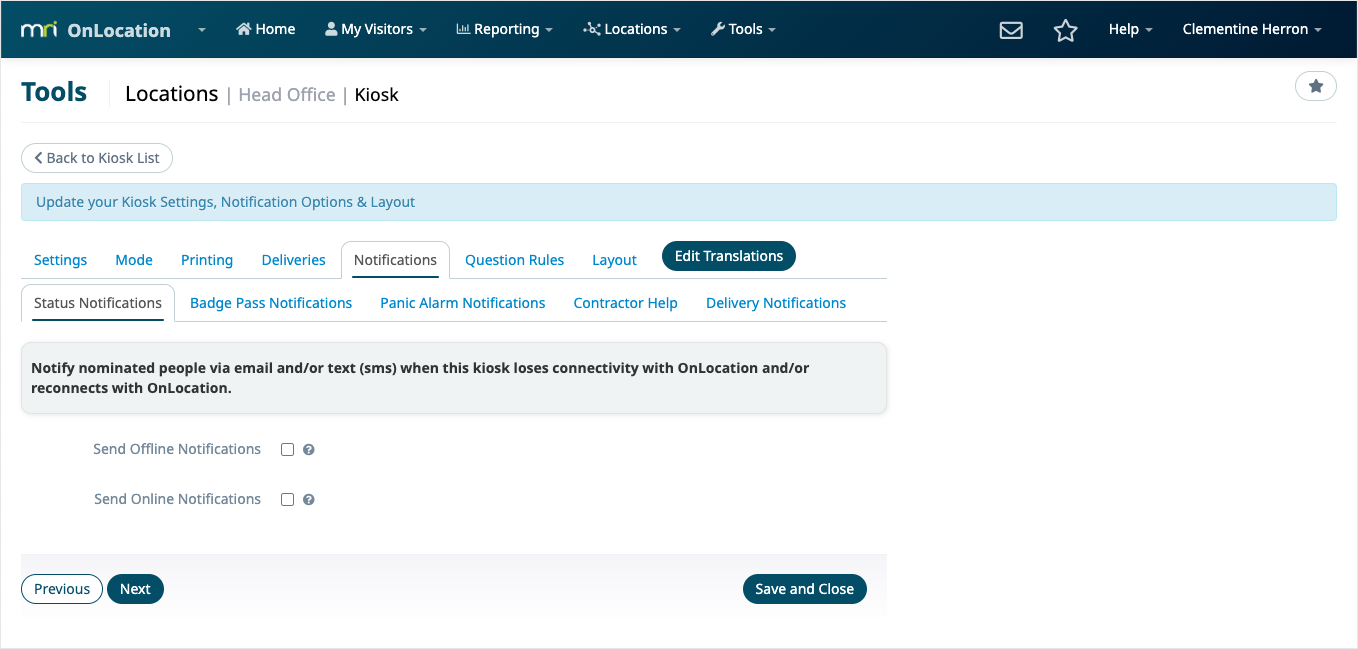
Status notifications
These send notifications to selected people when a kiosk goes offline and/or comes back online. When you activate each option available to you, additional options will appear to configure.
Send offline notifications
Will send notifications when the kiosk loses connection with MRI OnLocation. This can be because the kiosk device has lost power or internet connection, the kiosk browser has been closed, or any reason why the kiosk would no longer be active. You can choose how long after the kiosk going offline you want a notification to send. The notification will send once.
Offline timeout – Appears when Send Offline Notifications is enabled. Select how long after a kiosk goes offline you want notifications to send. You may want to add a buffer time in case the kiosk comes back online on its own, e.g. your wireless connection can sometimes drop out but comes back on quite quickly.
If the kiosk comes back online before the offline timeout period, no notifications will send.
Send online notifications
Will send notifications when a kiosk comes online. This may be after an outage, at the beginning of the day, or any other time the kiosk comes online. If a kiosk goes offline, then comes back online before the Offline Timeout, then no notification will send.
Recipients
You can send notifications by email and/or text to up to three employees and one non-employee, and you can customize who receives which notifications.
Set the employees under the Send to this employee fields, and the non-employee under the Send to this non-employee field. For each recipient, you can select any combination of Send Online Notification via Email, Send Online Notification via Text (SMS), Send Offline Notification via Email, and Send Offline Notification via Text (SMS); and you will see the recipient’s email and/or cell phone number appear next to each option.

Badge pass notifications
These send to selected recipients when the badge passes in your printer are running low and/or have run out. When you activate each option available to you, additional options will appear to configure.
To use badge pass notifications, you need to tell the system how many badge passes you are inserting into your printer. This is done through the kiosk using the Reset Print Count option under the kiosk options.
Send low badge pass notifications
Will send notifications when your badge passes reach a selected number left in the printer. This is set under the Badge Pass Low Notify Level which ranges from 5 to 100 passes left.
Send zero badge pass notifications
Will send notifications when there are no badge passes left in your printer.
Recipients
You can send notifications by email and/or text to up to three employees and one non-employee.
Set the employees under the Send to this employee fields, and the non-employee under the Send to this non-employee field. For each recipient, you can select Send Notification via Email and/or Send Notification via Text (SMS), and you will see the recipient’s email and/or cell phone number appear next to each option.
![]()
Resetting print count
When you install a new roll of labels into your printer, you will need to tell the kiosk how many labels you have installed. This is done through the kiosk options. You will need the PIN to access this option.
From the kiosk home screen:
- Click the Kiosk Options icon in the top-right corner.
- Select Reset Print Count (this option only appears when you are using Badge Pass Notifications). You will notice that the current print count is shown next to this option.
- Enter the PIN and select Continue.
- Enter the number of labels you have installed into the printer.
- (Optional) Choose to save this number as the default. This is useful if you are using the same size roll each time.
- Select Save & Enter Kiosk.
The print count will continue counting into the negatives if it is not reset or badges are trying to be printed with no labels installed. The amount you enter will be the new print count, so you can ignore any existing print count number.
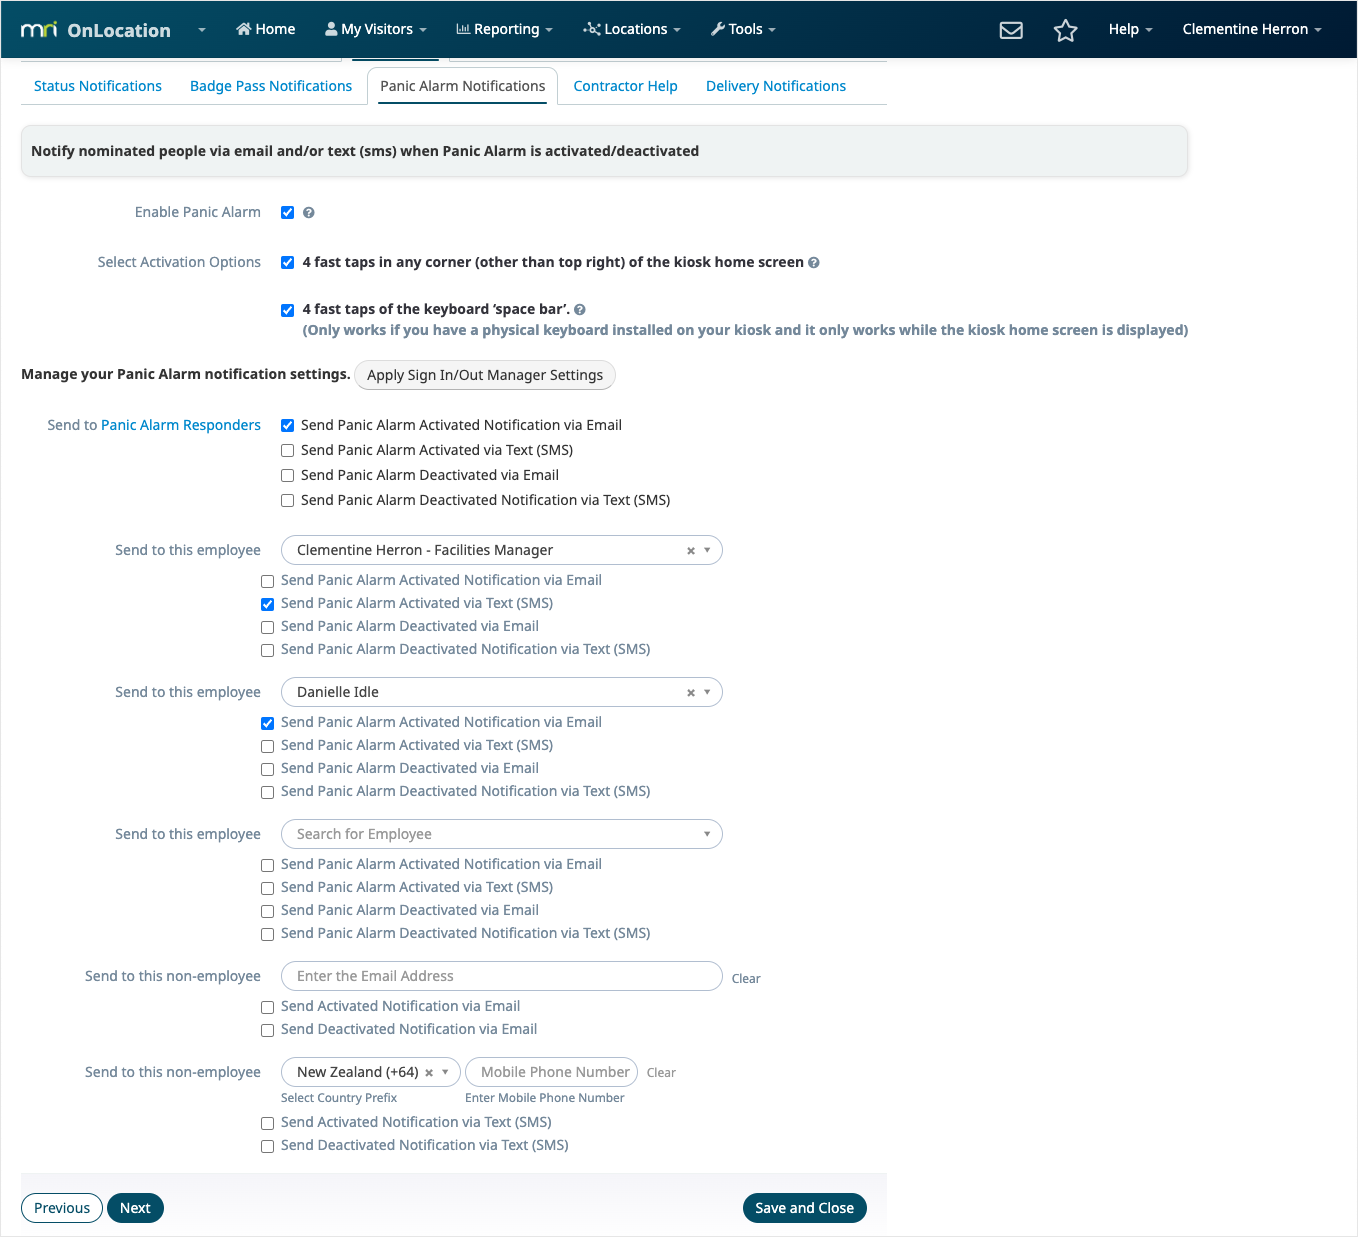
Panic alarm notifications
These send to selected recipients when a Panic Alarm is activated on the kiosk. The Panic Alarm is typically used by a receptionist if they are by the kiosk and need assistance because they feel their safety or security is being compromised.
Only users who are aware of the built-in panic alarm can use it, therefore it is typically used by receptionists, but it can be used by anyone with this knowledge.
Select Enable Panic Alarm to display the options for configuration.
Activation options
There are two methods for activating the panic alarm, one for touch screen, and one for standard PC. If you have a PC with both a touch screen and a keyboard, you can enable both options if you prefer.
For touch screens, tap 4 times in any corner of the kiosk home screen (excludes top right corner).
For standard PC, tap the spacebar 4 times.
Recipients
You can send notifications by email and/or text to your Panic Alarm Responders, up to three employees, and one non-employee.
You can mirror the recipients enabled in this location’s Sign In/Out Manager Panic Alarm settings by clicking Apply Sign In/Out Manager Settings.
Panic Alarm Responders are employees and/or contractors that have the Panic Alarm Responder role type. This is added in their profiles and allows you to have as many people alerted as required.
Set the employees under the Send to this employee fields, and the non-employee under the Send to this non-employee field. For each recipient, you can select any combination of Send Panic Alarm Activated Notification via Email, Send Panic Alarm Activated Notification via Text (SMS), Send Panic Alarm Deactivated Notification via Email, and Send Panic Alarm Deactivated Notification via Text (SMS).
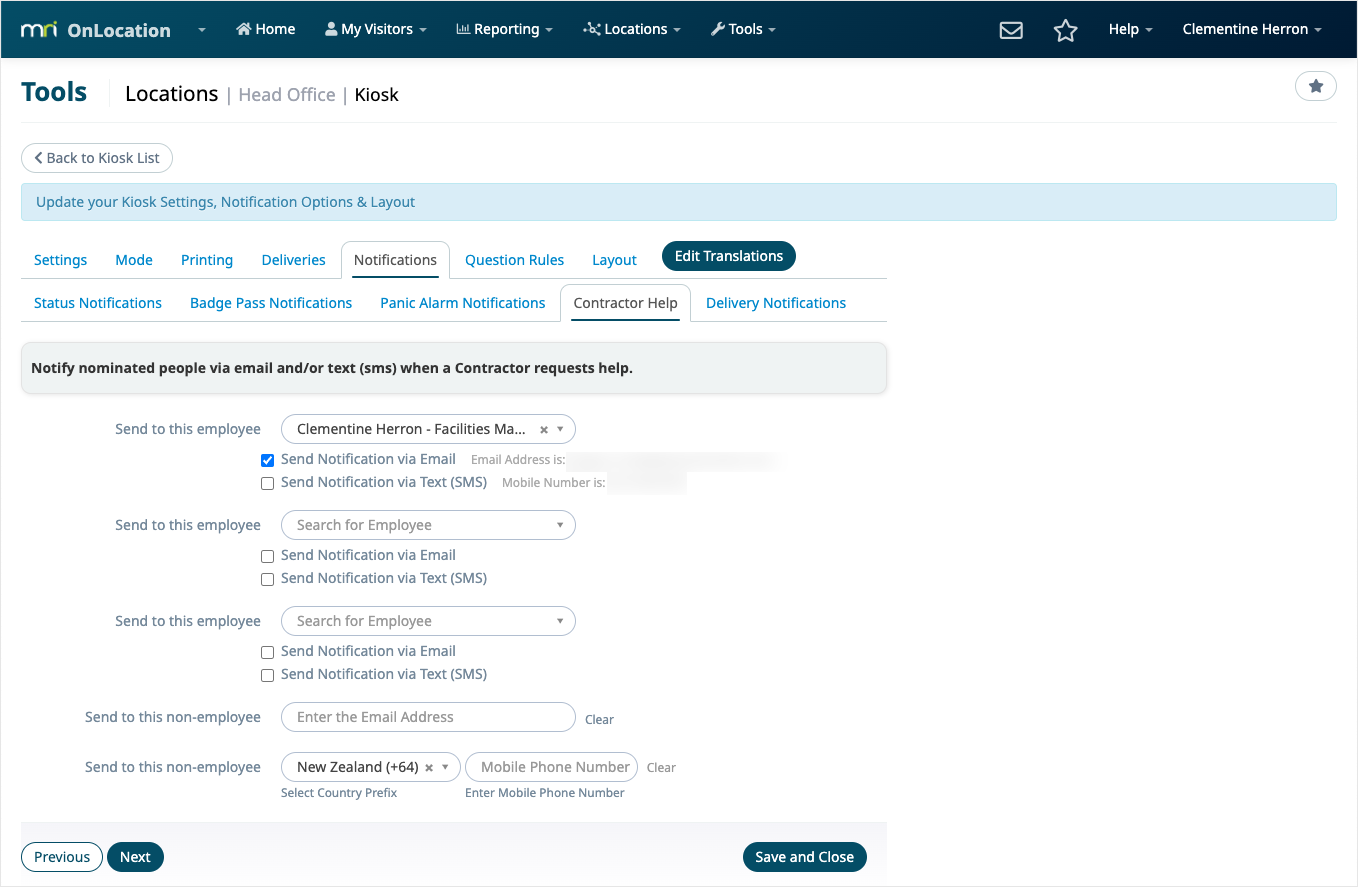
Contractor Help
You can send notifications by email and/or text to up to three employees and one non-employee.
Set the employees under the Send to this employee fields, and the non-employee under the Send to this non-employee field.
For each recipient, you can select Send Notification via Email and/or Send Notification via Text (SMS), and you will see the recipient’s email and/or cell phone number appear next to each option.
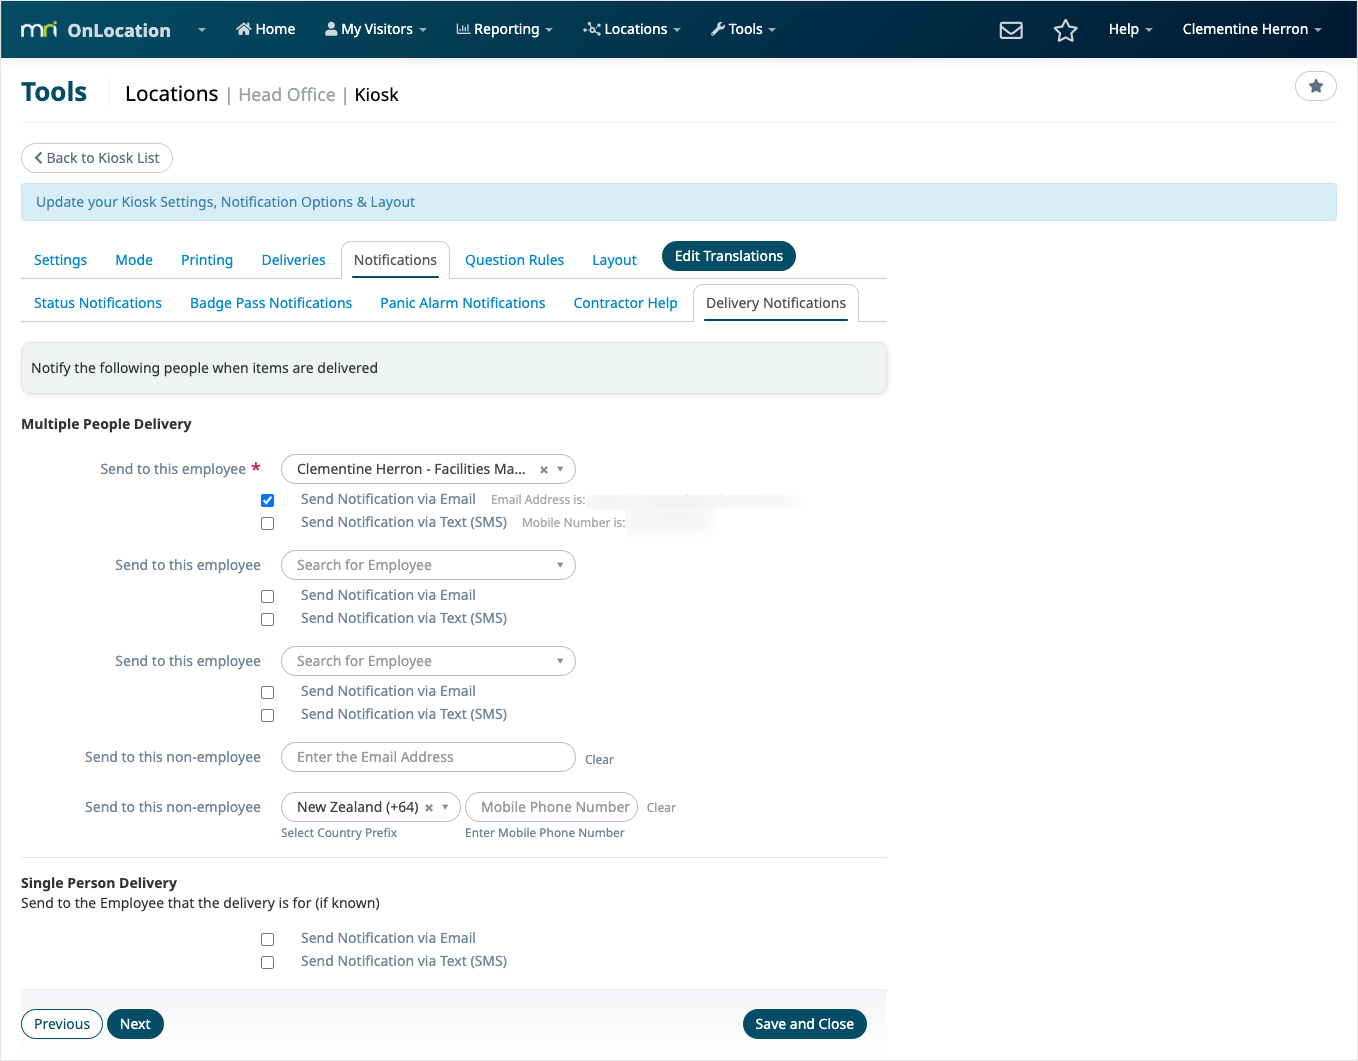
Delivery notifications
There are two types of notification recipient settings: Multiple People Delivery and Single Person Delivery.
Multiple people delivery
A delivery agent will select this option if the delivery is for more than one person, e.g. the marketing department, the company, or if the person is unknown.
People set up to receive these notifications will also receive a notification for Single Person Deliveries. This acts as a failsafe in case the selected person does not have the necessary details (email address or mobile number) in OnLocation to receive a notification. The two notifications received will be notably different to avoid any confusion.
You can choose up to three employees and one non-employee to receive these notifications, and you must set up at least one recipient.
To choose an employee to receive this notification, click on the Search for Employee bar, begin typing the employee's name, and select them from the dropdown menu. Then, select how you want this employee to be notified (Email and/or Text) by ticking the box next to the option.
To set up a non-employee, simply add their email address and/or mobile number into the Send to this non-employee fields.
Single person delivery
A delivery agent will select this option if their delivery is for one person who is an employee in the system.
Simply choose the notification types (Email and/or Text) you want the recipient to receive by ticking the box next to the option. As long as the recipient has the necessary information (email address or mobile number) entered into OnLocation they will receive a notification and, as a failsafe, the Multiple People Recipients will also receive a notification about the delivery.
Information captured from additional fields will be included in the deliveries reports.