How it works
The identity management add-on gives you the ability to add a token to a contractor profile.
Access tokens can be any barcode, QR code, or RFID string that is unique to a person. This could range from a company-issued ID/access card, driver’s license, or loyalty card. Once the token has been added to the contractor’s profile, it is their unique identifier.
When the token is scanned at the kiosk, the following process happens:
- The token number is entered as a string
- The kiosk searches your MRI OnLocation account for the string in the tokens set up
- It finds the associated profile
- The sign in/out process starts
If your kiosk is not set up to ask questions or acknowledgment notices, they are signed in/out automatically. If you use either of these, they need to be read and acknowledged on the kiosk before sign in/out is completed.
Enable the add-on
Turn on the identity management add-on, then choose the print request locations.
- Go to Tools > Account.
- Select Add-on Management from the left-hand menu.
- Set Identity Management to Yes.
- Click Save.
- From the add-on page, click Settings next to Identity Management.
- Switch the enable option to On.
- Select a print location, then click Add.
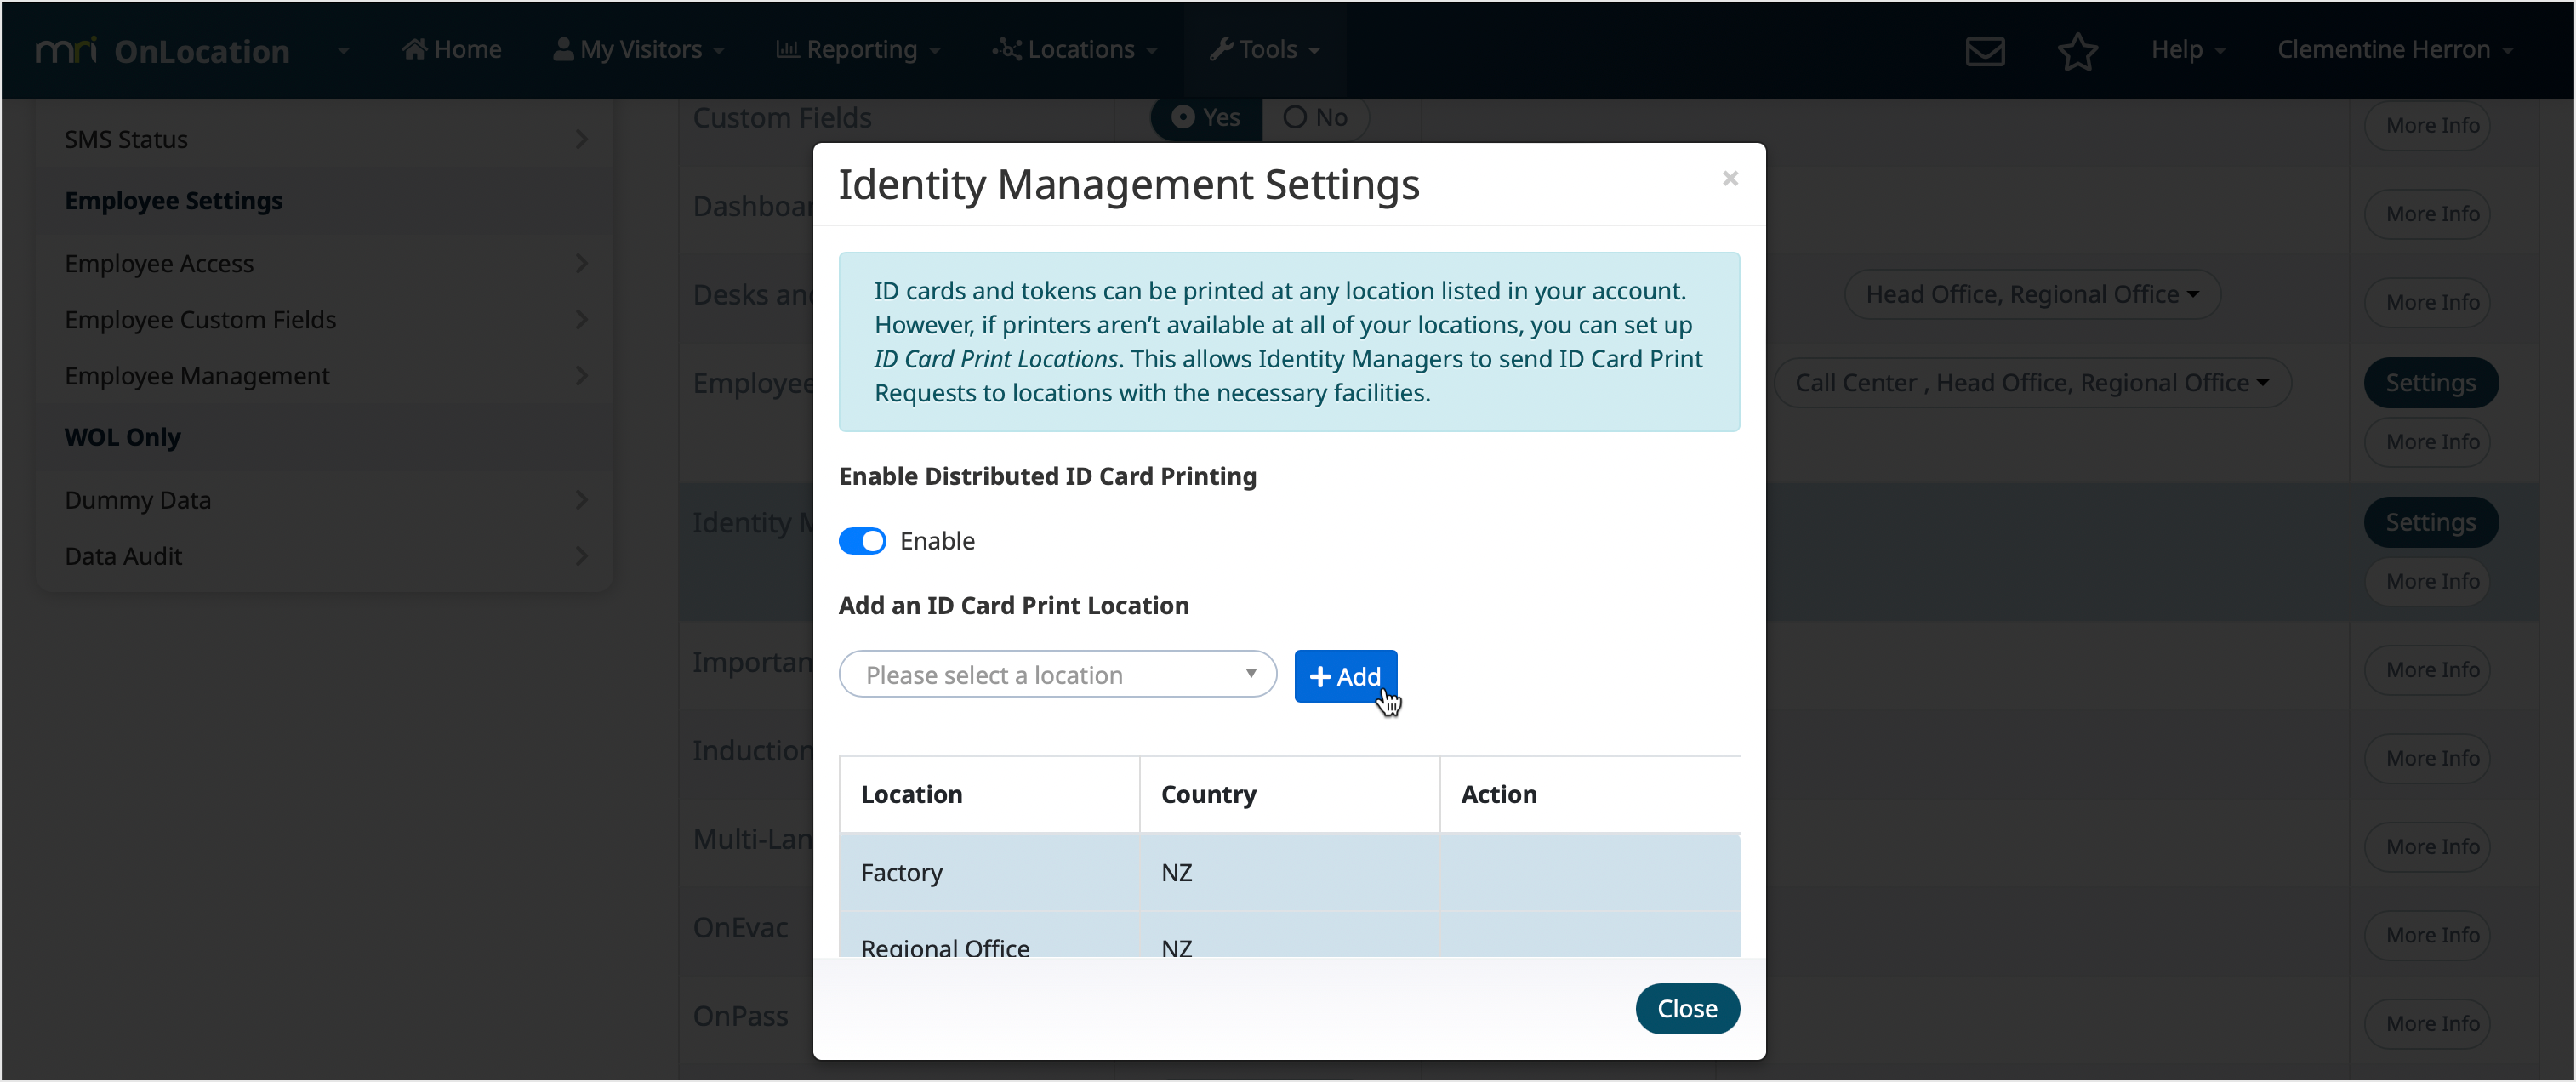
- Repeat for each print location as required.
- Click Close, then click Save.
Assign the user roles
There are two types of user roles you can assign for identity management:
- Identity Manager – can manage token types, add tokens to profiles, manage ID card templates, and print their own ID cards.
- Location Print Manager – can receive and manage ID card print requests only.
You can assign one or both roles to employees and they can be limited to a specific location(s) if required.
A print location is a location that can manage the printing of ID cards. Identity Managers can add and remove print locations from the Identity Management screen.
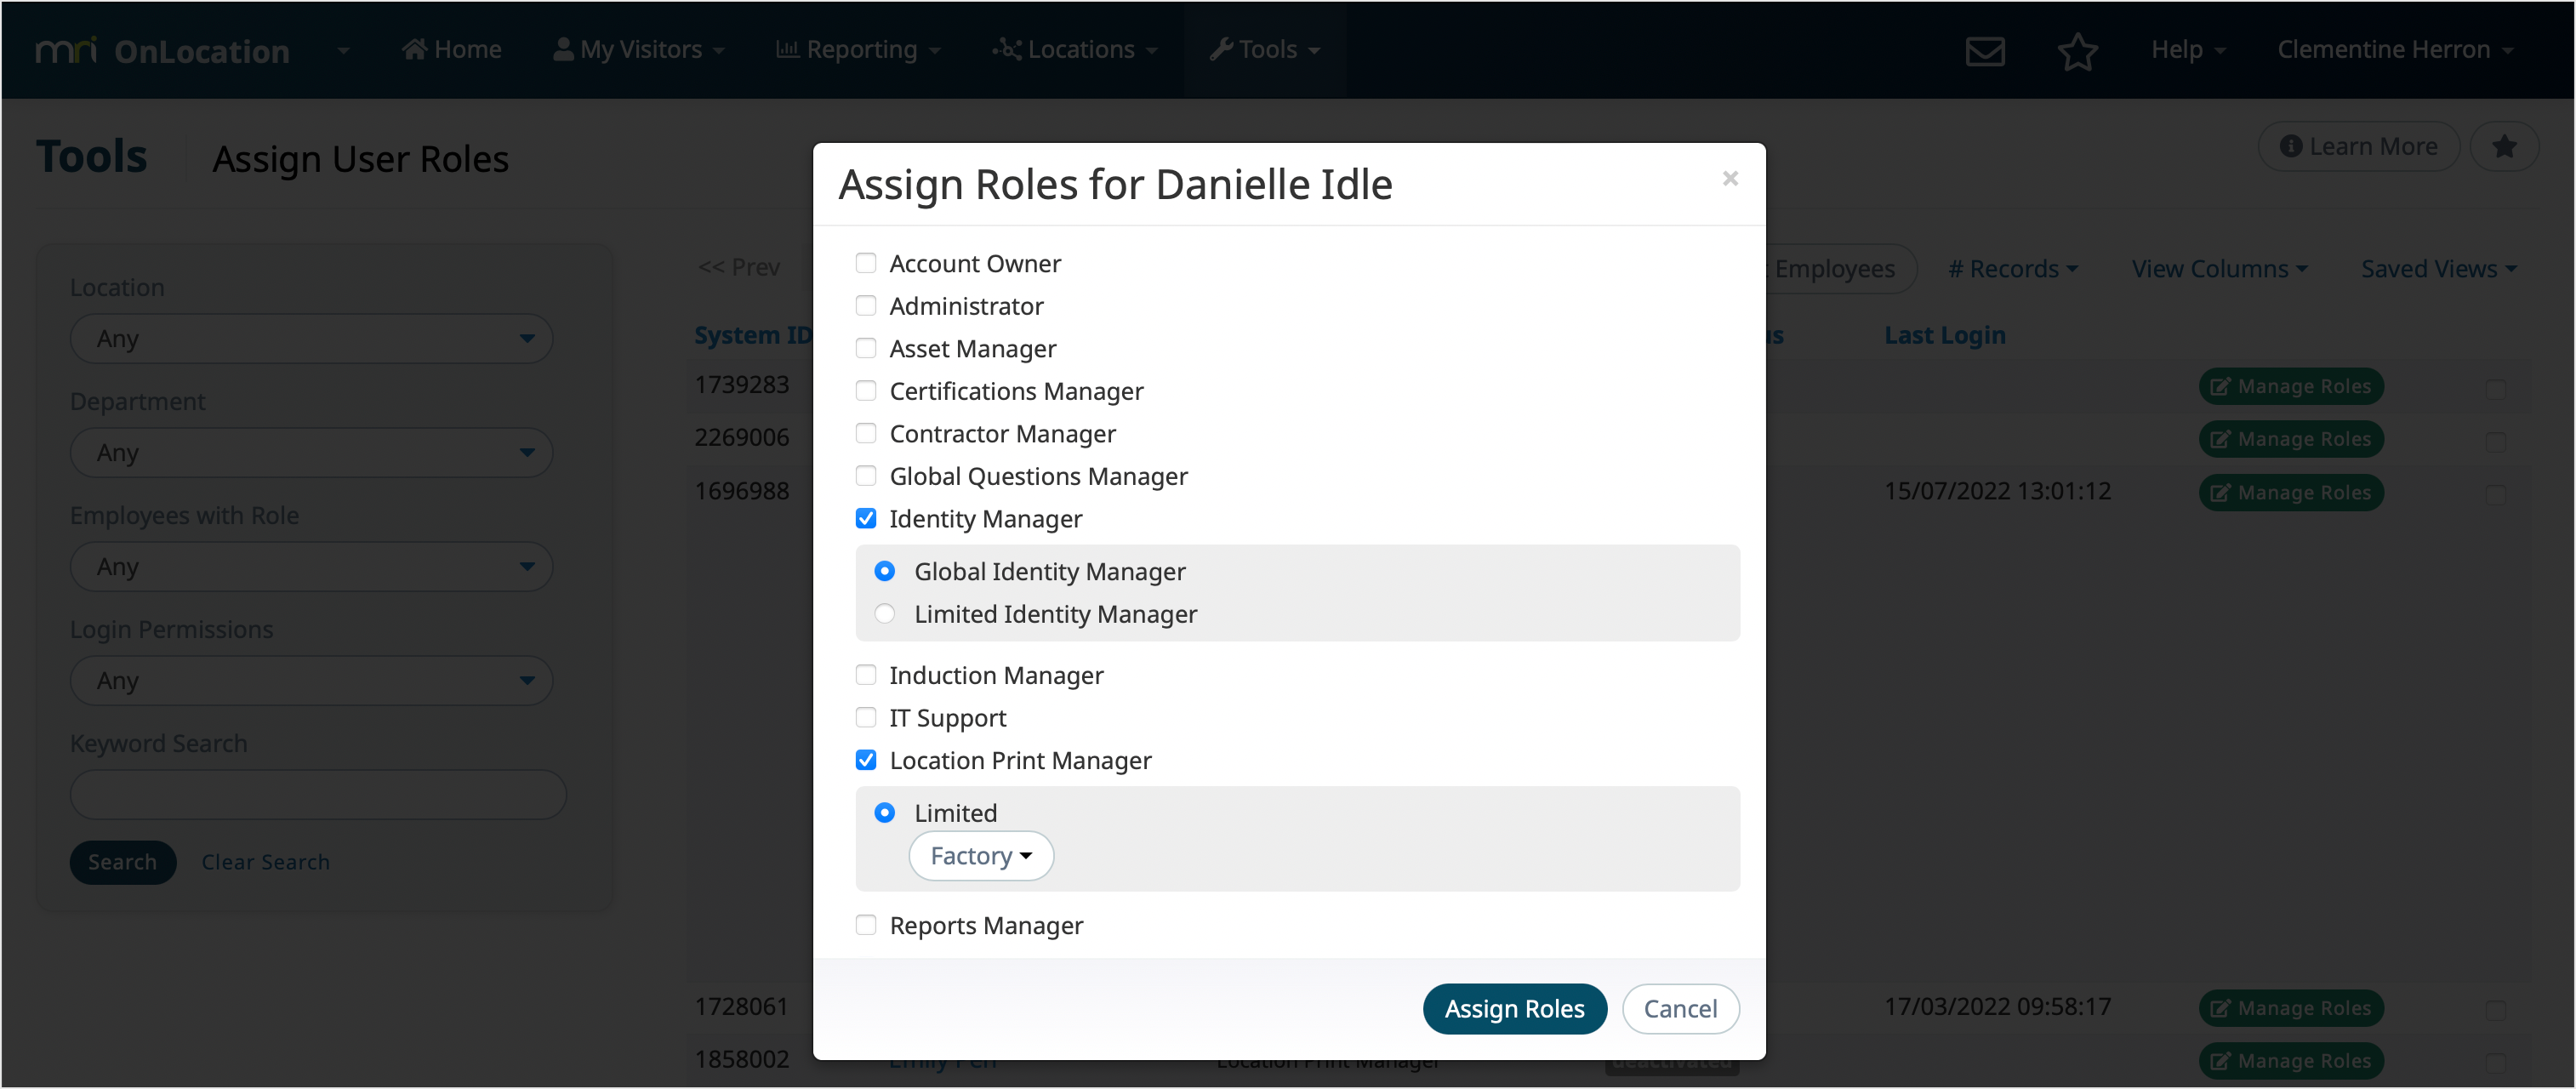
To assign a user role:
- Go to Tools > User Roles.
- Search for an employee using the filters and/or keyword search.
- Click Manage Roles next to their name.
- Select the checkbox next to Identity Manager.
- Select either Global or Limited and which locations they will be an Identity Manager for.
- (Optional) Select the checkbox next to Location Print Manager and select locations. This will only be available if print requests have been enabled in the add-on.
- Click Assign Roles.