How it works
Triggers are used to automate actions based on sign in/out activity in MRI OnLocation. There are many different triggers available, including sending notifications, displaying messages on a kiosk, denying access based on answers to custom questions, and more. Your account must have the triggers add-on enabled to set up a trigger.
There are four occupancy event triggers available:
- Zone occupancy decreases
- Zone occupancy increases
- Location occupancy decreases
- Location occupancy increases
You can also set up deny access triggers, based on the total number of people on site.
To set up an occupancy trigger, you need to configure the following details:
- Choose the event – select when you'd like to activate the trigger.
- Set up the rule – choose the parameters for activating the trigger.
- Set up the notification – select who in your organization needs to be notified and what the contents of the message should be.
Setting occupancy limits
The occupancy triggers are based on the two occupancy limits in OnLocation:
- Location maximum occupancy - The total number of people that are allowed on-site at this location at any one time.
- Zone maximum occupancy - If you have the Desks and Spaces add-on enabled, you can set the maximum occupancy for each zone.
When someone signs into a location or zone, you can use triggers to monitor the occupancy levels.
Calculating occupancy changes
Occupancy triggers use formulas to calculate when a zone or location increases or decreases. The following variables can be used while setting up the rule:
- maxo - the maximum occupancy this location can have
- max_zo - the maximum occupancy this zone can have
Rule examples using a variable:
- maxo_zo: equals the maximum occupancy this zone can have
- max_zo - 5: the maximum zone occupancy minus 5
- max_zo + 5: the maximum zone occupancy plus 5
Example: Set up a trigger to get notified when a zone is almost full
Before you start, make sure you've added the maximum occupancy for the zone.
To set up a trigger:
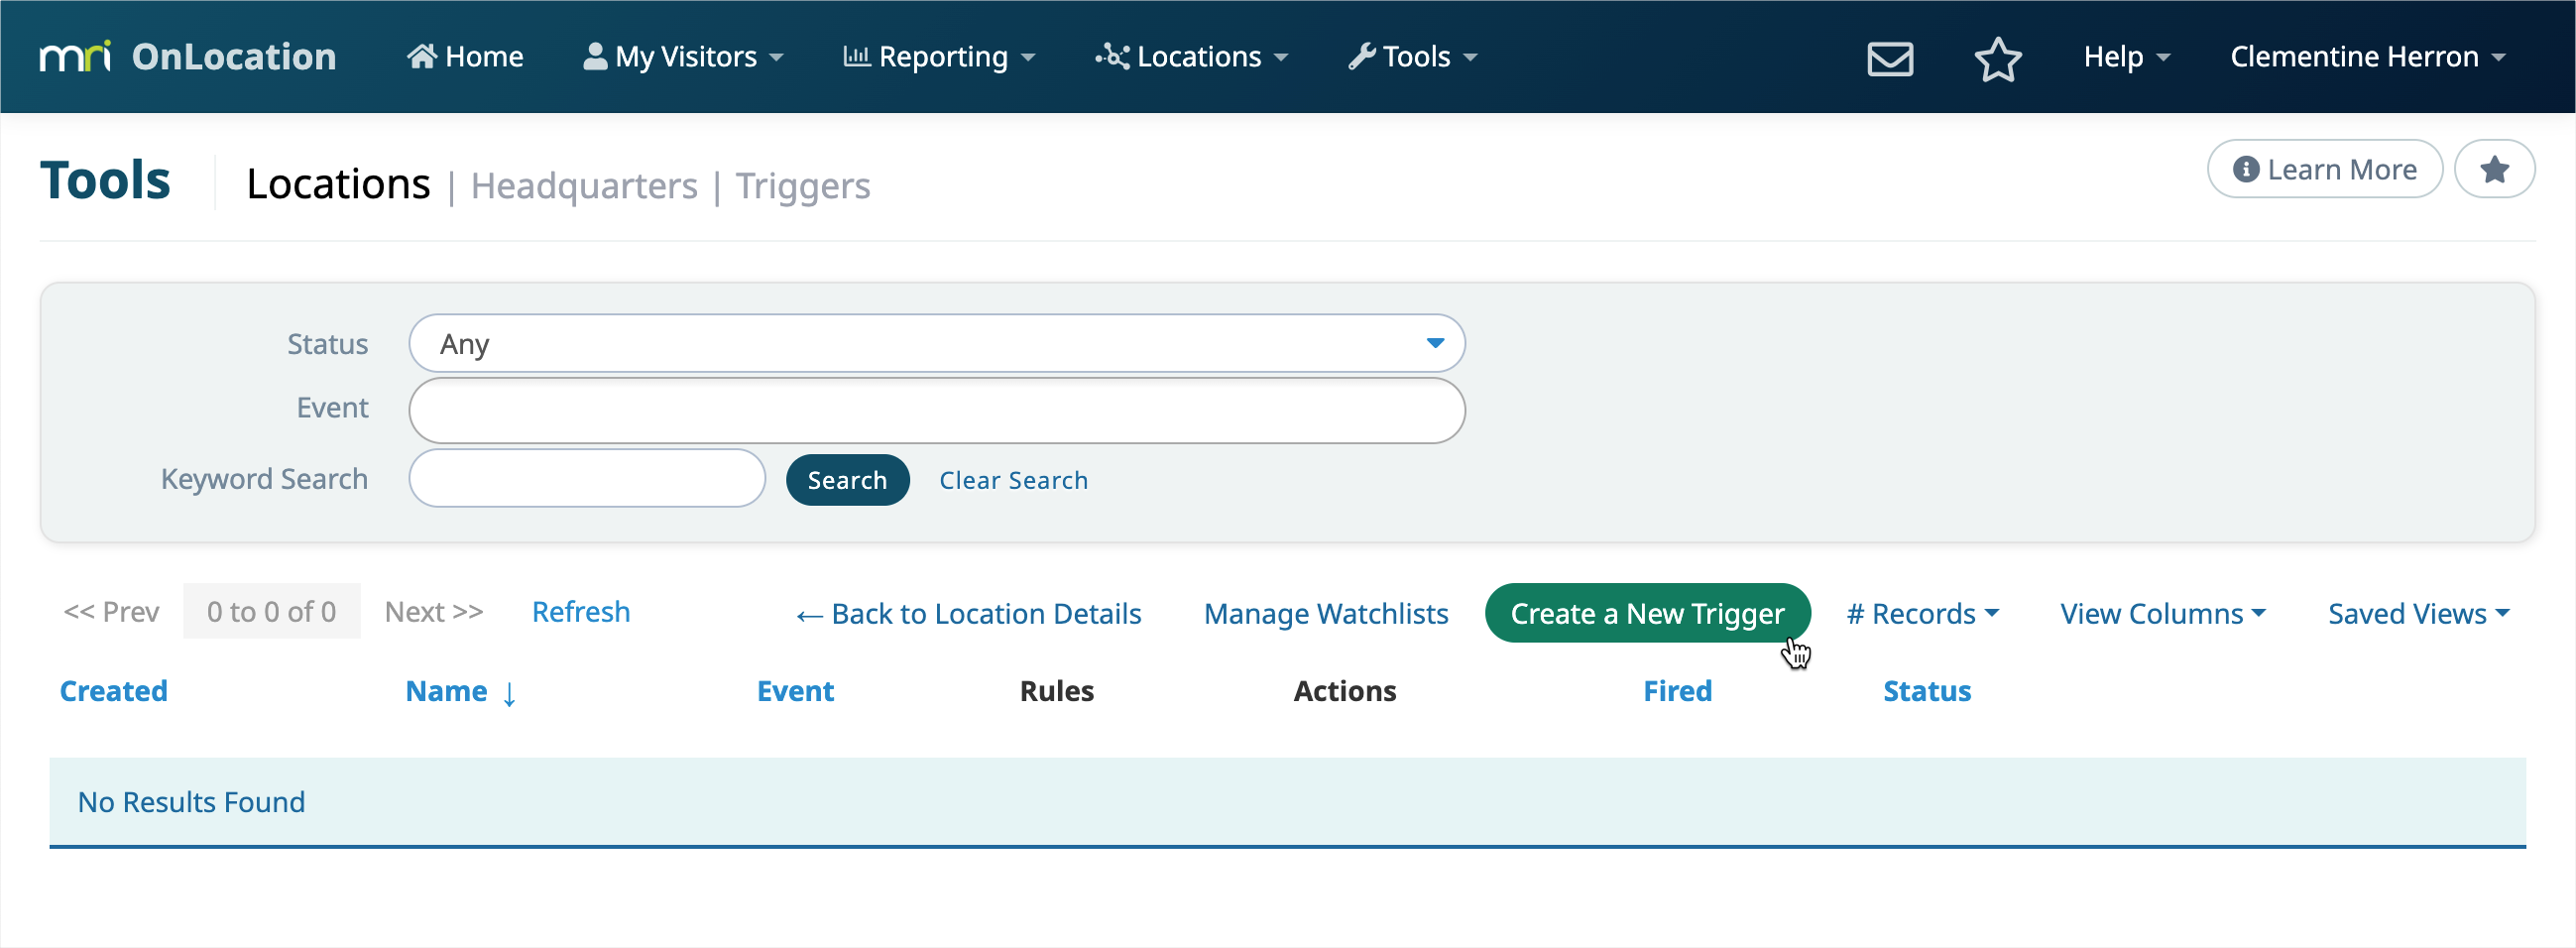
- Go to Locations, then select the location from the drop-down list.
- Select Triggers.
- Click Create a New Trigger.

Trigger Details tab
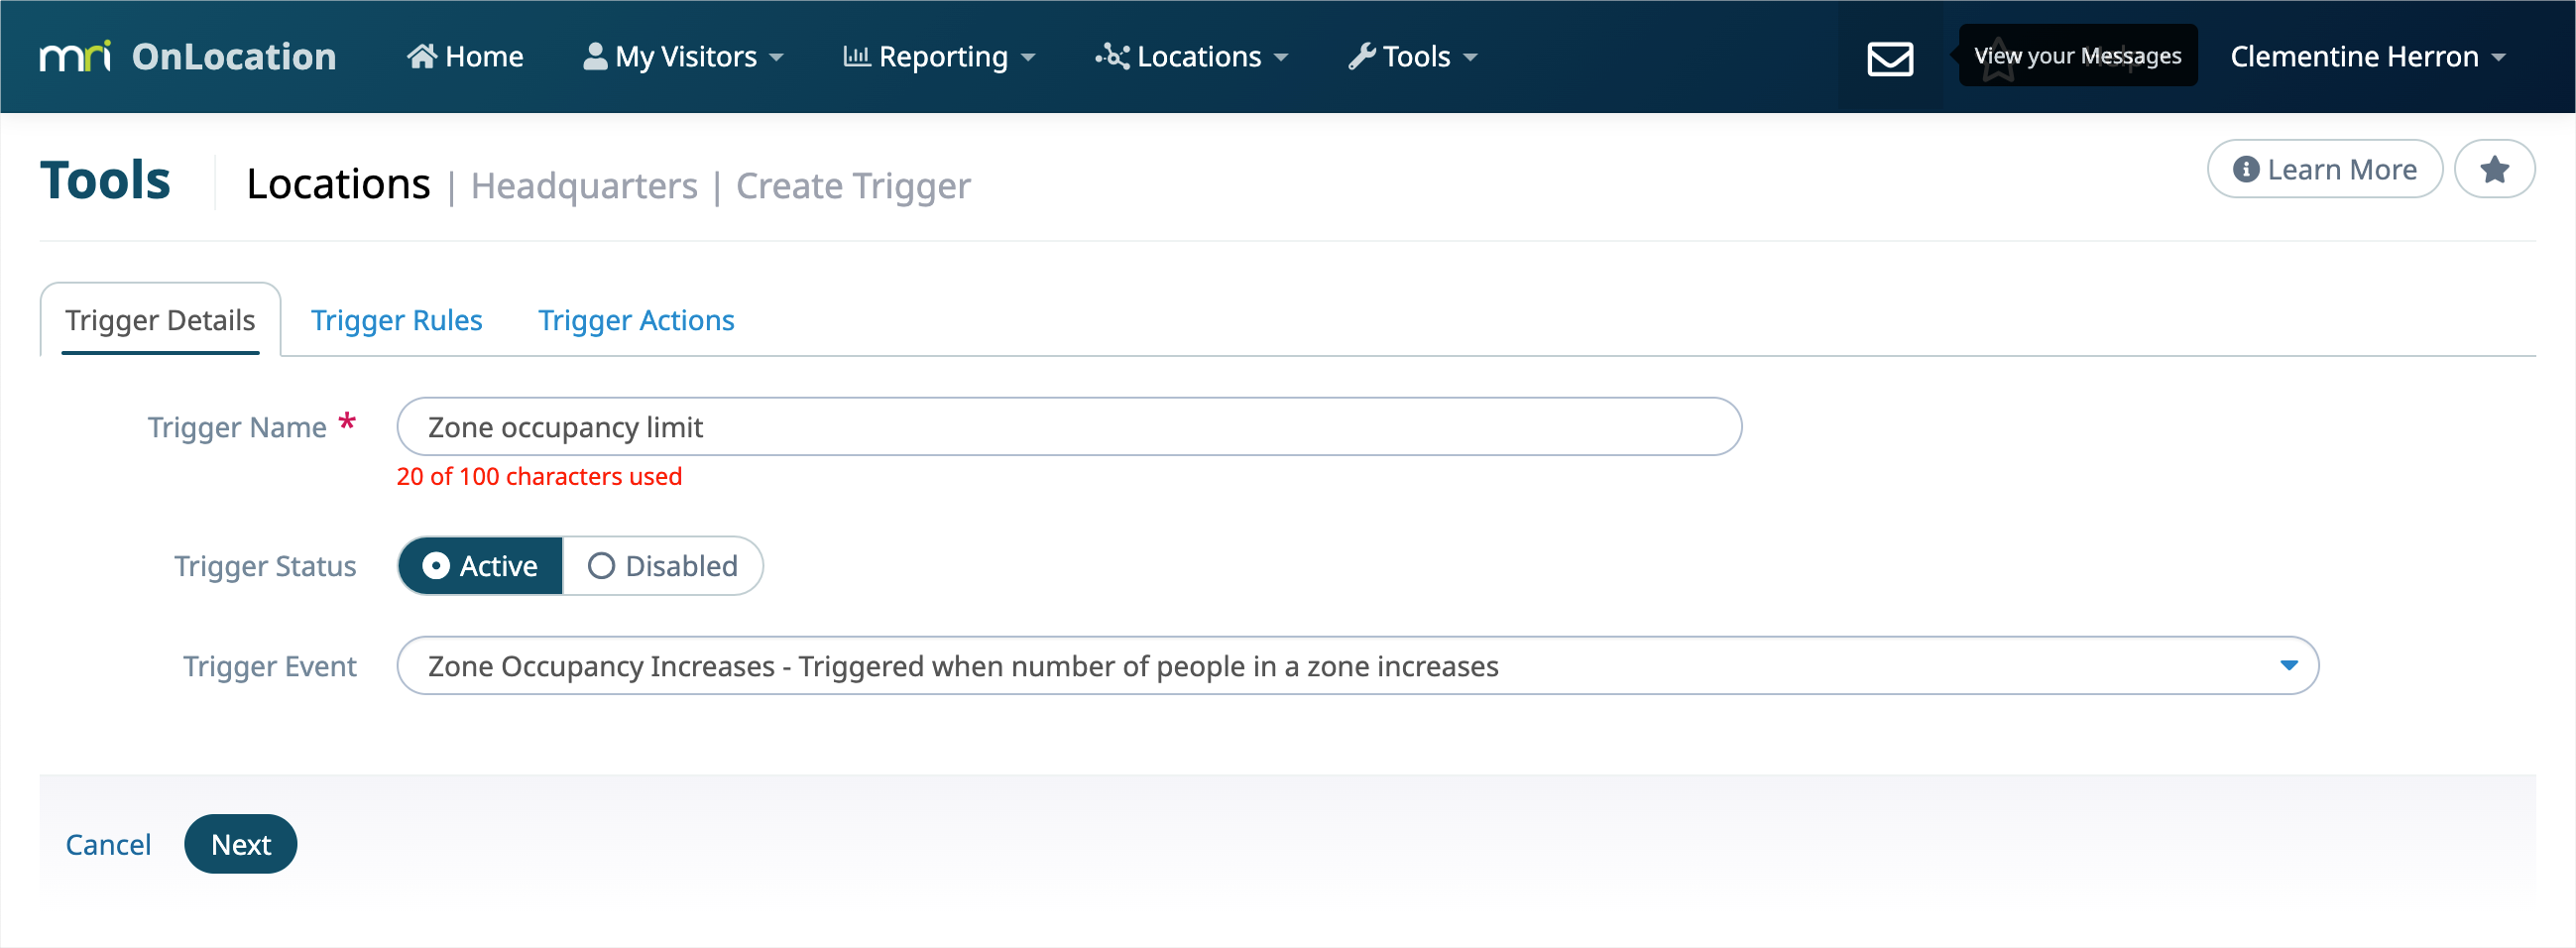
- Enter the trigger name.
- Select Active next to the Trigger Status.
- Under Trigger Event, select Zone Occupancy Increases.
- Click Next.

Trigger Rules tab
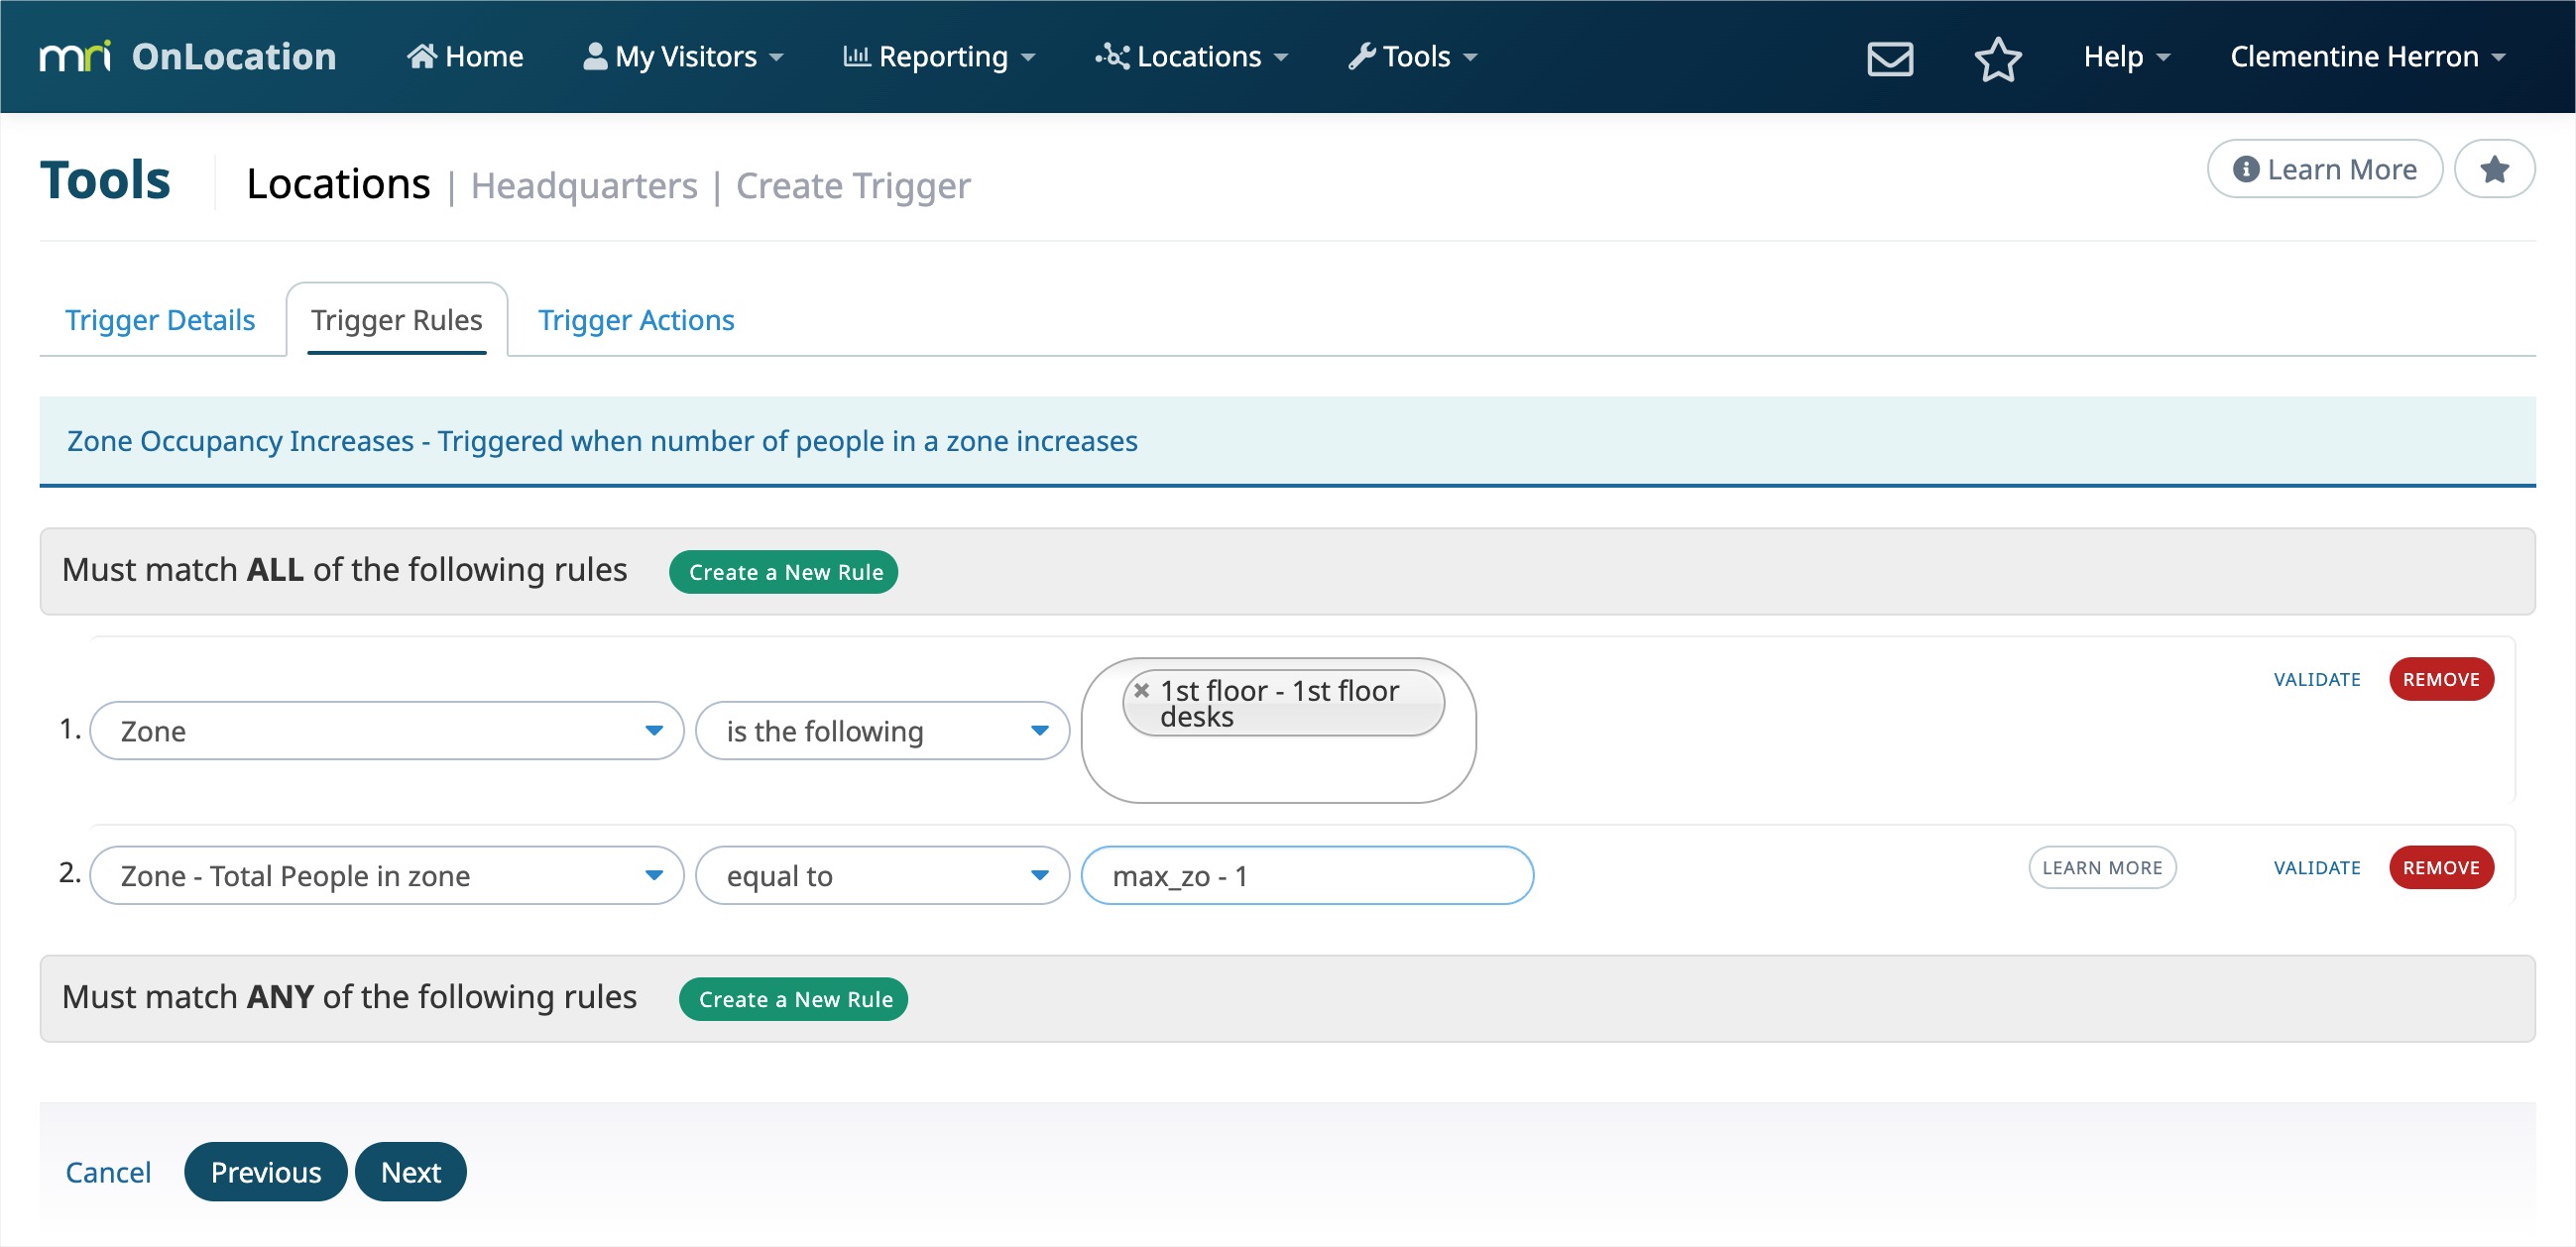
- Next to Must match all of the following rules, click Create a New Rule.
- Select the Zone rule.
- Select is the following as the rule condition.
- Select the relevant zone.
- Next to Must match all of the following rules, click Create a New Rule.
- Select the Zone - Total People in zone rule.
- Select equal to as the rule condition.
- Enter max_zo - 1. The trigger will fire when the zone is 1 person under the maximum occupancy.
- Click Next.

Trigger Actions tab
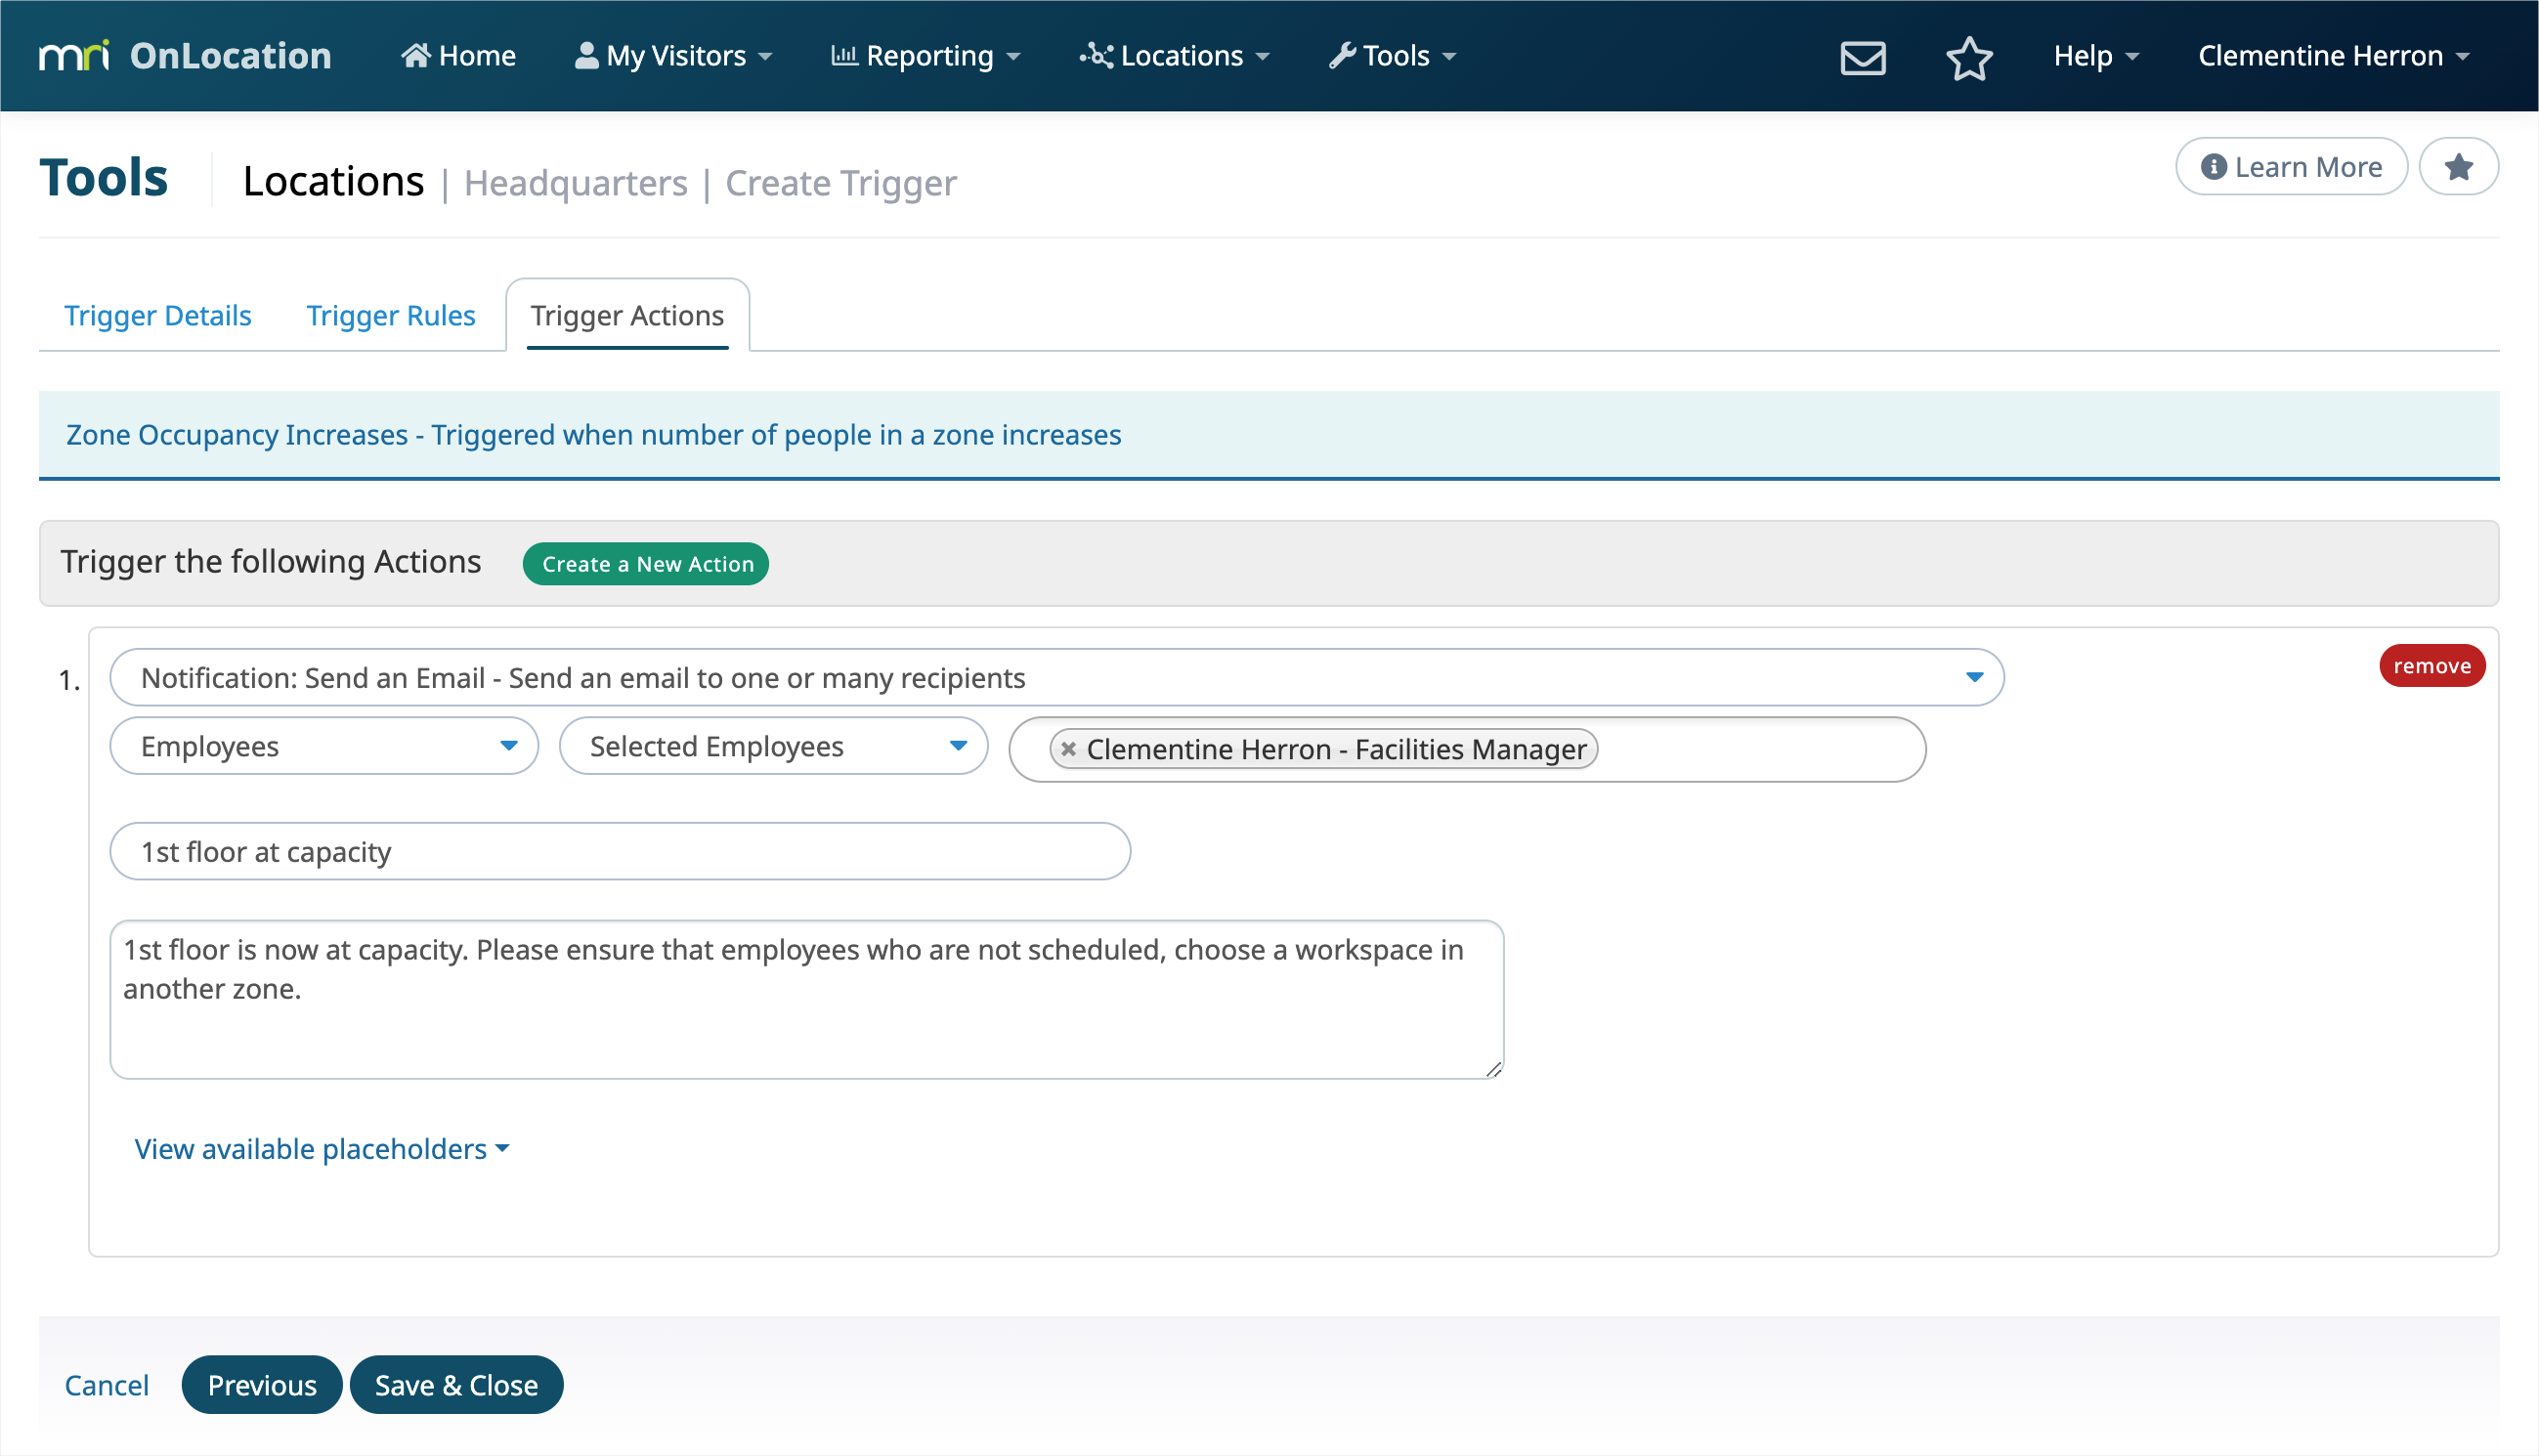
- Click Create a New Action.
- Select Notification: Send an Email as the action.
- Select Employees as the recipient type.
- Select Selected Employees as the recipient, then choose the employee.
- Enter the relevant email subject and message.
- Click Save & Close.

When the zone is one person away from capacity, the selected employee will receive a notification.