Learn how to install your PDC Certis B4-30 printer onto your Windows PC or kiosk.
Before you start
First, install the PDC Certis B4-30 printer onto a Windows PC or kiosk following the install guide that comes with your printer. Check the pdc IDenticard website if you need help with installation.
Second, set up your badge pass template in MRI OnLocation. There are three compatible label options for the PDC Certis B4-30 printer:
- Dymo 101 x 54 mm
- Dymo 70 x 54 mm
- Tempbadge BP4 71 x 49 mm
Update your printer settings
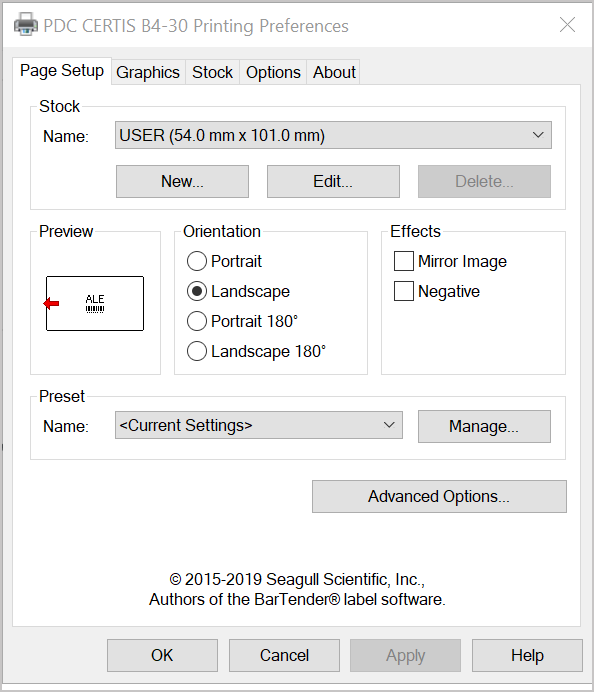
Set the PDC Certis B4 printer preferences to match your badge pass template:
- On the receptionist’s PC or kiosk, go to the Control Panel.
- Click View devices and printers.
- Right-click on the PDC Certis B4-30 printer, then select Printing Preferences.
- Select USER as the Name, then click Edit.
- Enter the label size you’ve chosen for your badge pass template, then click OK.
- Click Apply, then click OK.

Update browser printing settings
To complete the setup of your printer, update your web browser's printing settings. This will ensure that your badge passes print correctly.
In your preferred browser, add the relevant scale and custom margins in the print settings.
Scale
| Label | Scale |
| Dymo 101 x 54 mm | 115% |
| Dymo 70 x 54 mm | 100% |
| Tempbadge BP4 71 x 49 mm | 100% |
Custom margins
| Side | Millimeters | Inches |
| Left | 5 | 0.19 |
| Right | 2.5 | 0.1 |
| Top | 2.5 | 0.1 |
| Bottom | 2.5 | 0.1 |
Print a test badge pass
Test that the print settings are configured correctly by printing a sample badge pass:
- Go to Locations, then select the location from the drop-down list.
- Select Badge Passes.
- Click View next to the badge pass
- Click Test Print Label.
- Check the label preview. If it is not displaying correctly, update the advanced printing settings, or check the template settings.
- When the label preview looks correct, click Print.