How it works
A geofence is a virtual perimeter for a geographic area. By creating a geofence around a location, OnLocation Mobile can detect where that location is and automatically sign users in or out when they enter and exit the location. Everything inside the geofence is considered on-site. Users will be signed in when they cross the geofence boundary and signed out when they cross back outside of the geofence.
Automatic sign in/out relies on GPS, WIFI, and cellular location tracking to identify a user’s proximity to the location’s geofence. Due to technical and hardware limitations, there can be a delay in signing users in or out of a location. If your organization requires that sign in/out records are updated immediately, another sign in/out option like manual sign in/out with OnLocation Mobile, sign in/out kiosk, or Brivo access control may be a better solution for your organization.
Geofence types
There are two types of geofence available: circle or custom shaped. You may need to configure multiple geofences if you have a large location.
Circle geofence
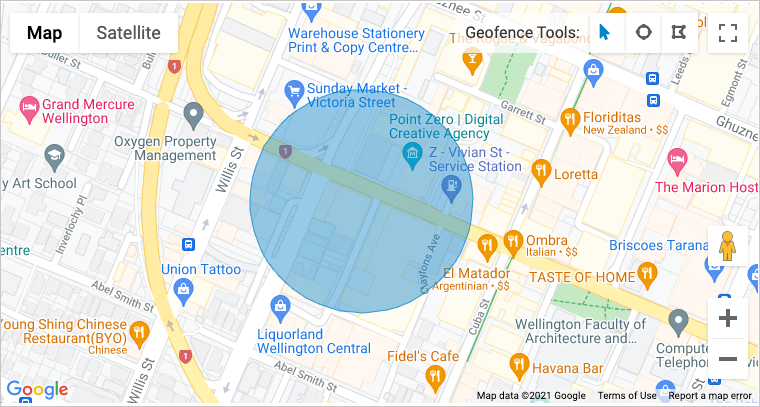
Once you enable auto sign in, you’ll have a circle geofence by default. The center of the geofence is the address you’ve entered in your location details using Google address verifier.
It must have a minimum radius of 100m (110 yds). As the geofence may be wider than your actual location, you can use Bluetooth beacons to delay the automatic sign in until the user is physically on-site.
Custom shaped geofence
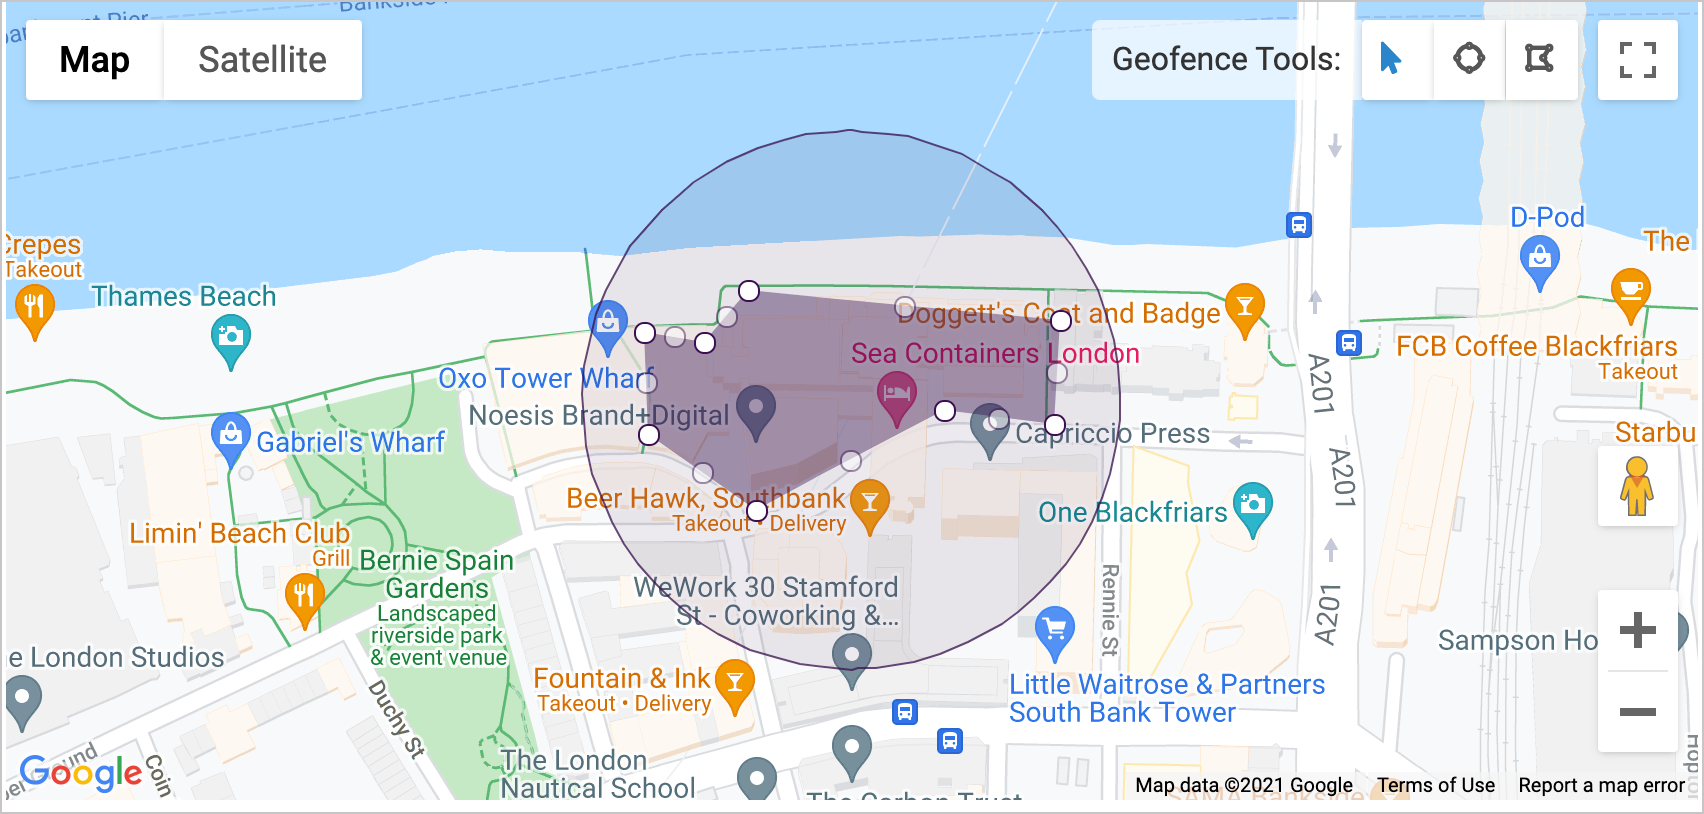
A custom-shaped geofence must be made up of at least three sides that all join up. You can draw any shape that fits the physical specifications of your location.
Each custom-shaped geofence has a circular boundary around it, with a radius of at least 100m. The boundary detects the user’s proximity to the geofence and can't be edited. When the user enters the circular boundary, their phone will start checking their location. Once they cross the geofence, they will be signed in. Later, when they travel out of the circular boundary, they will be signed out.
There is flexibility around the size of your custom geofence. However, the larger the custom-shaped geofence, the more battery power it will use. If your location covers a large area, multiple, smaller geofences may be a better option for your users.
Multiple geofences
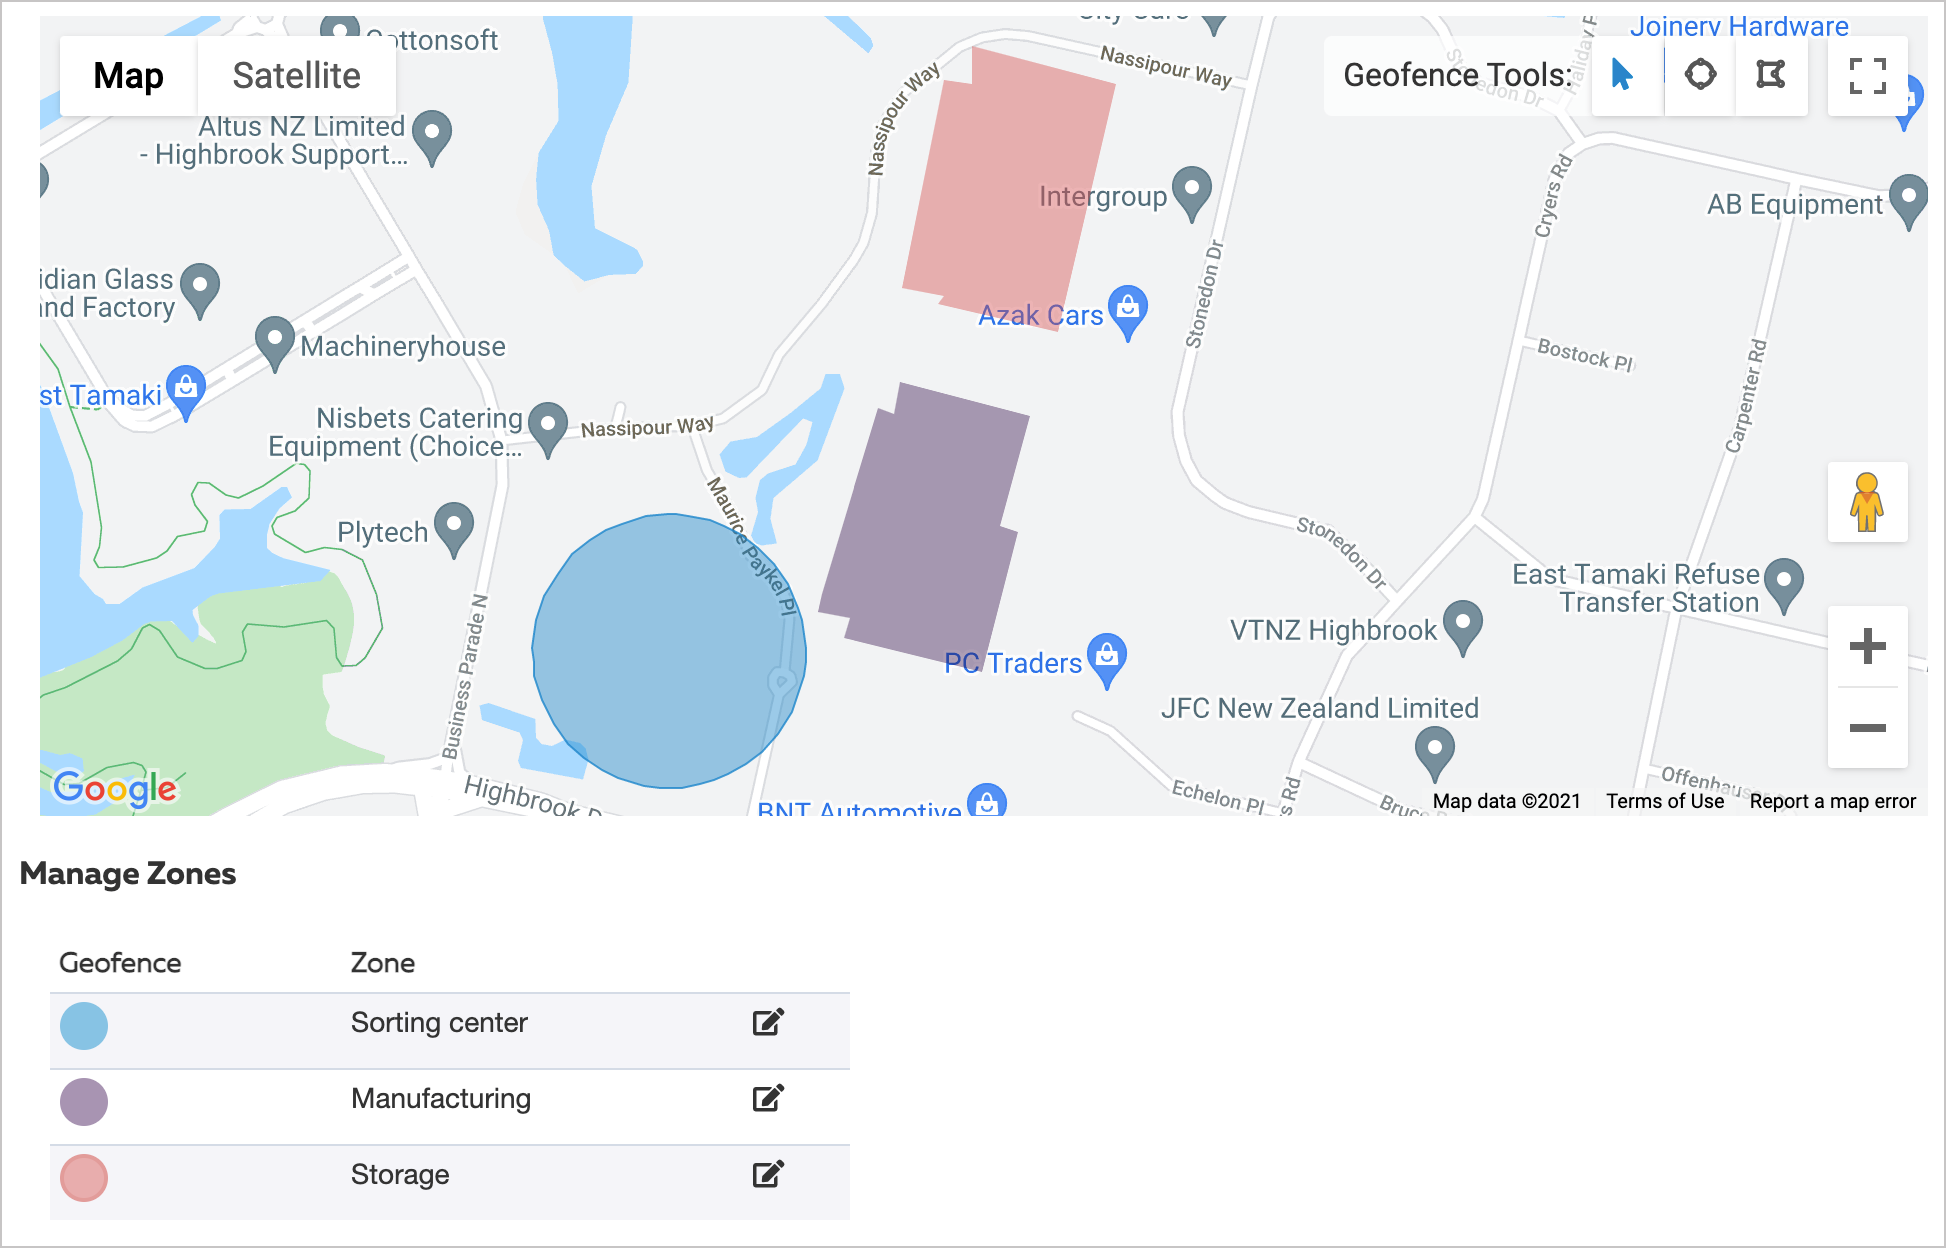
For large locations or campuses, add multiple geofences. Each geofence can be linked to a different zone so that you can record inter-zone movements. Your zones must be in separate buildings or areas so the geofences do not overlap.
Due to hardware limitations, you can only configure up to five geofences for OnLocation Mobile. You also can’t use Bluetooth beacons.
Before you start
Before you set up your geofence:
- Enable auto sign in/out in your OnLocation Mobile settings.
- (Optional) Add zones in your location settings
Set up a geofence
- Go to Locations, then select the location from the drop-down list.
- Select OnLocation Mobile.
- Select the Auto Sign-In/Out tab.
- If not enabled, select Yes next to Auto Sign In/Out.
- Either edit the default geofence or add a circle or custom-shaped geofence.
- Click Save.
Edit the default circle geofence
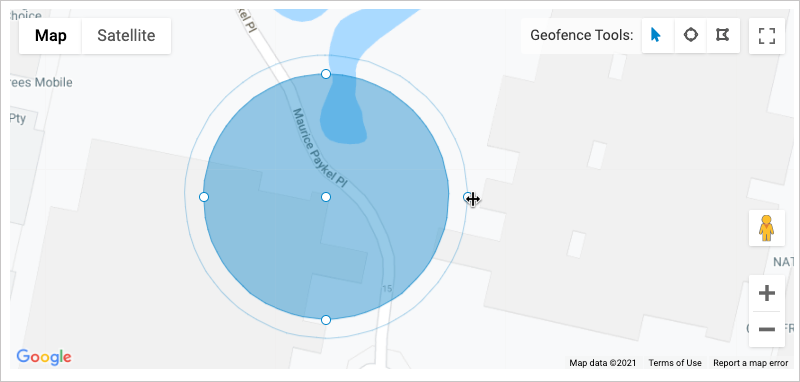
A circle-shaped geofence is created automatically. To edit the default geofence, click on the geofence:
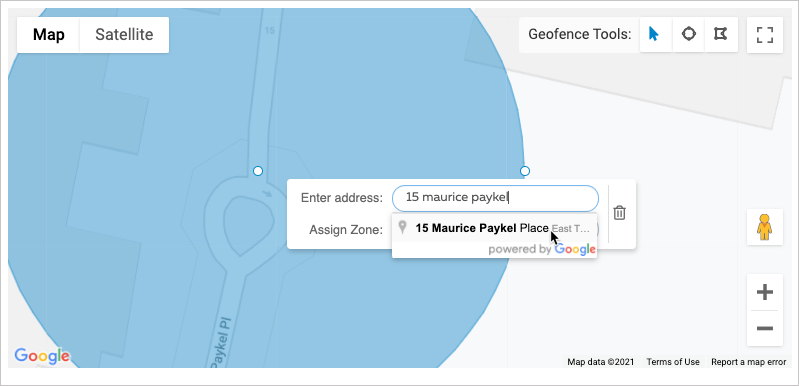
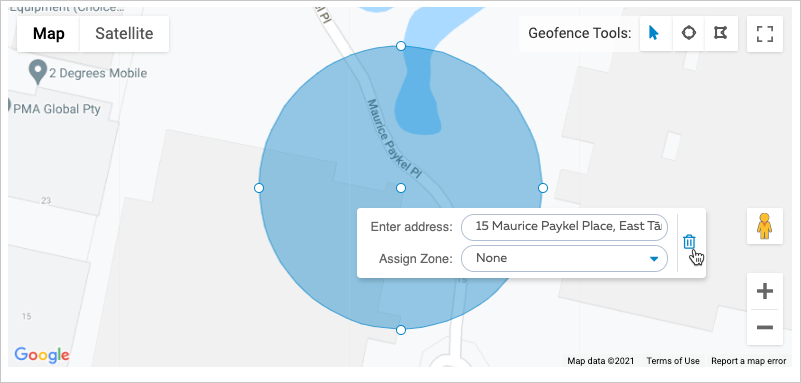
- To move the geofence – click on the center point, then drag it to the required location. Update the verified address by clicking on the geofence, then enter and select the address.
- To adjust the geofence size, drag the edge of the geofence inwards or outwards.
- To delete the default geofence – click on the geofence, then click the delete icon.
Add a circle geofence
To add a new circle geofence:
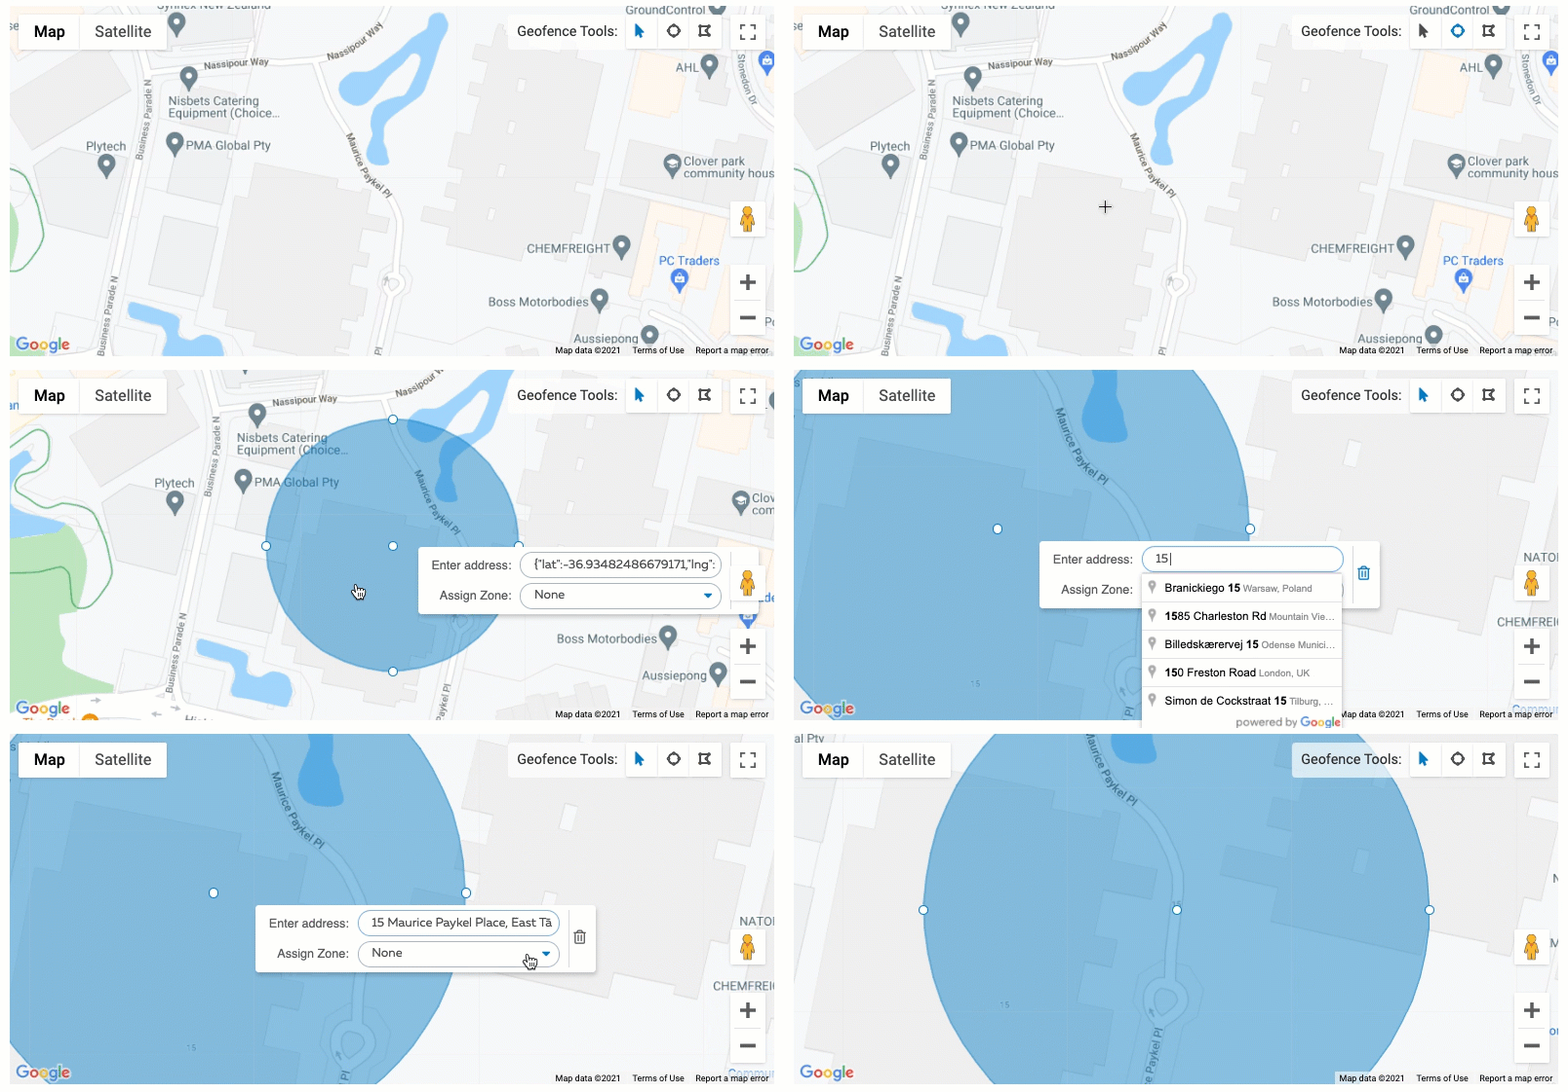
- Click the circle geofence icon on the top right corner of the map.
- Click on the map, then drag the circle to expand the diameter of the geofence.
- Click on the geofence, then enter the location address. Select the address from the Google address verifier.
- (Optional) Assign a zone to the geofence.
- Click Save.
Add a custom shape geofence
To add a custom-shaped geofence:
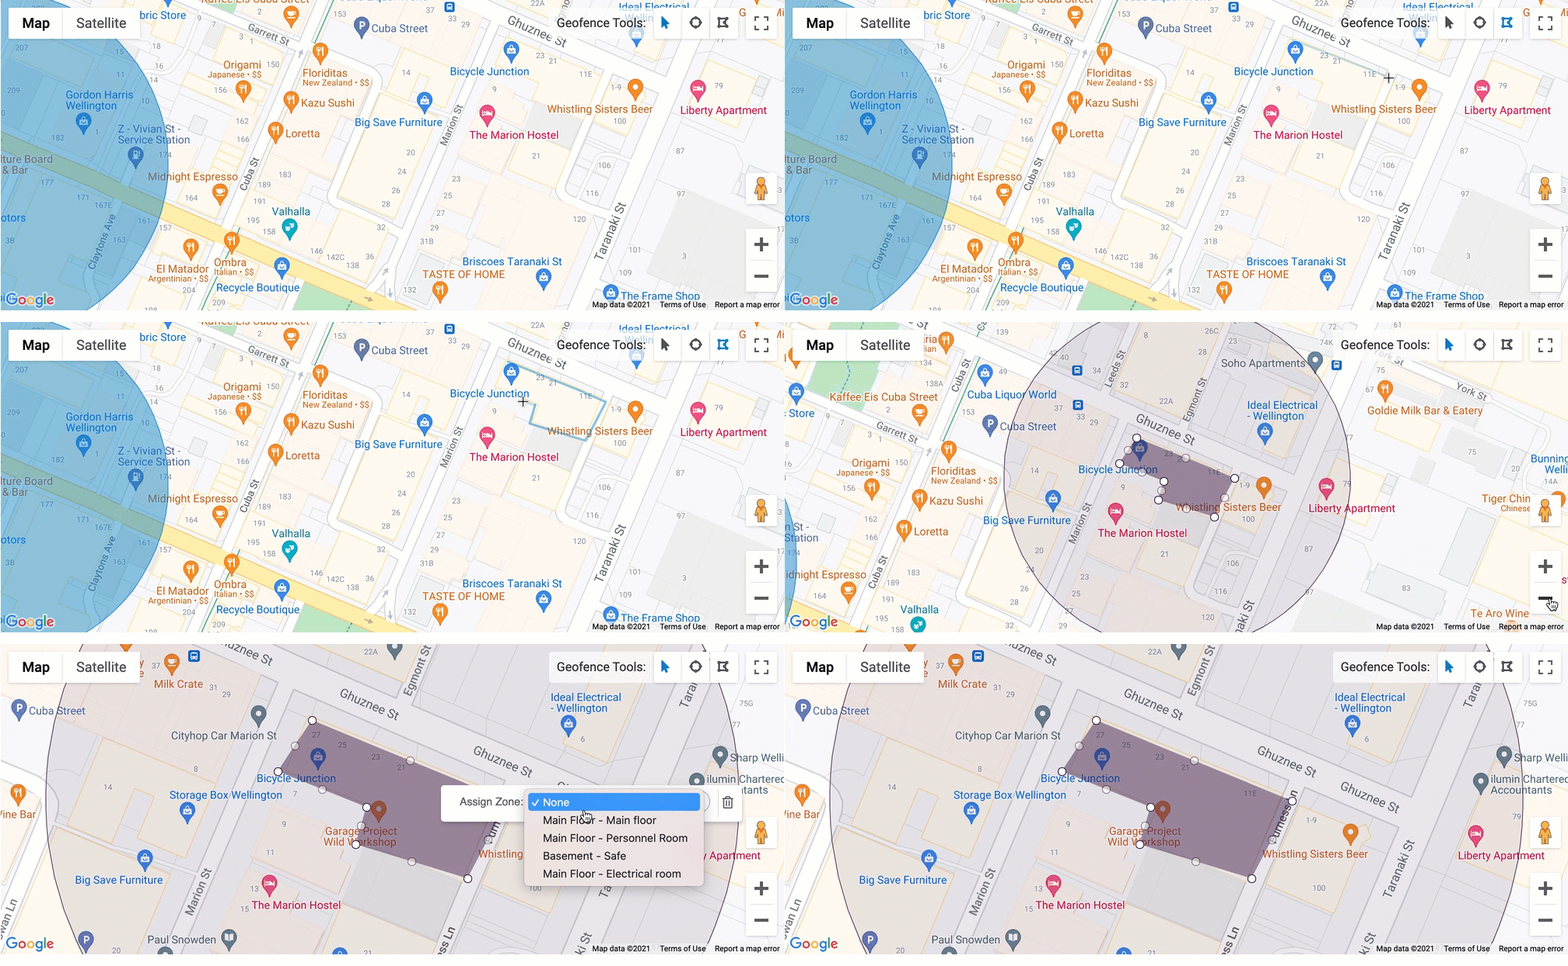
- Click the custom shape icon on the top right corner of the map.
- Click on the map to add your first point and draw your geofence. Drag the line, then click to add another point.
Repeat until you’ve drawn a shape that covers your location or zone and all sides join up. - (Optional) Click on the geofence, then assign a zone.
- (Optional) Repeat for each geofence you need.
- Click Save.
Delete a geofence
To delete a geofence, click on the geofence, then click the delete icon.

If you have auto sign enabled, you must have at least one geofenced configured. You won't be able to delete a geofence if it's the only one set up for the location.