Find out how to set up your SCORM Cloud account and upload your course in SCORM Cloud. You must complete these steps before you can enable the integration and add the induction course in MRI OnLocation.
How it works
To use the SCORM Cloud integration, you’ll need to complete the following:
- Sign up for a paid SCORM Cloud account. Make sure you have an account type that has enough monthly registrations for your organization. Each time a course is launched, this counts as one registration.
- Created an induction course in a separate authoring tool. SCORM Cloud is a hosting tool, you can only upload courses, you can’t create them.
- Your course must be in a ZIP file to upload it into SCORM Cloud. You also need to make sure it contains the imsmanifest.xml file which describes the course contents.
To get set up:
- Set up the connection with OnLocation
- Upload the induction course
- Configure the course launch settings
If you already have a SCORM Cloud account and have previously uploaded a course, skip this process and use your existing app ID and secret key to set up the integration with OnLocation.
Step 1: Set up the connection with OnLocation
- Sign up for a paid SCORM Cloud account, or log in using your existing account.
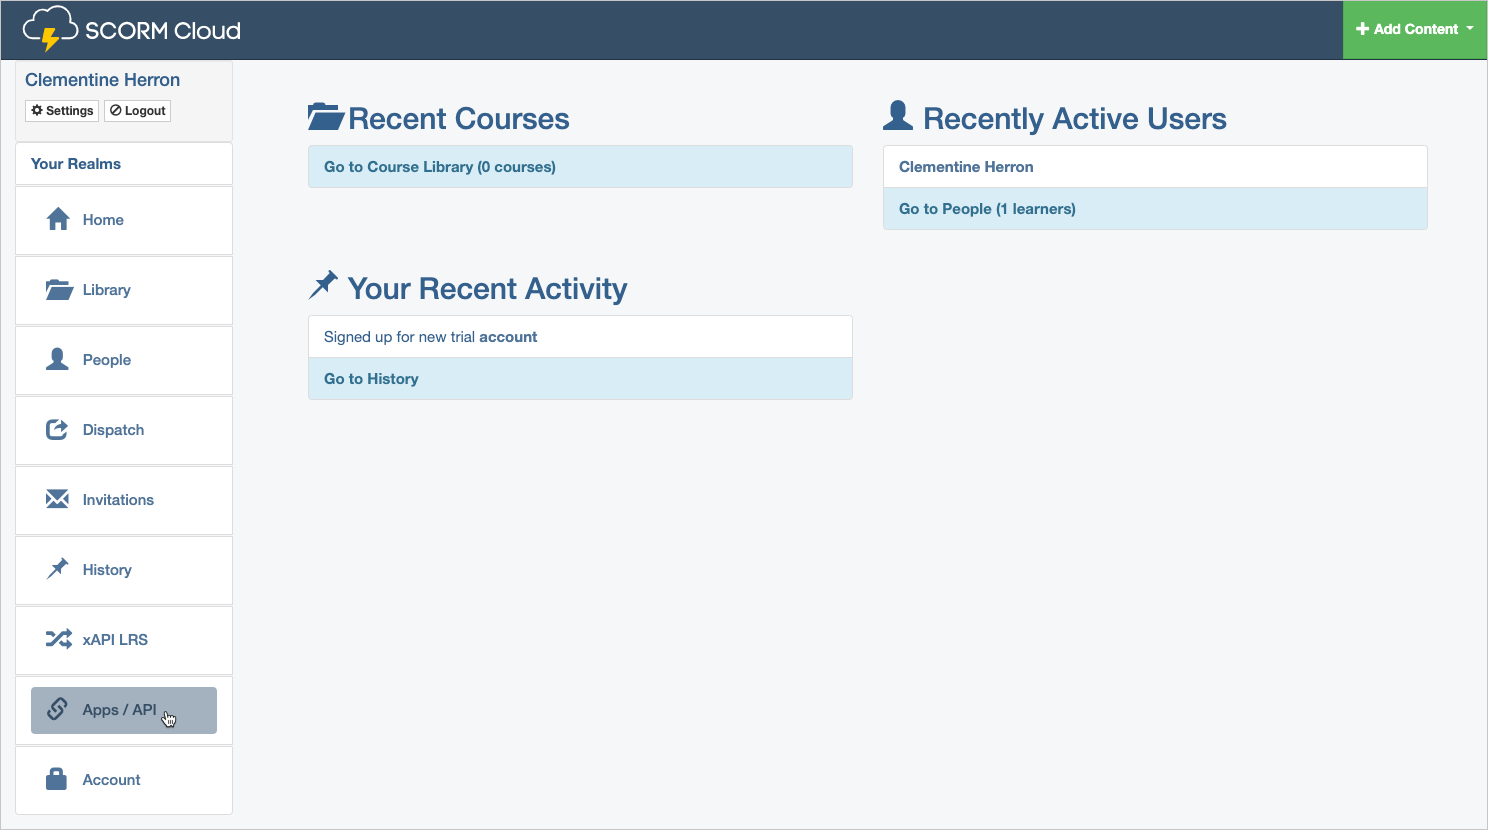
- Click Apps/API.
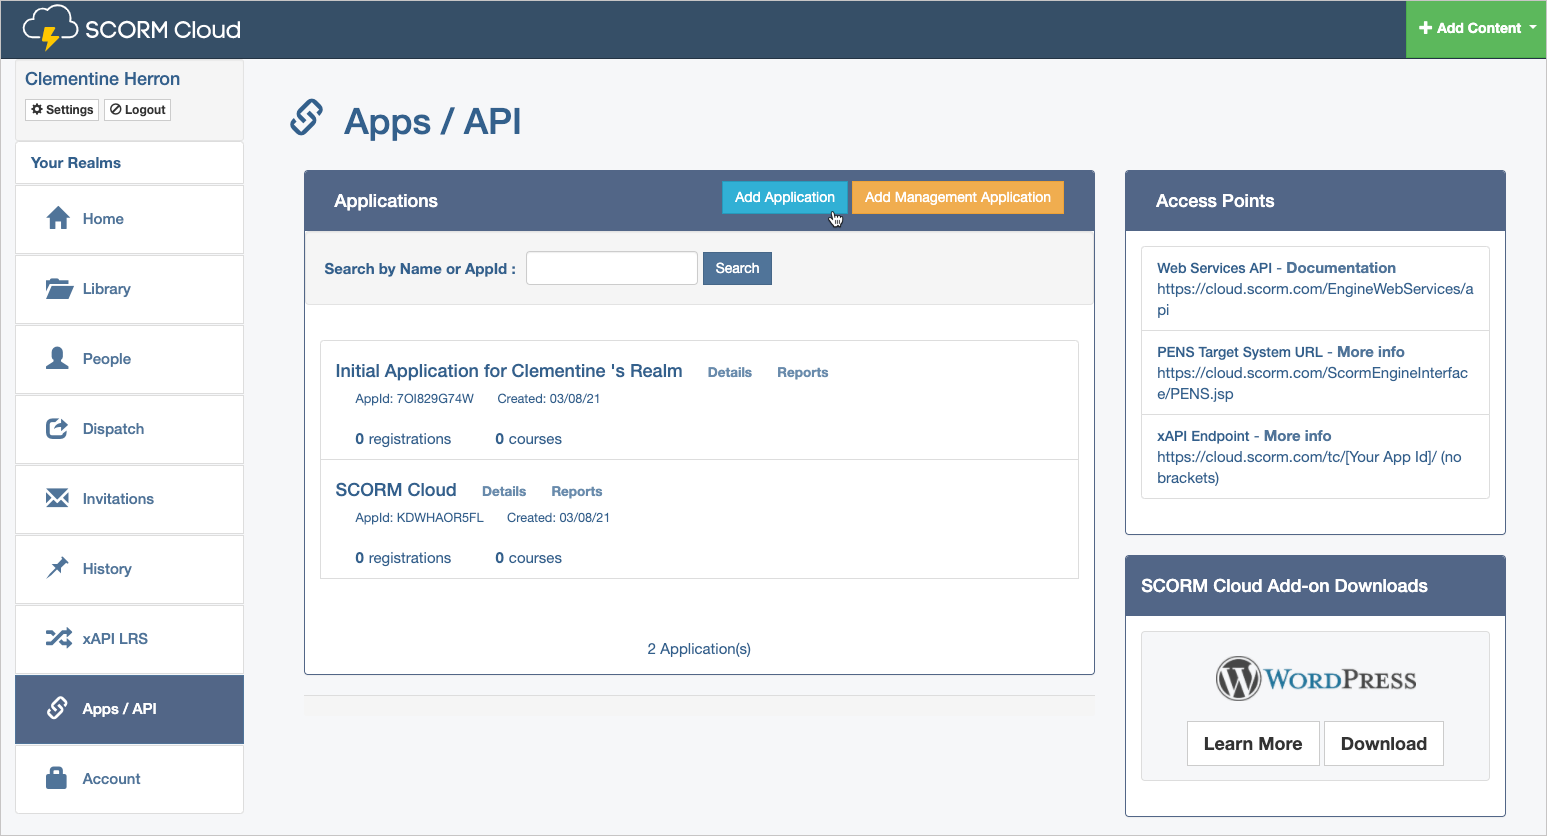
- Click Add Application.
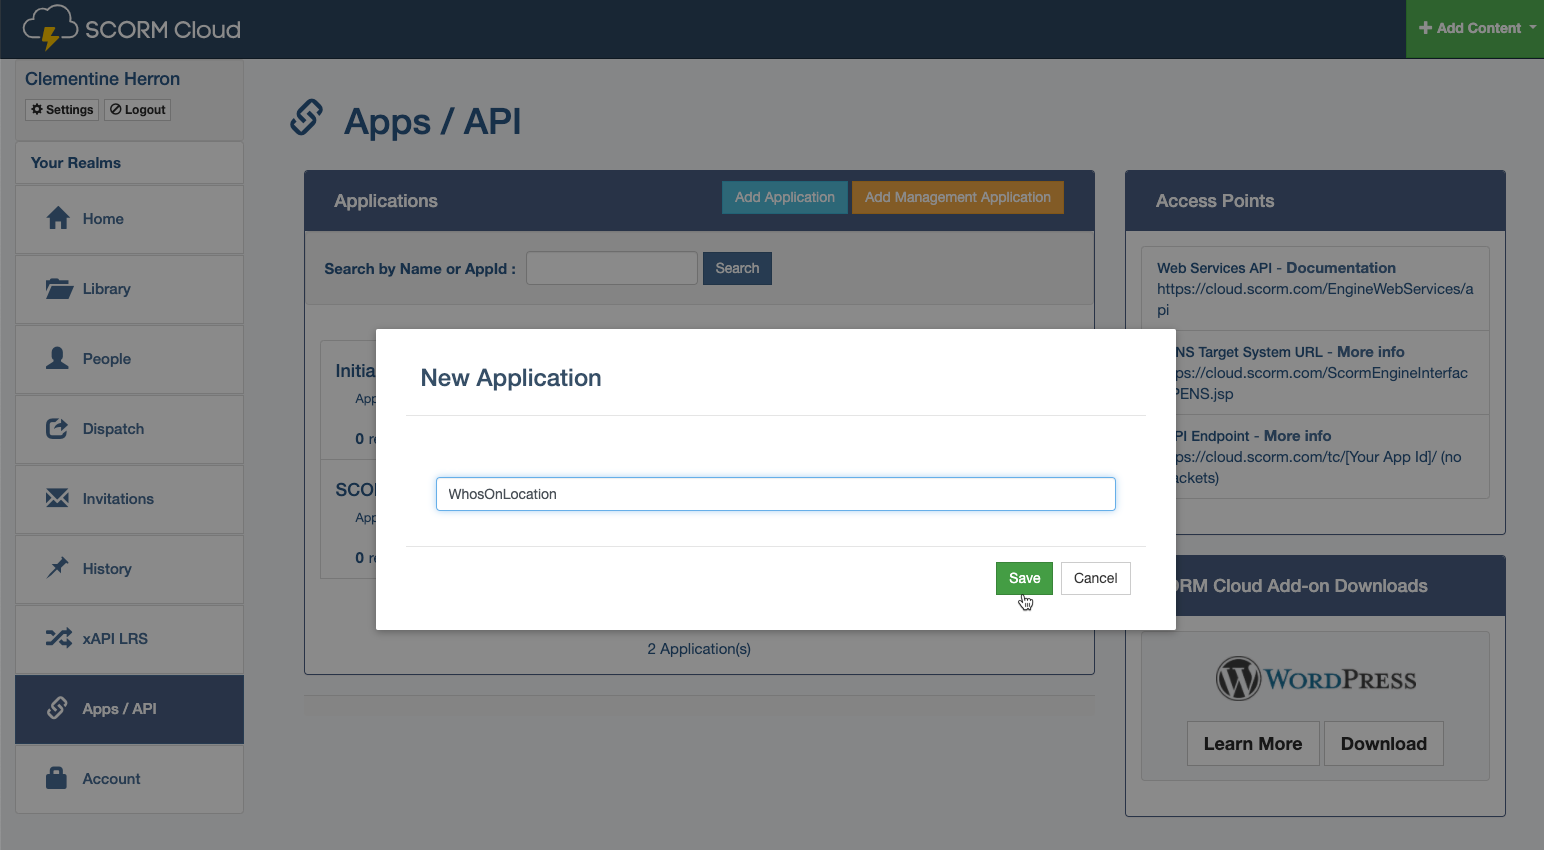
- Enter OnLocation, then click Save.
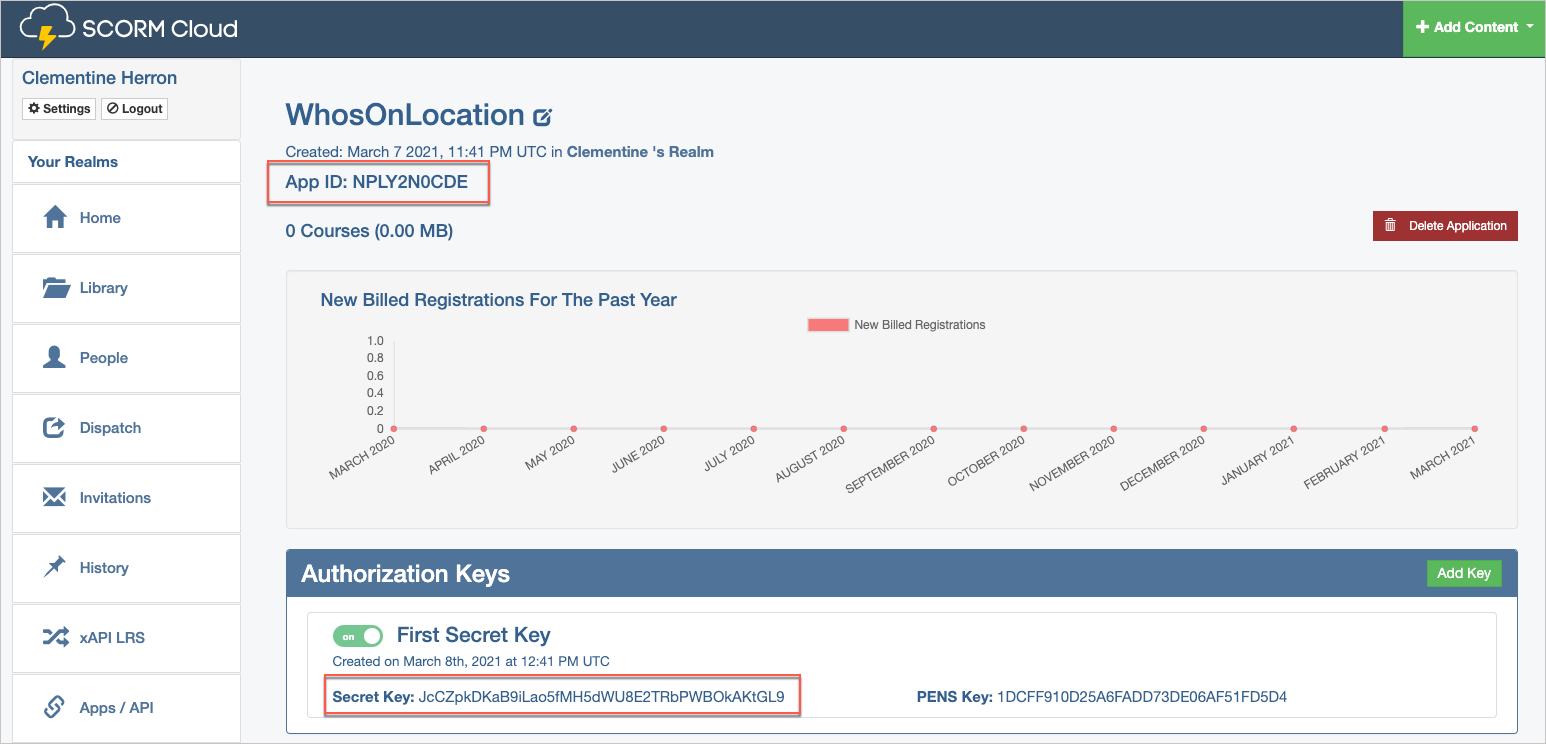
- Click Details.

- Make a copy of the App ID and Secret Key. You will add these in OnLocation shortly.
Step 2: Upload the induction course
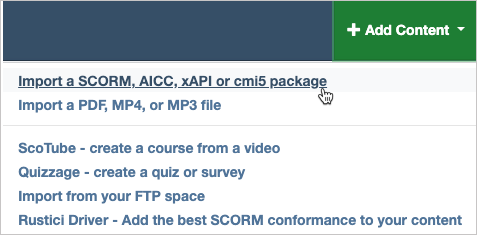
- Click Add Content in the top right corner.

- Select Import a SCORM, AICC, xAPI or cmi5 package.
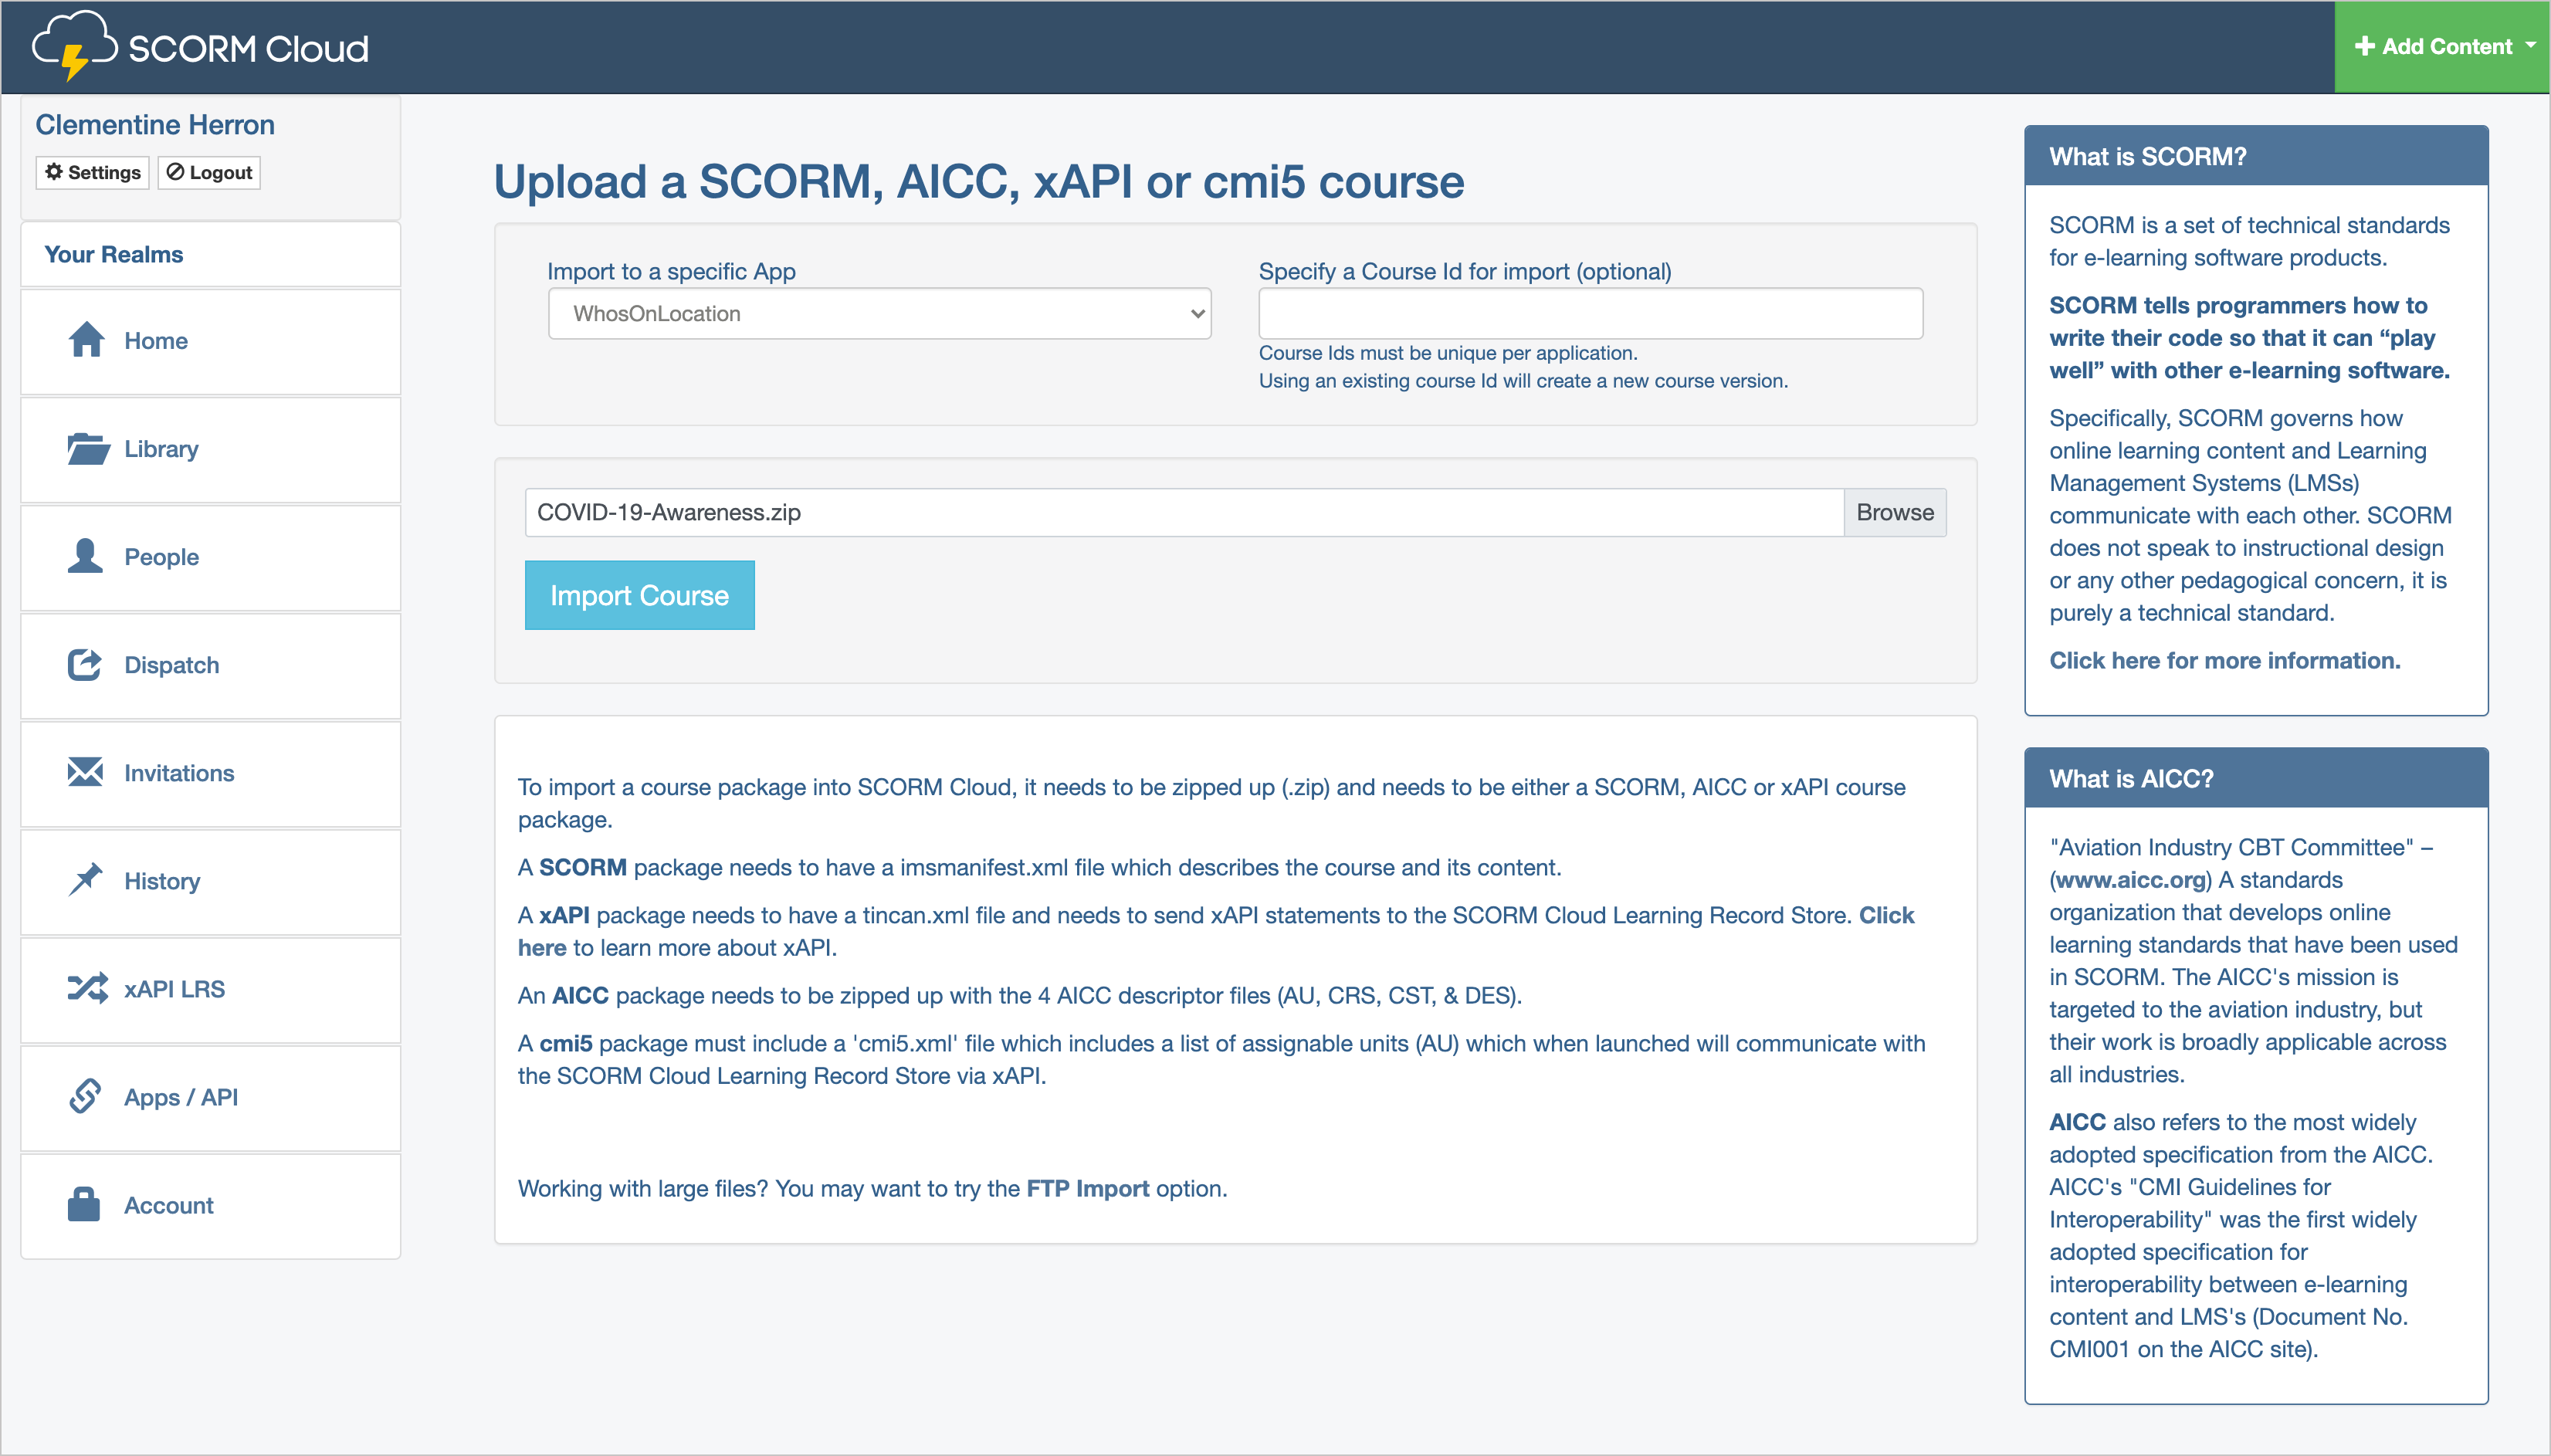
- Under Import to a specific App, select OnLocation.
- Click Browse, then select the SCORM course ZIP file from your computer.
- Click Import Course.
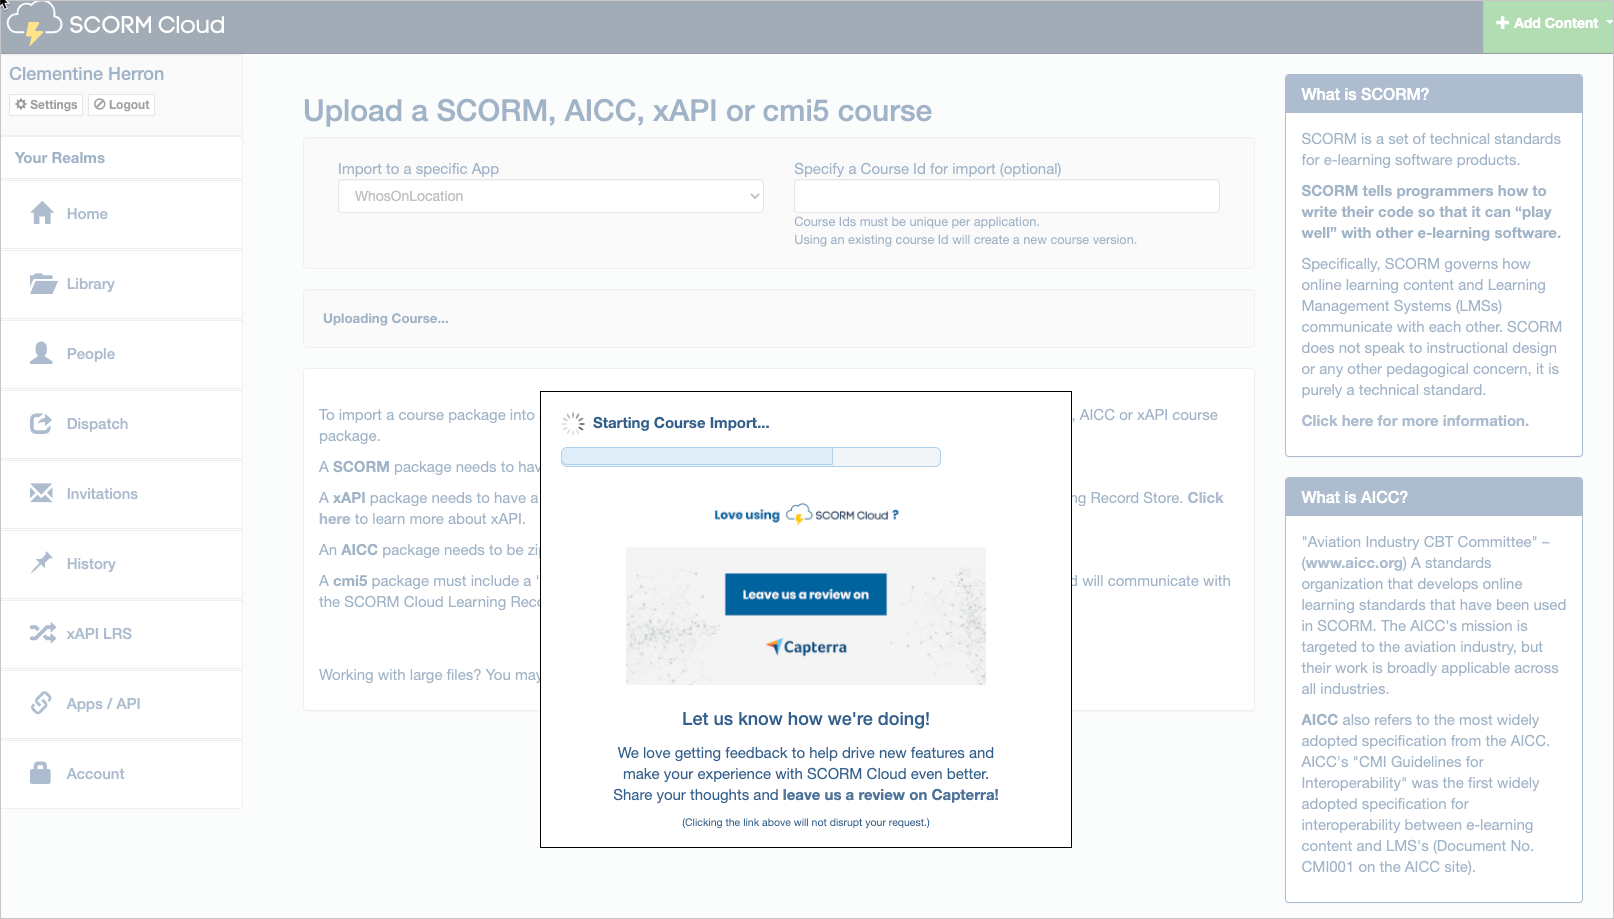
- The course will begin the upload process.
Step 3: Configure the course launch settings
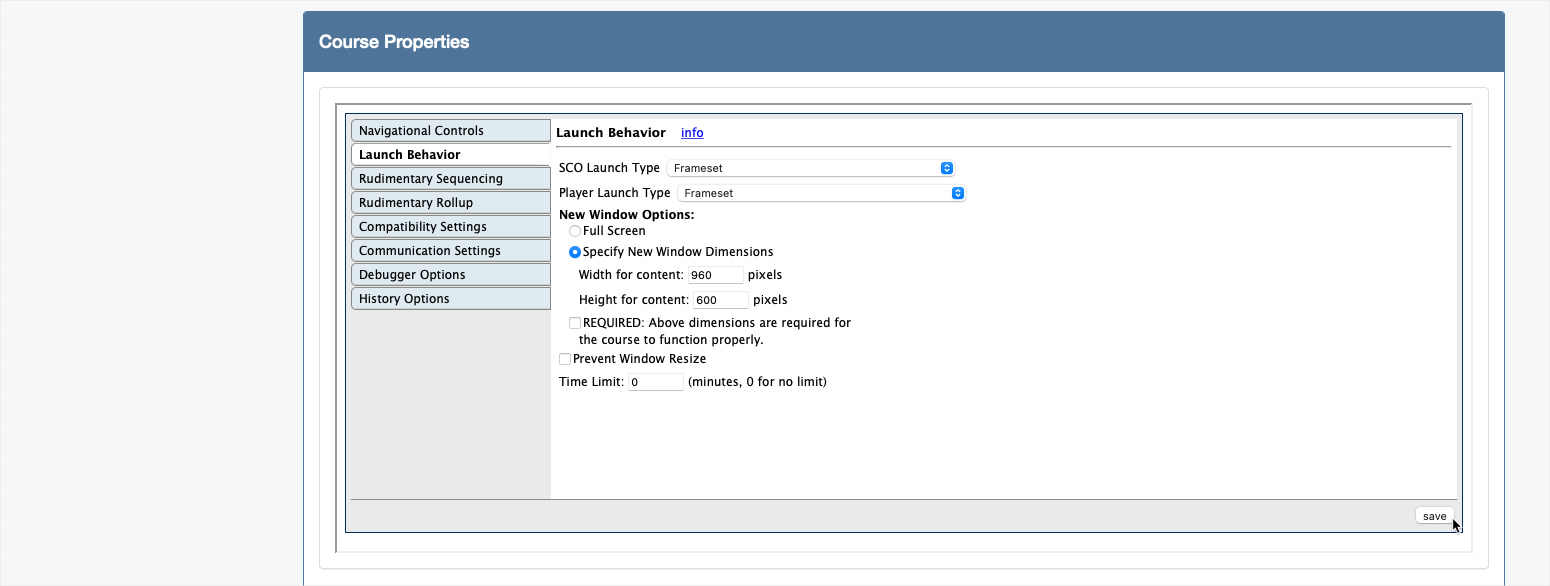
Once the upload is complete, choose the course launch settings in SCORM Cloud. This will ensure that the course opens in the same window as the kiosk.
- Go to Library, then select the course you just uploaded.

- Scroll down to Course Properties, then select Launch Behavior.
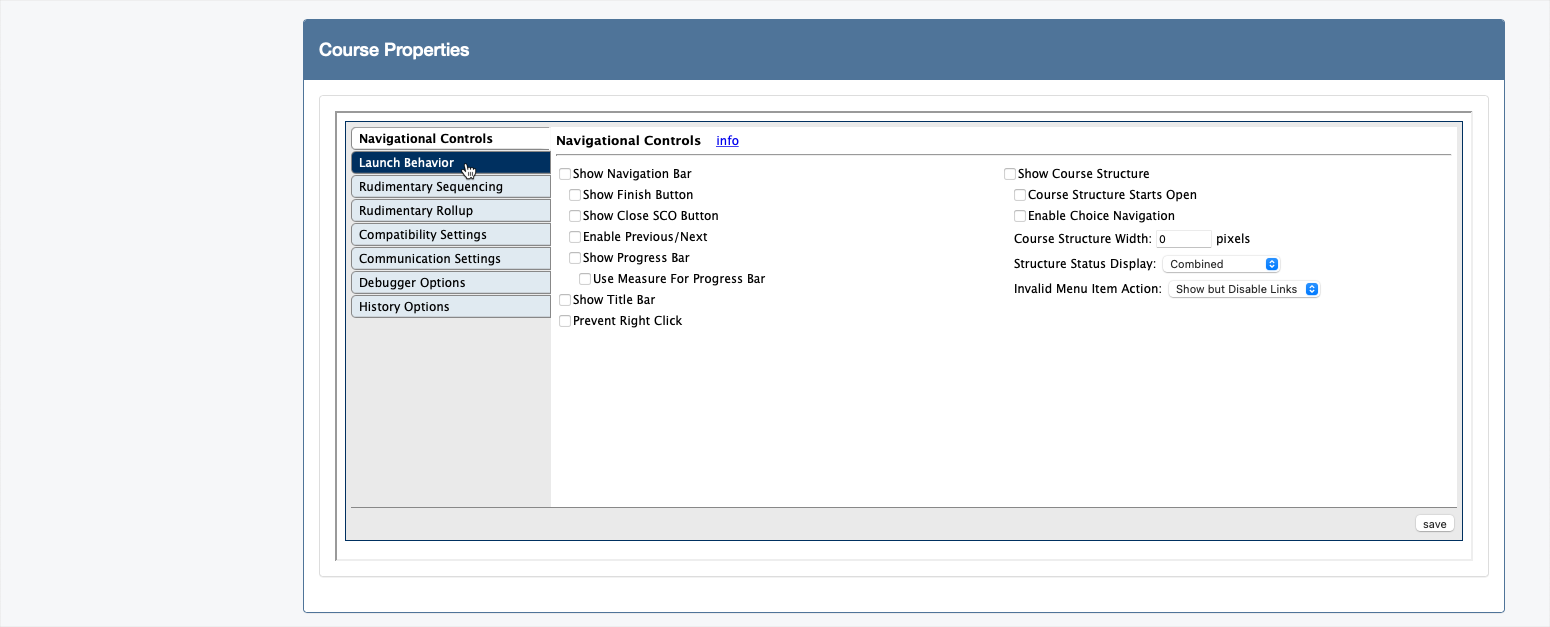
- Next to SCO Launch Type, select Frameset.
- Net to Player Launch Type, select Frameset.
- Click Save.
If you have any questions about your SCORM Cloud account or need help uploading a course:
- Check the SCORM Cloud Knowledge Base
- Contact the SCORM Cloud Support team